
 Facebook
 X
X
 Pinterest
 Copy Link
Fun Décor and Functional Spaces Make a Luxe, Modern Beach Home
This week’s article is from our partners at Luxury Portfolio.
When it comes to the interiors of an oceanfront getaway, beachy décor can sometimes veer into seashell cliches and casual vibes that read messy.
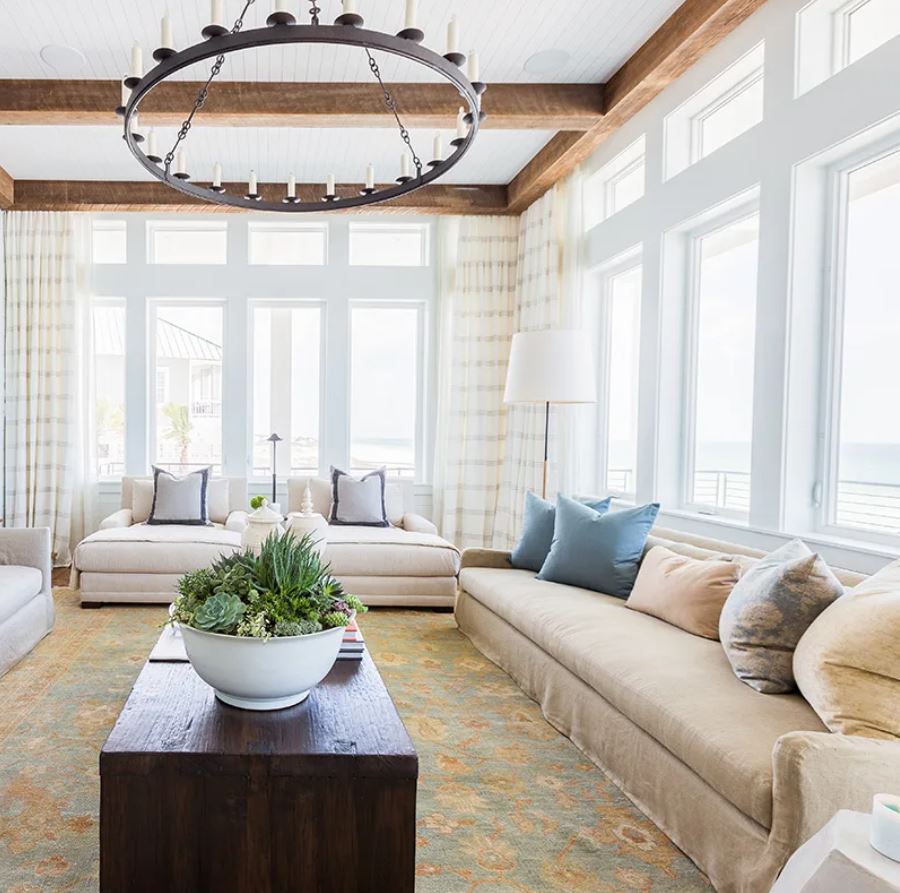
Designers such as Chad James, principal of the Nashville-based Chad James Group, are creating next-level beach houses that, yes, nod to the nautical, but also up the luxe factor while remaining comfortable and personal family retreats.
“It has always been by goal to provide each project with its own uniqueness that is established by the location and the client’s own personal interests,” Mr. James, who designed the Florida beach house seen here for country music superstar Luke Bryan, said.
Beachy Keen
The starting point for most design is the property’s function, and that certainly differs between main residences and vacation homes.
“When designing multiple homes for our clients, it’s always important to understand the function and purpose of this location,” Mr. James said. “Establishing this allows us to create spaces that exclusively cater to their needs.”
Beach homes are generally meant for relaxation and spending quality time with the family, and the house itself needs to provide the perfect place to do so.


Design by Chad James Group. Photo by Alyssa Rosenheck
“Beach and coastal homes have their own set of rules, many of which are dictated by a sense of casual relaxation and having a place to gather and make lasting memories,” Mr. James said.
“This home was always intended to be a family retreat,” Mr. James said of the Bryan project, adding that his design focused on gathering spaces.
The outdoors are what beachfront living is all about, and the home provides plenty of room to spend time in the sea air.
And, the last thing a family wants to worry about on vacation is taking care of their beach house. Using easily cleaned, non-fussy materials that can withstand salty air, sun and sand allows for those tasks to be thrown out to sea.
“Vacation homes are just that—a place to vacation and cast your stress into the water,” Mr. James said. “We always make sure that fabrics, colors and materials are being used in a way where maintenance is as easy as possible.”
A casual, easy home does not have to give up luxurious surroundings, however.


Design by Chad James Group. Photo by Alyssa Rosenheck
“Just because a home is at the beach doesn’t mean that the luxury element should be forgotten,” Mr. James said. “We establish this through the backdrop of materials we use like marble, tile, special wood finishes and also the furnishings we include.”
On top of that, Mr. James utilizes his clients’ extensive art collections to personalize not just their main homes, but their vacation spaces as well.
Fun, modern beachy touches liven things up too.
In this home, Mr. James added cheeky sculptures, outdoor surfboard showers and vintage ship plaques to a classic blue-and-white color palette and comfy, family-friendly furniture.
The designer’s motto, “If it’s not fun, I’m not doing it,” can be found throughout this Florida beach home, and every Chad James Group project.
“Often those fun moments are more of an inside joke, reference or acknowledgment to something that only our clients will understand,” Mr. James said. “It’s always important to nod our head to the whimsical nature that lives inside of each of us.”
Don’t miss a post! Get the latest local guides and neighborhood news straight to your inbox!
![]()
9 Small DIY Projects to Tackle at Home This Summer
Looking to give your home a bit of a revamp this summer without taking on a full remodel? You’re in luck, as there are so many impactful DIY projects that you can take on both indoors and out, some of which will only take a couple of hours. Below, nine area designers share their go to summer upgrades that will make all the difference in your space.
Paint Your Front Porch Ceiling
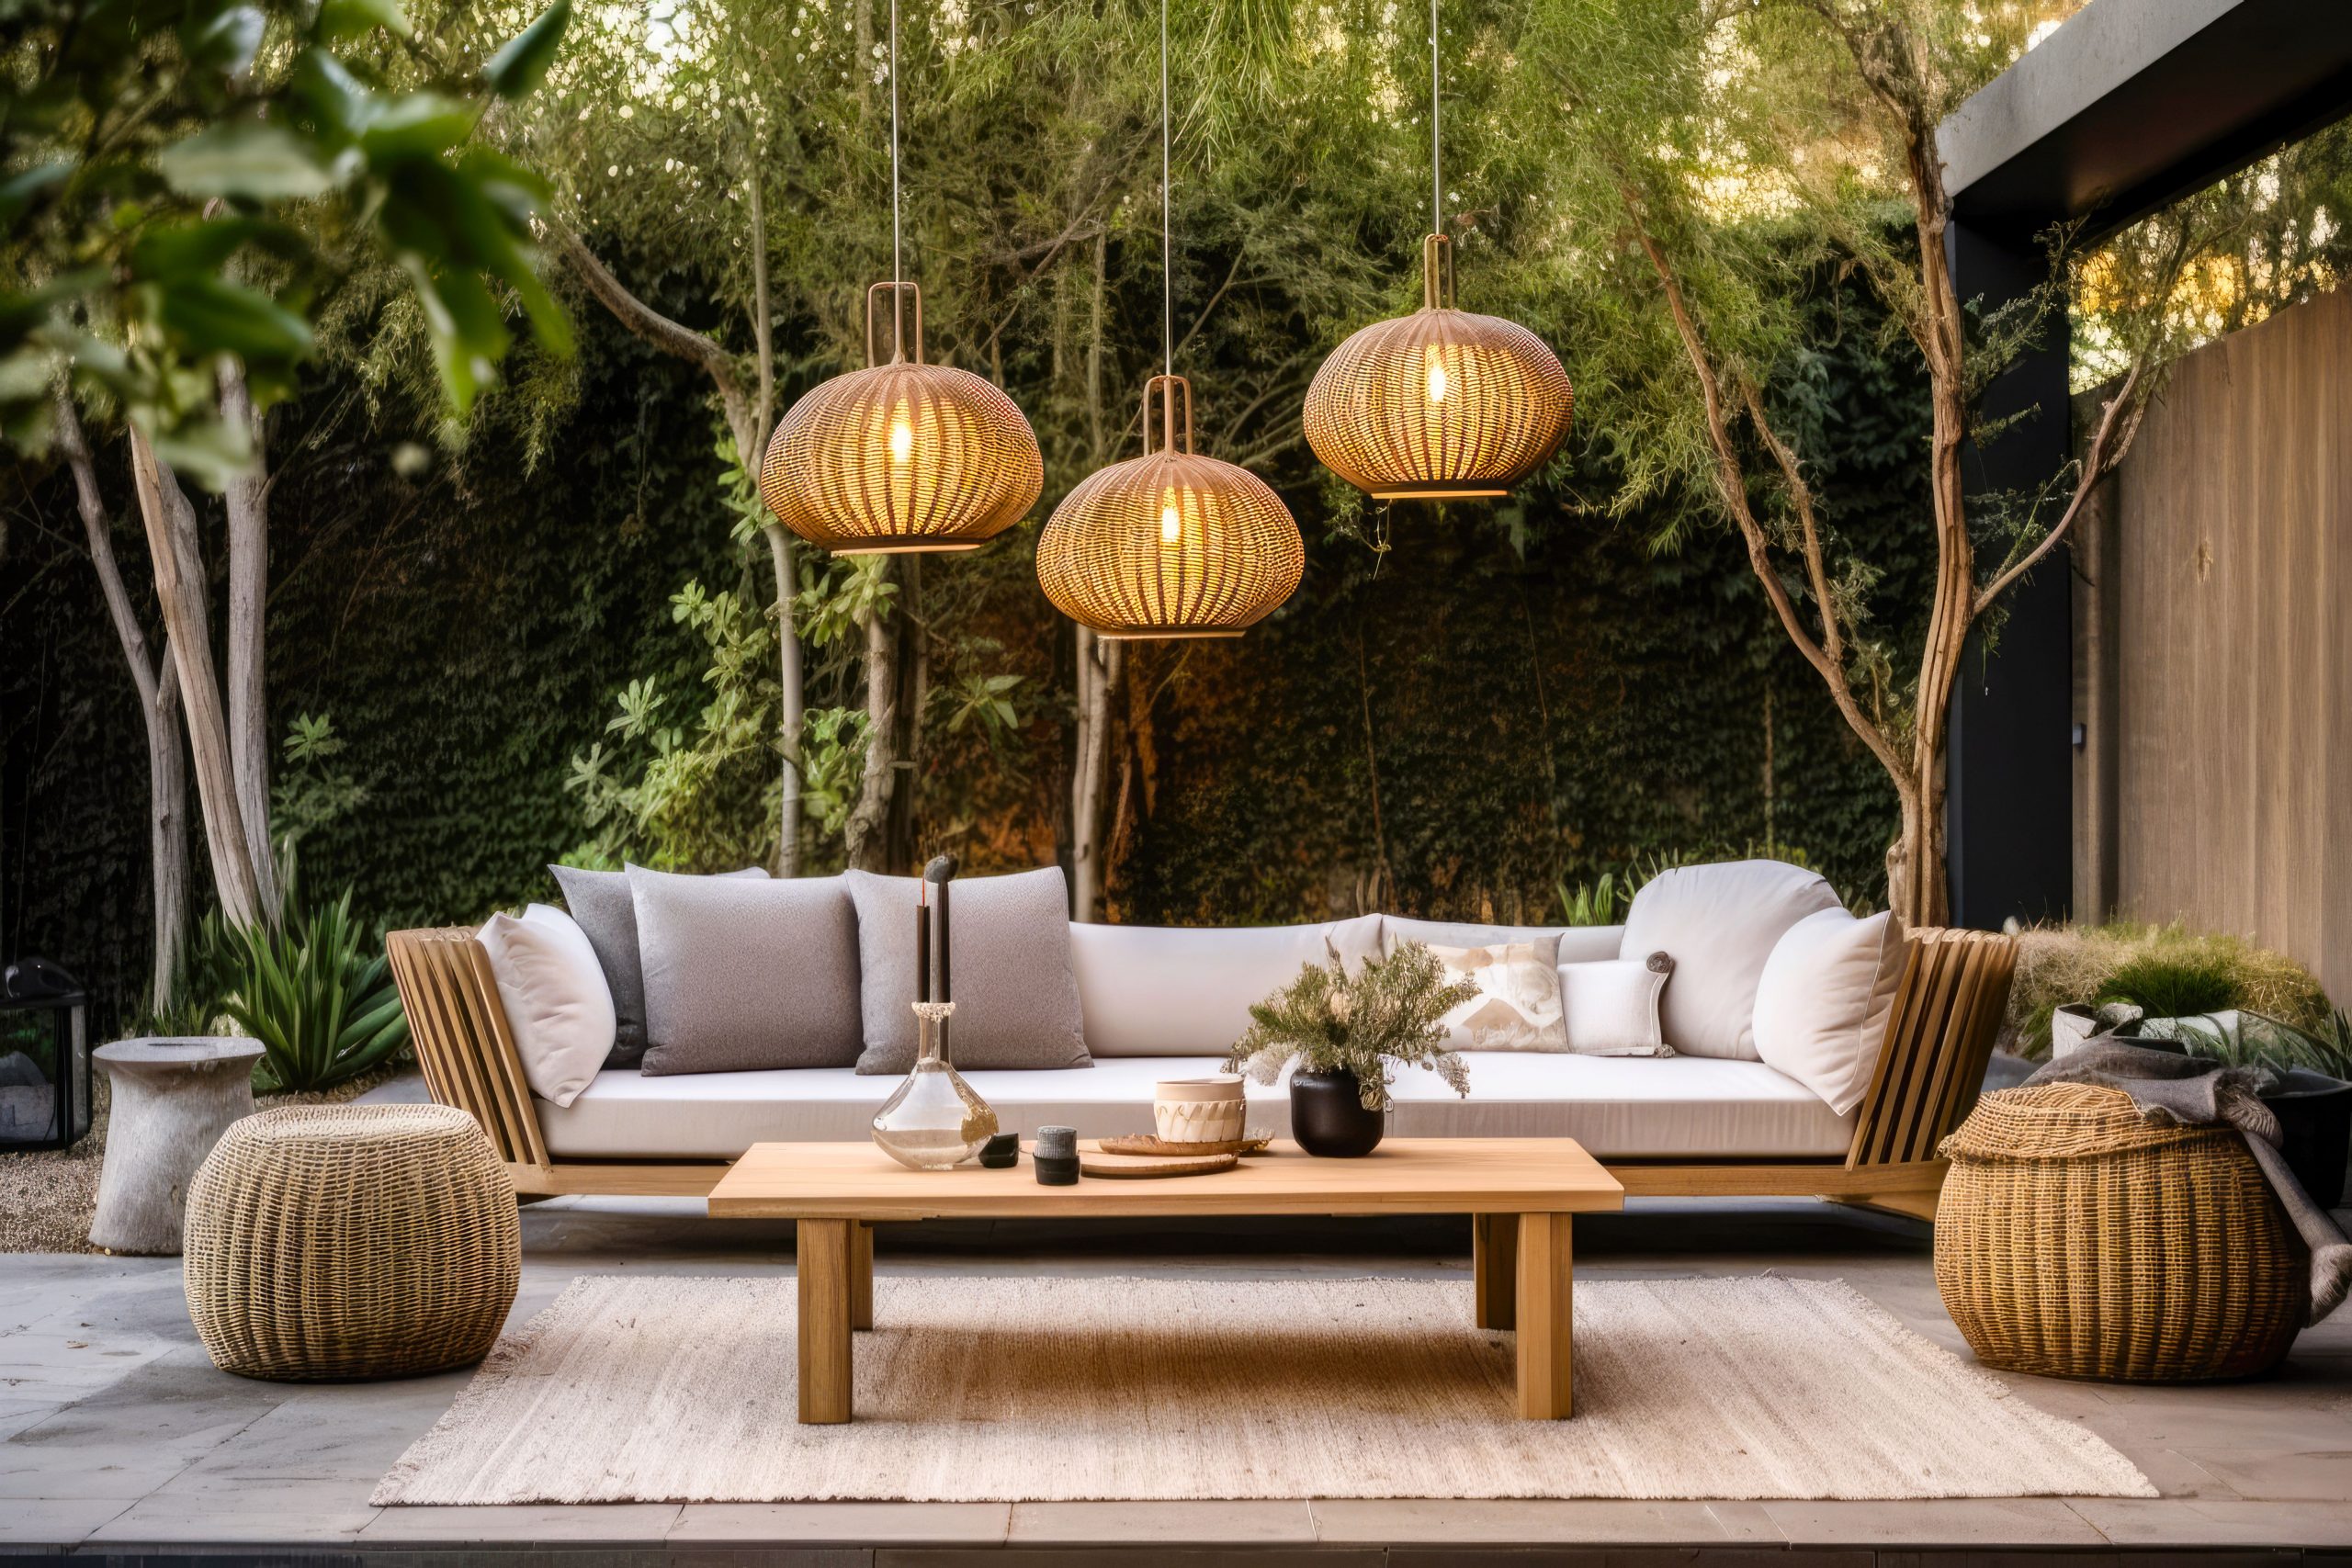
You may have already hopped on board with the trend of painting indoor ceilings, but why not embrace the look outside, too, by tackling your porch? “Most people use a soft sky blue to mimic the sky, but you can be different and do a soft yellow or peach color, or even go black,” comments DC-based designer Rashida Banks. But don’t stop decorating once the paint is dry. “To push the look even further, you can also hang some baskets from the porch ceiling and add battery operated light bulbs to it,” Banks suggests. “Now you have a DIY chandelier.”
Make Dining Al Fresco Feel Like a Treat
Take your outdoor dinners to the next level by giving your patio a bit of a facelift. “A new table umbrella can make a world of difference,” comments Maiya Kathryn Dacey of Maryland-based Maiya Kathryn Design. “Don’t have an umbrella? Buy a tablecloth or get new cushions for your outdoor furniture,” she adds. “Just run to pick up a citronella candle and you are almost BBQ and summer cocktail ready!”
Clear the Clutter
Inside the house, make an effort to streamline all of the clutter that has piled up over the past several months. “In winter I’m guilty of loving ‘more is more,’ but by the time summer is here I want to put away all the extra things, even if they are pretty or sentimental,’ Dacey explains. For starters, why not streamline your frames? “Put away a few of the family photos on every surface, and prioritize what needs to be on view,” she says. “Hint: it’s less than you think!”
Create Outdoor Zones
Perhaps you’re wishing you could magically make your outdoor space feel a bit more cohesive—well, you can with this hack from Susan Sutter of Susan Sutter Interiors in Virginia. “An expansive outdoor area can be challenging to furnish,” she comments. “Make it more manageable—and create a nice flow in the process—by arranging distinct areas in the layout.” For example, think about how you’ll use your space the most and cater to those activities. Sutter says, “Having a designated section for activities like lounging and eating can help make the most of your design scheme. Consider introducing rugs for each zone to make even more of a statement.”
Stencil a Wall
“Tired of a boring wall? Consider trying a DIY stencil design from Royal Stencil and tackle it yourself,” offers Allie Mann of CASE Architects & Remodeling in Maryland. You can hire a pro, too, if you prefer, but either way, the results will be major. “This application would make a big impact on a feature wall, or a small space like a powder room, laundry room, or mudroom,” Mann says. “Wallpaper adds a finished look to a small space as well.”
Give Your Staircase New Life
Maryland designer Elana Mendelson of Elana Designs says, “A really fun, creative, easy, and unique DIY home project for summer is to add some personality to your staircase by applying stair riser decals to the risers (vertical plane) of the stairs.” The choice is yours when it comes to selecting a pattern—go colorful to pull in colors from neighboring rooms of the home, or keep things simple, she offers. “This will 100% transform a standard staircase and create a stunning, personalized, visual impact,” Mendelson says. Better yet, the upgrade is manageable for anyone. “This project is really easy even for a novice DIYer because riser decals are cut to riser size and readily available from many online sources like Etsy, Amazon and Wallalternatives, to name a few,” the designer explains.
Grow a Garden
It wouldn’t be summertime without a garden! Why not create your own and enjoy watching your tender loving care pay off over the course of the season? “I recommended investing in a few small planters for indoor, easy maintenance indoor plants that require low light, such as blue star ferns, variegated schefflera, jade plants (succulents), and olive trees,” says Casey Sanford of Casey Sanford Interior Design in Virginia.
Spruce Up the Balcony
No green thumb? No problem. You can still make your outdoor space shine with these tips from Amanda Martin of Amanda Elizaberh Interiors in DC. “I like to work from the ‘ground’ up,” she comments. “Laying interlocking deck squares is a great way to add visual interest and they’re easy to install.” Plus, she says, decking is more practical than your standard outdoor rug, which may hold onto moisture, and additionally, there are plenty of shades and patterns of deck squares from which to choose. She adds, “The overall look is aesthetically pleasing, and your friends will think you hired a designer!”
Upgrade an Out of Date Bathroom
Is that bathroom that looks like it belongs in the 1970s making you cringe on a daily basis? This summer, why not do something about the space once and for all? Kate Dreyer of Kate Decorates in Virginia has revamped many of her home’s dated bathrooms. “I often find older bathrooms have an unpainted wood vanity, old lighting, and funky tiles,” she says. “You may not be able to quickly replace the tiles, but I promise they will look worlds better with a few small updates throughout the rest of the bathroom.” Dreyer likes to first repaint the vanity using a color that complements the existing vanity top and any other features that you cannot change (such as the aforementioned tiles). Then, bring some personality into the space with new vanity pulls, shower rod and rings, and perhaps even a new faucet (if you’re an experienced DIYer). Then, work in some new textiles—shop for a shower curtain, hand towels, and bath mat or small bath rug in a shade that complements the paint you selected. Last but not least, don’t forget about your loo’s light fixtures. “We always find that updating the lighting makes an enormous difference for a very low cost,” Dreyer says. “Ideally you can update the vanity sconces and ceiling pendant, and even if this requires an electrician, it is usually not more than one hour of work. The end result is a very fresh feel in your bathroom, at a fraction of the cost of a full remodel!”

Sarah Lyon is a New York City-based freelance writer, originally from Bethesda, MD. She contributes to a number of national design and lifestyle publications like Architectural Digest, Apartment Therapy, MyDomaine, the Washington Post, and more. Sarah also works with designers to help them style spaces for photo shoots. Find more shelfies on her Instagram page, @sarahlyon9
Don’t miss a post! Get the latest local guides and neighborhood news straight to your inbox!
![]()
Merger of Local Powerhouse Brokerages Maps the Future of Independent Real Estate
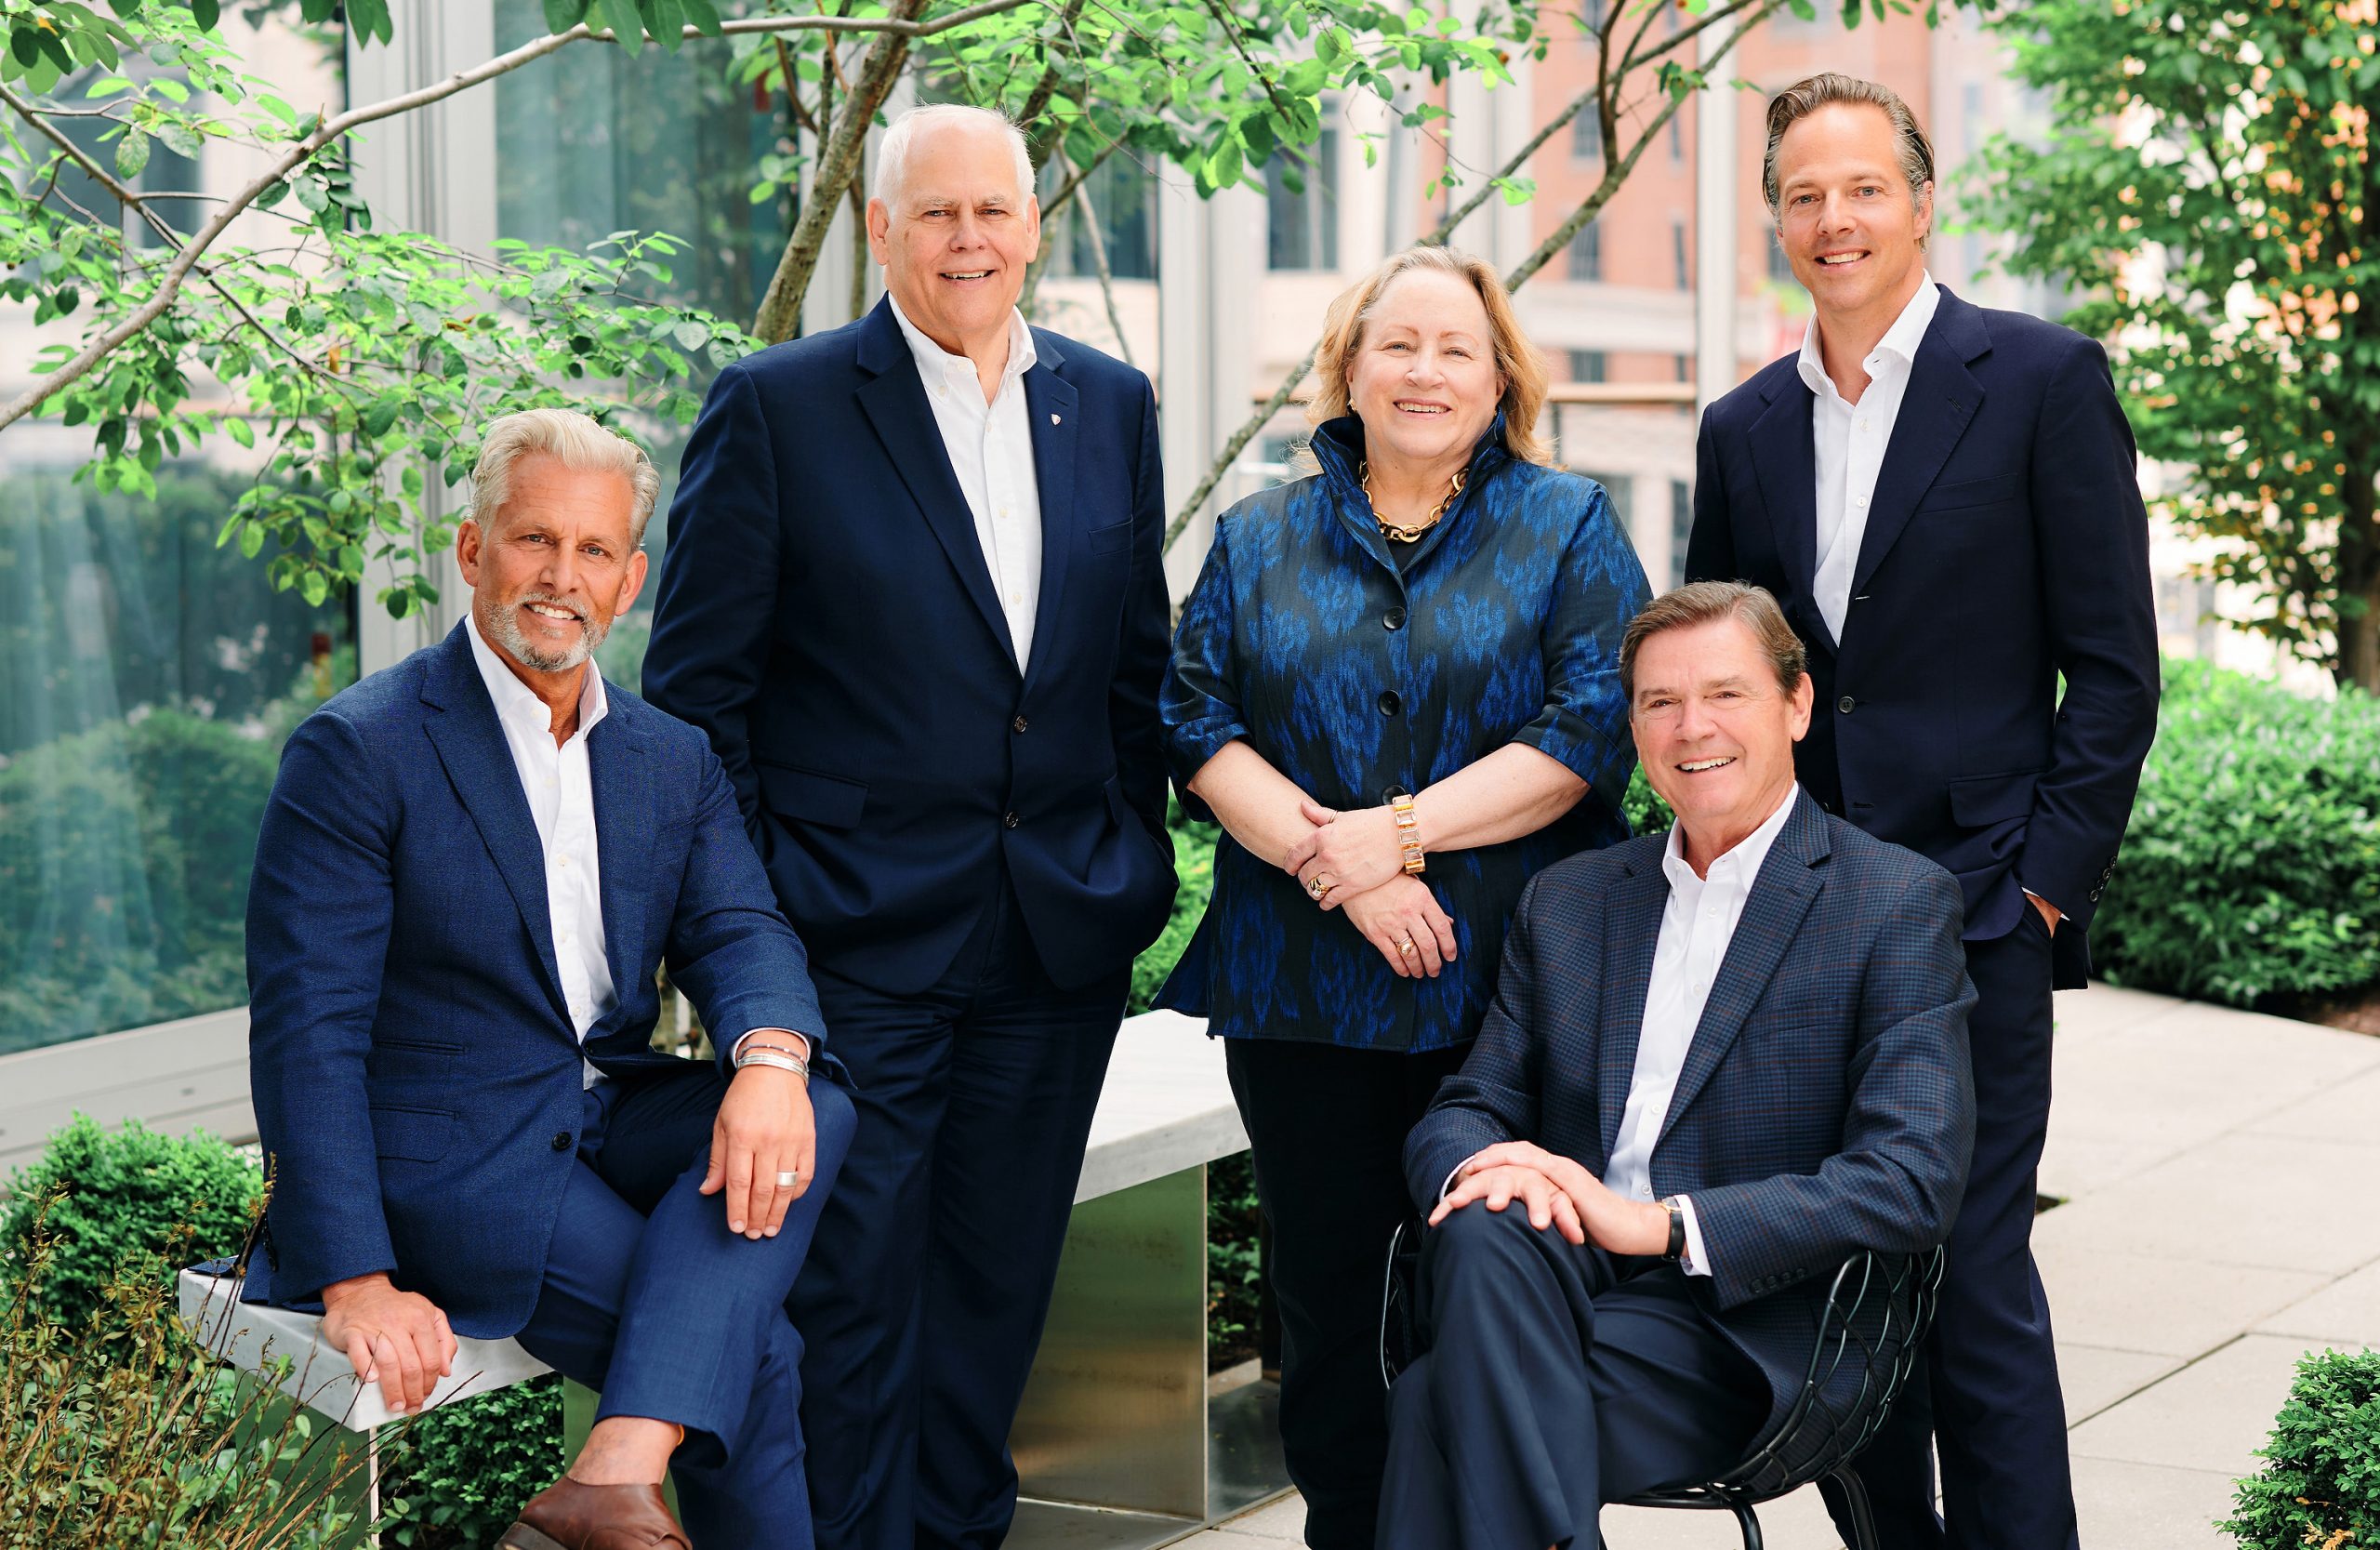
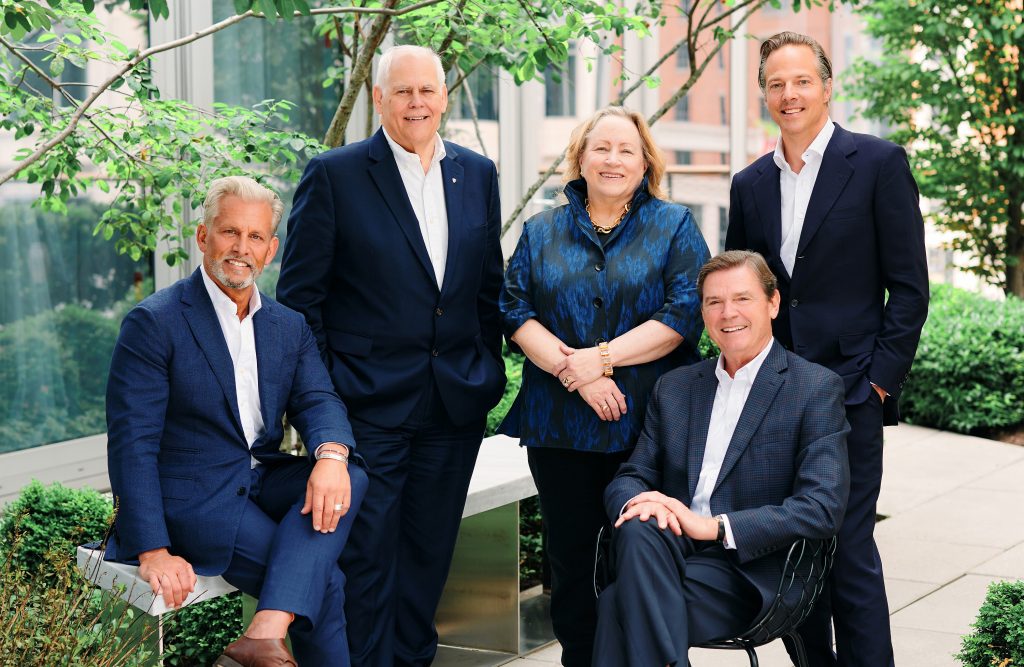
Announcing the Merger of McEnearney Associates and Middleburg Real Estate/Atoka Properties
Two of the most respected names in local real estate – McEnearney Associates and Middleburg Real Estate/Atoka Properties – have combined their exceptional talent and resources into one powerhouse firm. This strategic union marks a significant milestone poised to affirm their long-standing traditions of excellence and transform the future of independent real estate.
“Our firm is built on a foundation of trust, which starts with finding the absolute best agents in the business who have the highest standard of integrity and fiduciary responsibility for our clients,” said President Maureen McEnearney Dunn, who will continue to lead the new firm along with McEnearney Principals Dave Hawkins and David Howell, who are now joined by new Principals Peter Pejacsevich and Scott Buzzelli.
“It was a natural fit,” says McEnearney Dunn, “Middleburg Real Estate/Atoka Properties is a firm focused not on quantity, but quality; aiming not to be the biggest, but The Best, and that’s what we look for when partnering with others: common goals for growth and always doing the right thing for our agents and clients.”
For more than 40 years, McEnearney Associates’ corporate mission has been, foremost, to provide unrivaled support to its agents and clients while strategically expanding its footprint in Virginia, Maryland, and Washington, D.C. Atoka Properties was formed in 2008 by partners Pejacsevich and Buzzelli, who were drawn to Middleburg for its strong heritage and history. Since its inception, their brokerage has continued to grow into the premiere real estate brokerage in Hunt Country and beyond.
The combined forces of McEnearney Associates and Middleburg Real Estate/Atoka Properties unlocks myriad benefits with an expanded network of talented and exceptional agents, an increased portfolio of listings, a luxury presence, curated marketing, advanced data analytics, and – most importantly – a seamless experience for homebuyers, sellers, property management and real estate professionals.
“We are and will continue to be the industry’s best,” said Pejacsevich on the future of the newly merged company. “We provide hands down the most support for our agents and clients and can do so because we are not tied to a franchise fee or national ownership.”
Adds Buzzelli, “We believe in investing in our team to help agents create a stellar experience for clients, and by combining our strengths we will deliver a new level of service and value to everyone.”
The merger, which will take about six months to complete, will expand the firm’s footprint to 16 offices throughout Virginia, West Virginia, Maryland, and Washington, D.C.

Don’t miss a post! Get the latest local guides and neighborhood news straight to your inbox!
![]()
Juneteenth Celebrations Handpicked by McEnearney’s Diversity Council

Juneteenth celebrations across the DMV this summer honor freedom, Black Culture and the “longest-running African-American holiday”
Juneteenth, also known as Freedom Day, Jubilee Day or Juneteenth Independence Day, was established as a federal holiday in 2022 to commemorate the United States’ abolition of slavery. A combination of the words “June” and “nineteenth,” it was on this day in 1865 that the emancipation of enslaved African-Americans was formalized in Texas. This occasion is of extreme importance to our nation and on behalf of McEnearney’s Diversity Council we send an inspirational Juneteenth message and warm wishes to all. Let us put an end to discrimination and racism by standing together in solidarity.
Juneteenth has been celebrated as the nation’s “longest running African-American celebration” in various states and municipalities for generations. In Washington, DC, which has recognized it as an official holiday since 2004, there are myriad events that honor the indomitable spirit of freedom and joy of Black Culture. Here is a sampling of Juneteenth events throughout the DMV this weekend and throughout the summer, with links to more events available at each site:
From Juneteenth.com
ONE DC is organizing a Juneteenth Community Festival on Monday June 19 from 11am-5pm at the ONE DC Black Workers & Wellness Center at 2500 Martin Luther King Jr. Ave SE (adjacent lot – sponsored by Bethlehem Baptist Church) and will feature live music, local artists & vendors, community outreach tables, food, drinks and a presentation from historian Bill Fletcher Jr.
From Eventbrite
Starting on Sunday June 18 and continuing into the early Juneteenth morning, The DMV’s Largest Juneteenth Celebration: A Cultural Music Event will happen at the MGM Grand Casino at National Harbor and features several musical acts and DJs. Also from Eventbrite are many online celebrations that you don’t even have to leave home to enjoy!
From Washington.org
No summer celebration is complete without a sampling of some of the best eats in the city, and this round-up of 20+ eateries and bars helmed by Black chefs or Black-owned is sure to keep you sated.
From Virginia.org
The “BURG” Family Reunion Club hosts its Third Annual Juneteenth Celebration 2023 on June 17 from 12-6pm featuring food, drinks, music vendors and children’s activities at the Ida Lee Park in Leesburg while the Columbia Pike Blues Festival happens from 1-8:30pm and is touted as Arlington’s “Best Block Party.”
From VisitMaryland.org
Jazz on the Rails at the B&O Train Museum Outdoor Pavilion kicks off at 5pm on June 17 with live contemporary jazz, vendors and a celebration of front-line railroad workers. Closer to The District, Watkins Regional Park’s Juneteenth celebration on June 17 from 12-5pm includes entertainment, seminars and even a genealogy workshop.
Events on The National Mall and other local museums
- In addition to flagship events at the National Museum of African American History & Culture – like Afrofuturism: A History of Black Futures through March 2024 — there are Juneteenth exhibits throughout the Smithsonian system and at various local and private museums.
- From June 17-19 The National Archives will display the original Emancipation Proclamation and its companion document, General Order No. 3, which granted freedom to the last enslaved people in Galveston, TX on June 17-19. Because of their fragility the documents can only see 36 hours of sunlight per year so this is a rare chance to glimpse the originals.
- The National Portrait Gallery showcases One Life: Frederick Douglas from June 16-April 21 (2024), illuminating the legacy of one of the 19th century’s most influential writers, speakers and intellectuals through prints, photographs and ephemera, and Brian Lanker’s I Dream a World: Portraits of Remarkable Black Women (Part II) through September 23. At the National Gallery of Art visitors can enjoy classic and contemporary art from essential Black artists at the exhibit Called to Create: Black Artists of the American South through December 31.
- Mount Vernon’s Freedom Before Emancipation: Family Day for Juneteenth happens Saturday June 17 and remembers how enslaved people resisted enslavement and sought freedom before the Emancipation Proclamation. See special character performances, take a tour of the estate, and honor the lives of the enslaved at a commemoration ceremony.
- And proving that art isn’t the domain just for adults, The Phillips Collection hosts a community exhibition of local elementary, middle and high school students’ creations in Focal Point, inspired by the work of Frank Stewart’s Nexus: An American Photographer’s Journey, 1960’s to the Present.
Do you have traditions for Juneteenth? Let us know at our McEnearney Facebook and Instagram pages!
Take a look at our website for all of our listings available throughout Washington, D.C., Maryland, and Virginia.
Don’t miss a post! Get the latest local guides and neighborhood news straight to your inbox!
![]()
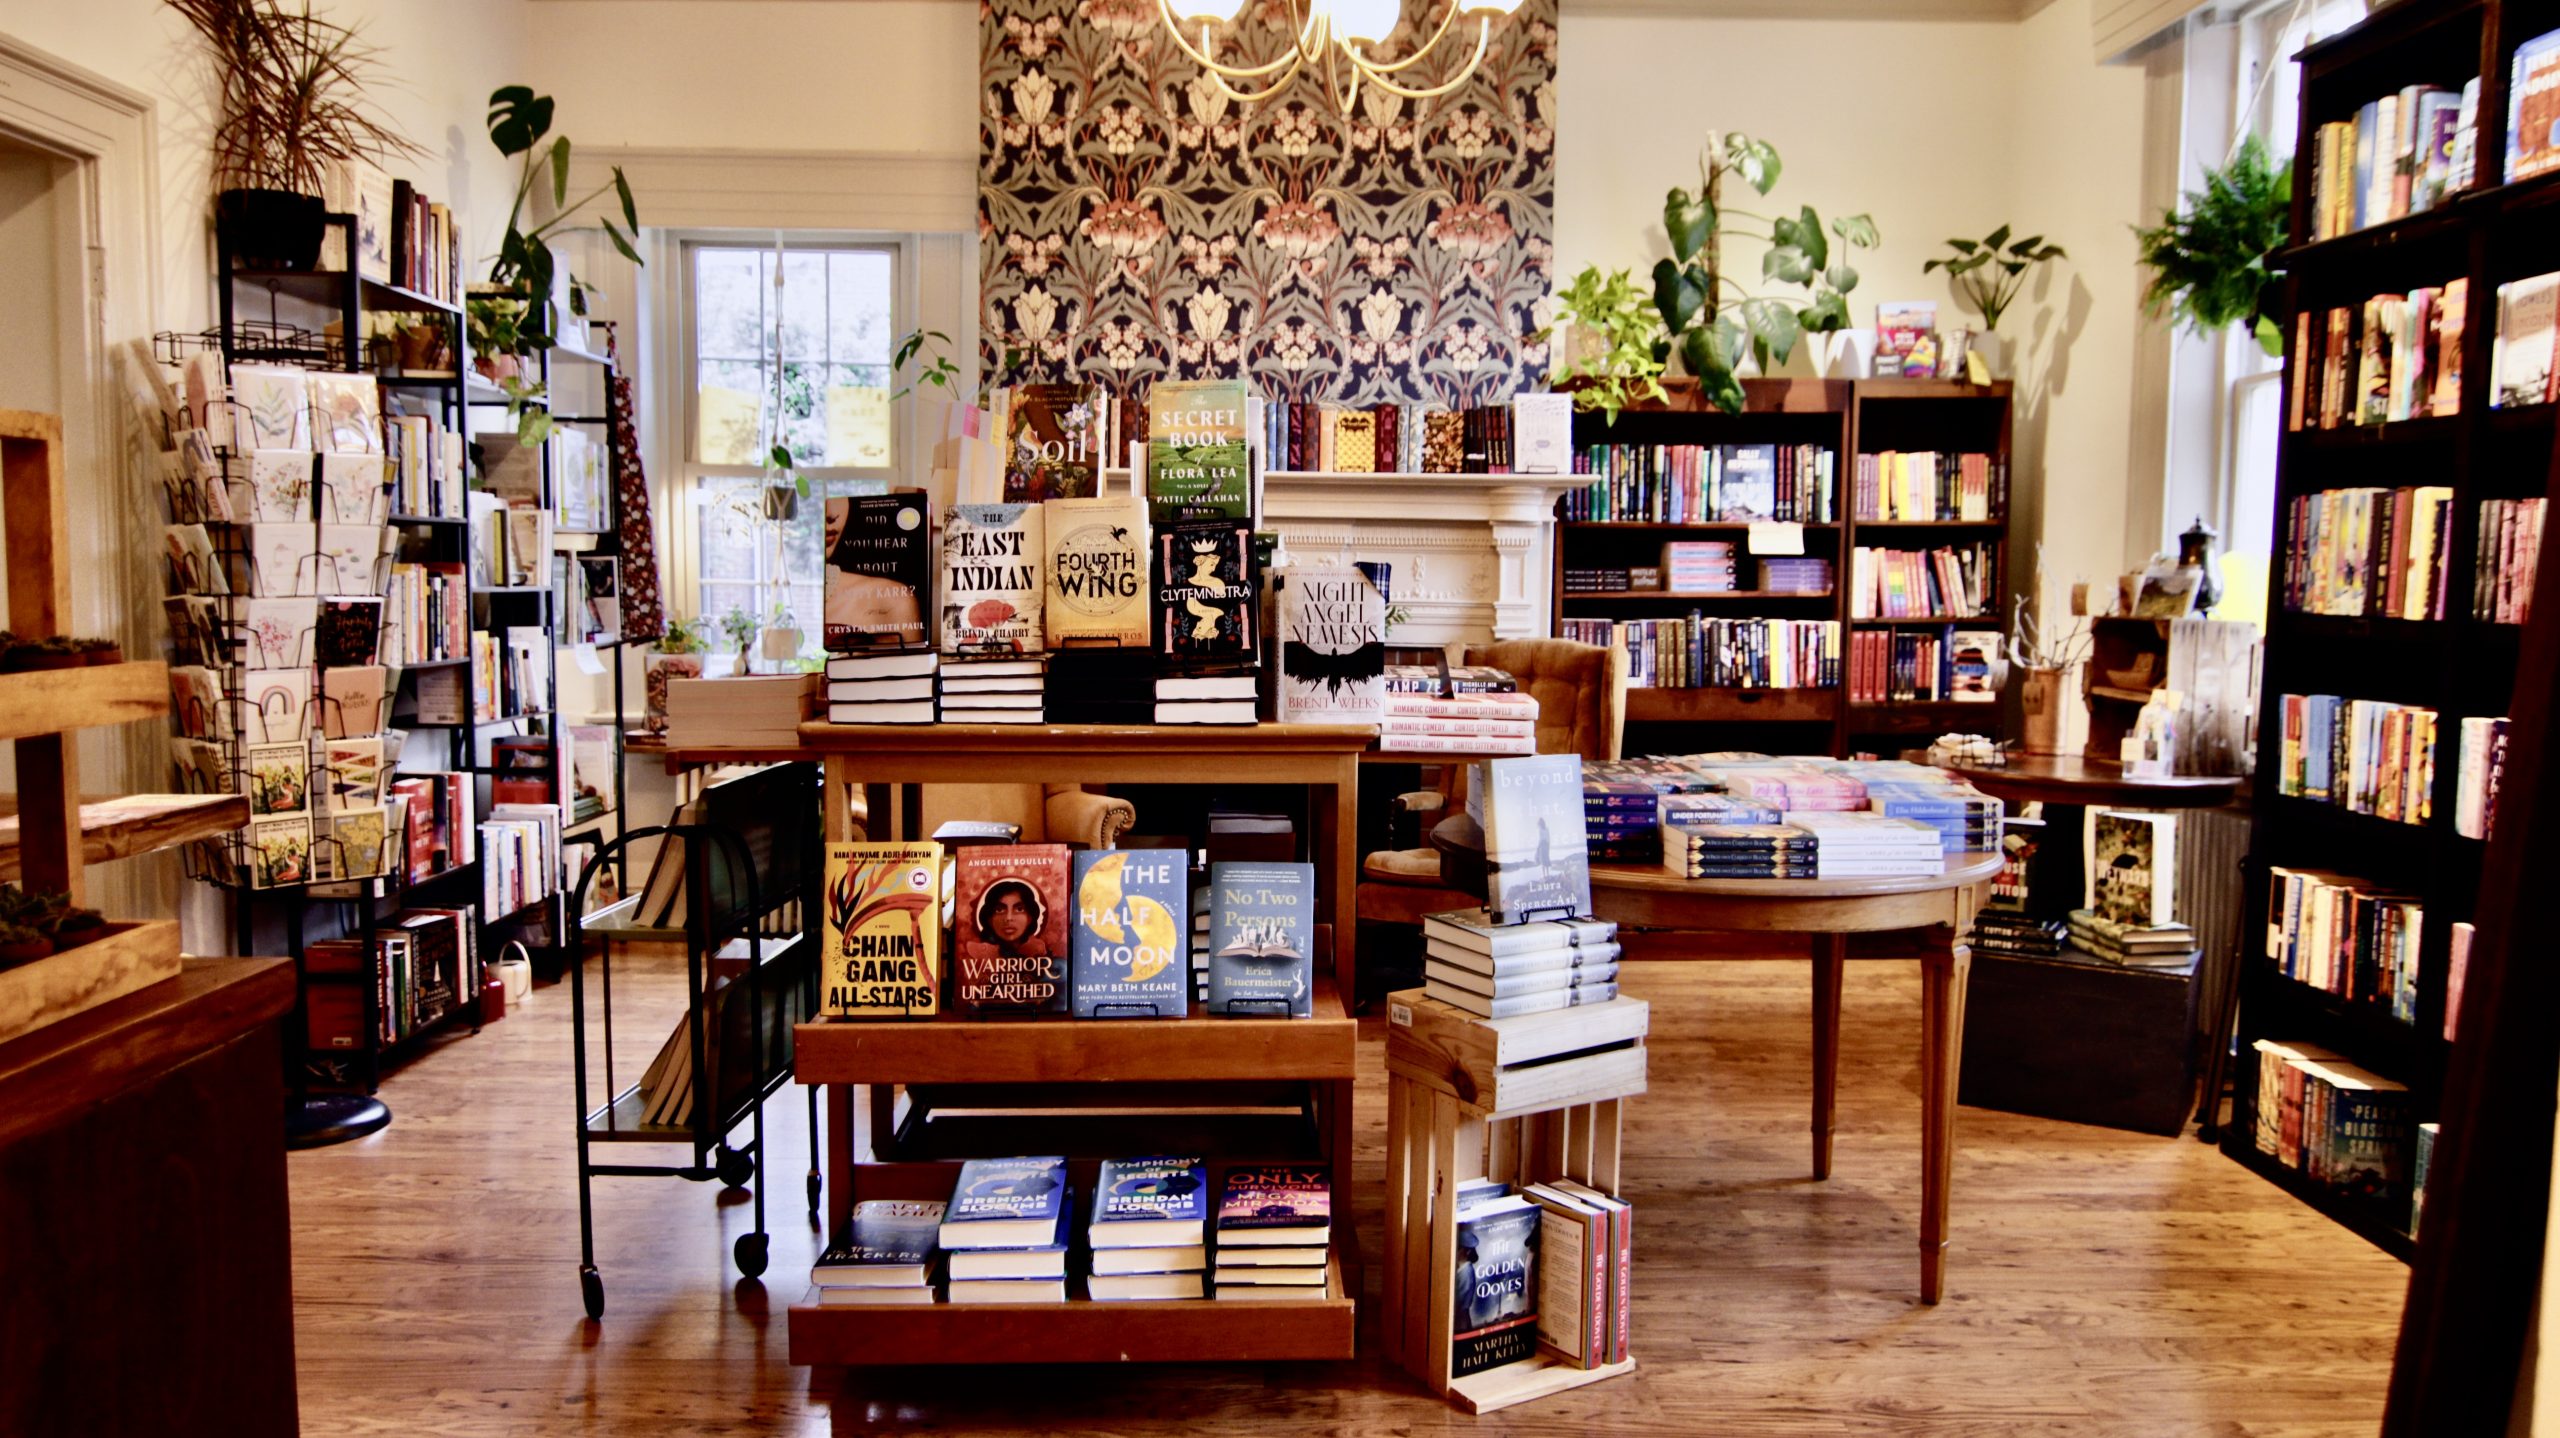
Summer Reading Guide 2023: Nostalgic Titles from Birch Tree Books & Foliage Plants

Summer is fast approaching, and whether you’re facing boring flights and long road trips or looking forward to relaxing afternoons on the beach, what you need is a good book.
What makes a good summer read? A story that’s compelling and bingeable, and also sparks conversation topics to take home with you. And this summer at Birch Tree, we’re celebrating some brand-new releases with a touch of nostalgia: think summer camp, ‘90s vibes, reboots, vintage recipes.
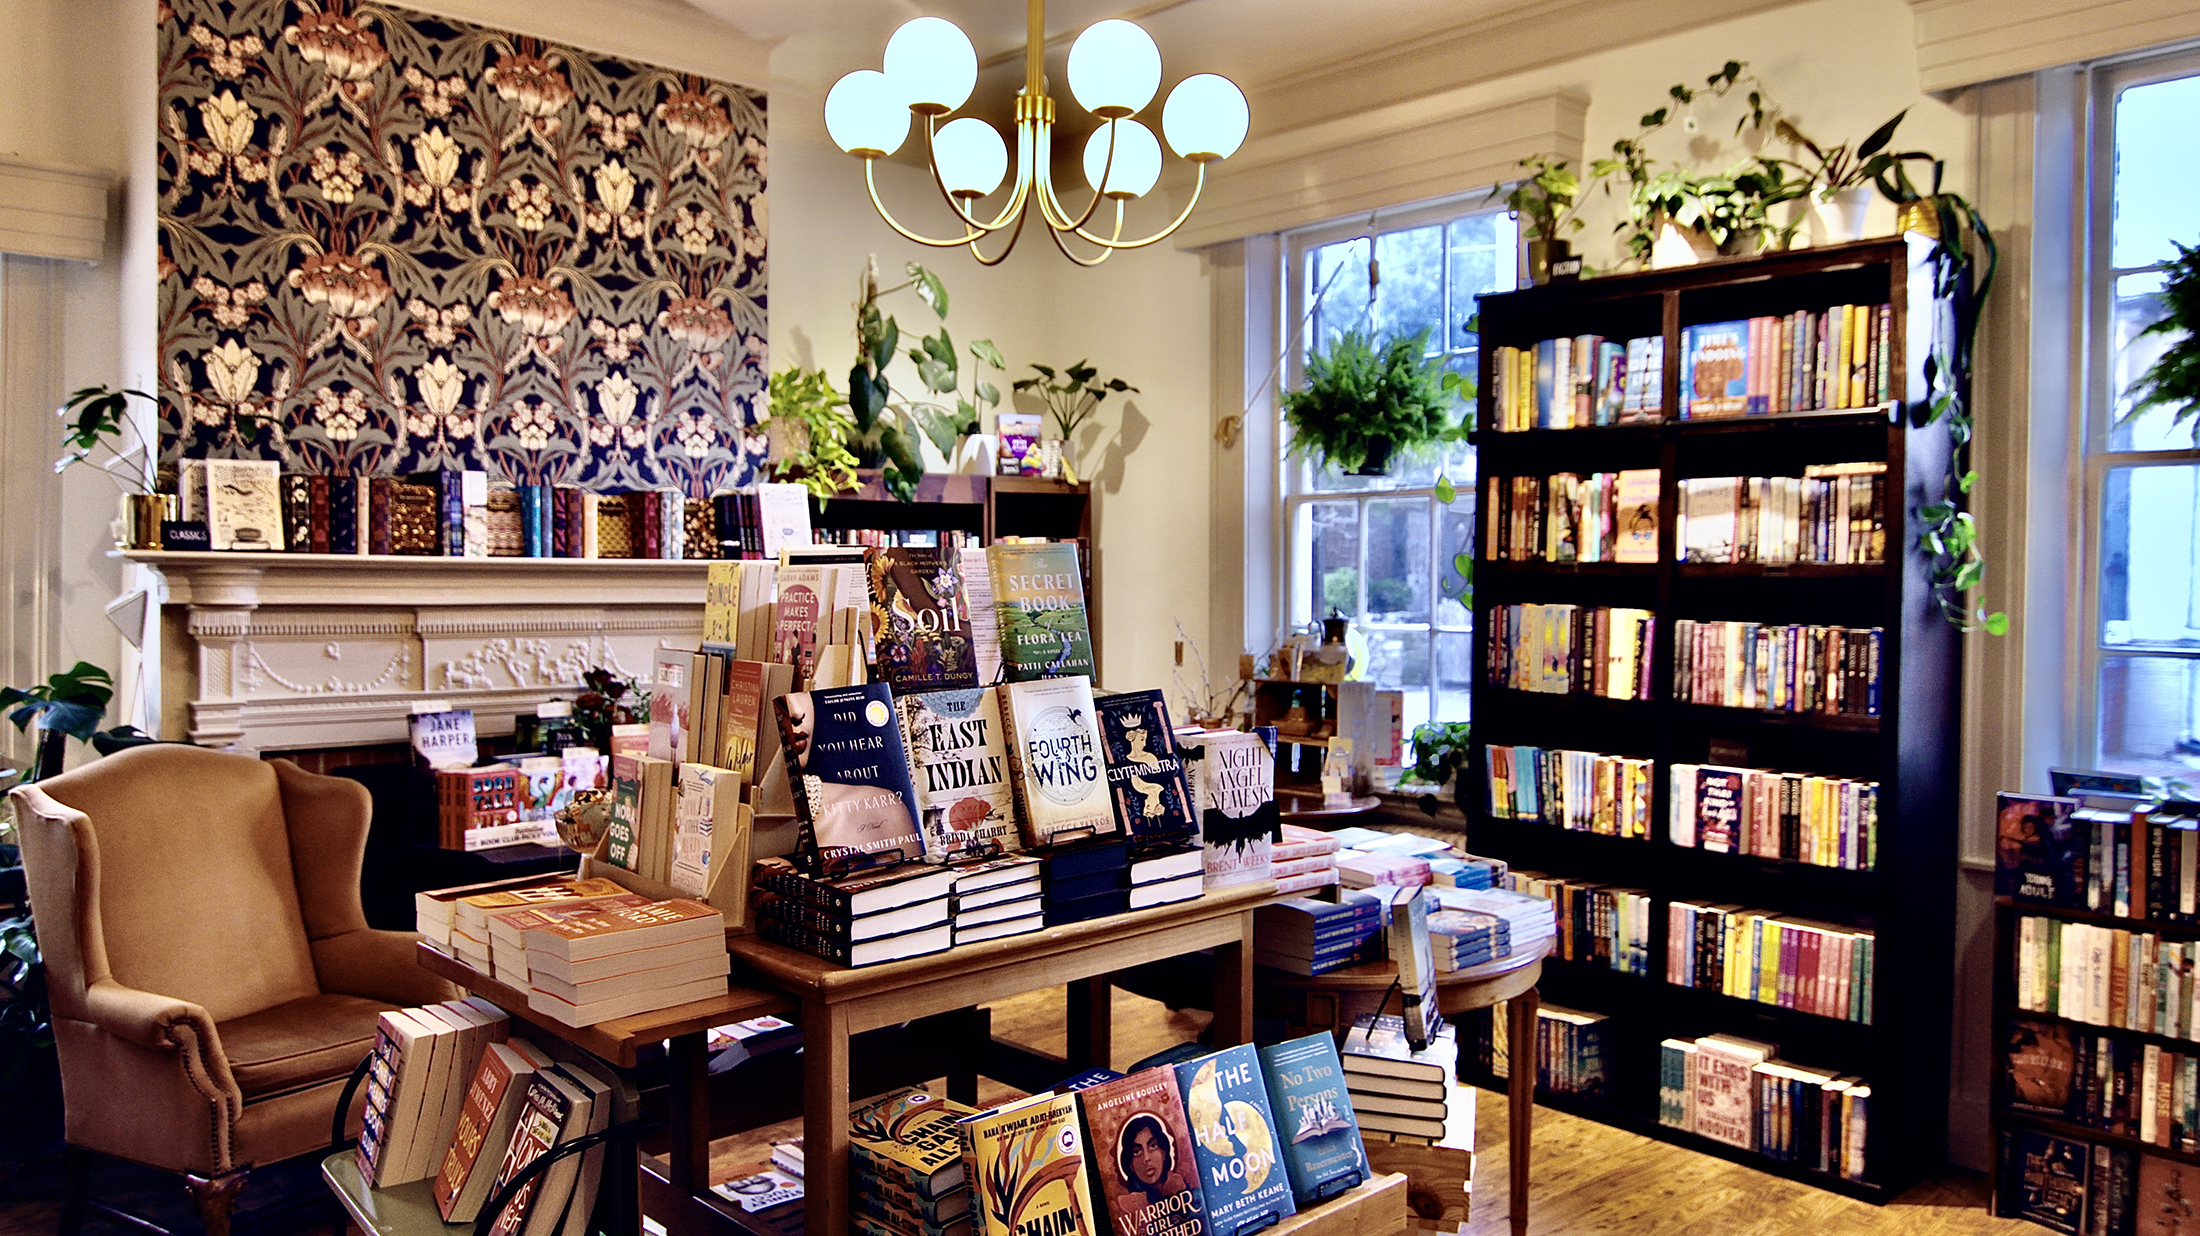
With that in mind, we here at Birch Tree Bookstore have compiled the following list of titles showcasing a variety of genres and ranging across a variety of reading levels (what better way to keep little ones occupied on a road trip than with a colorful, fun picture book?).
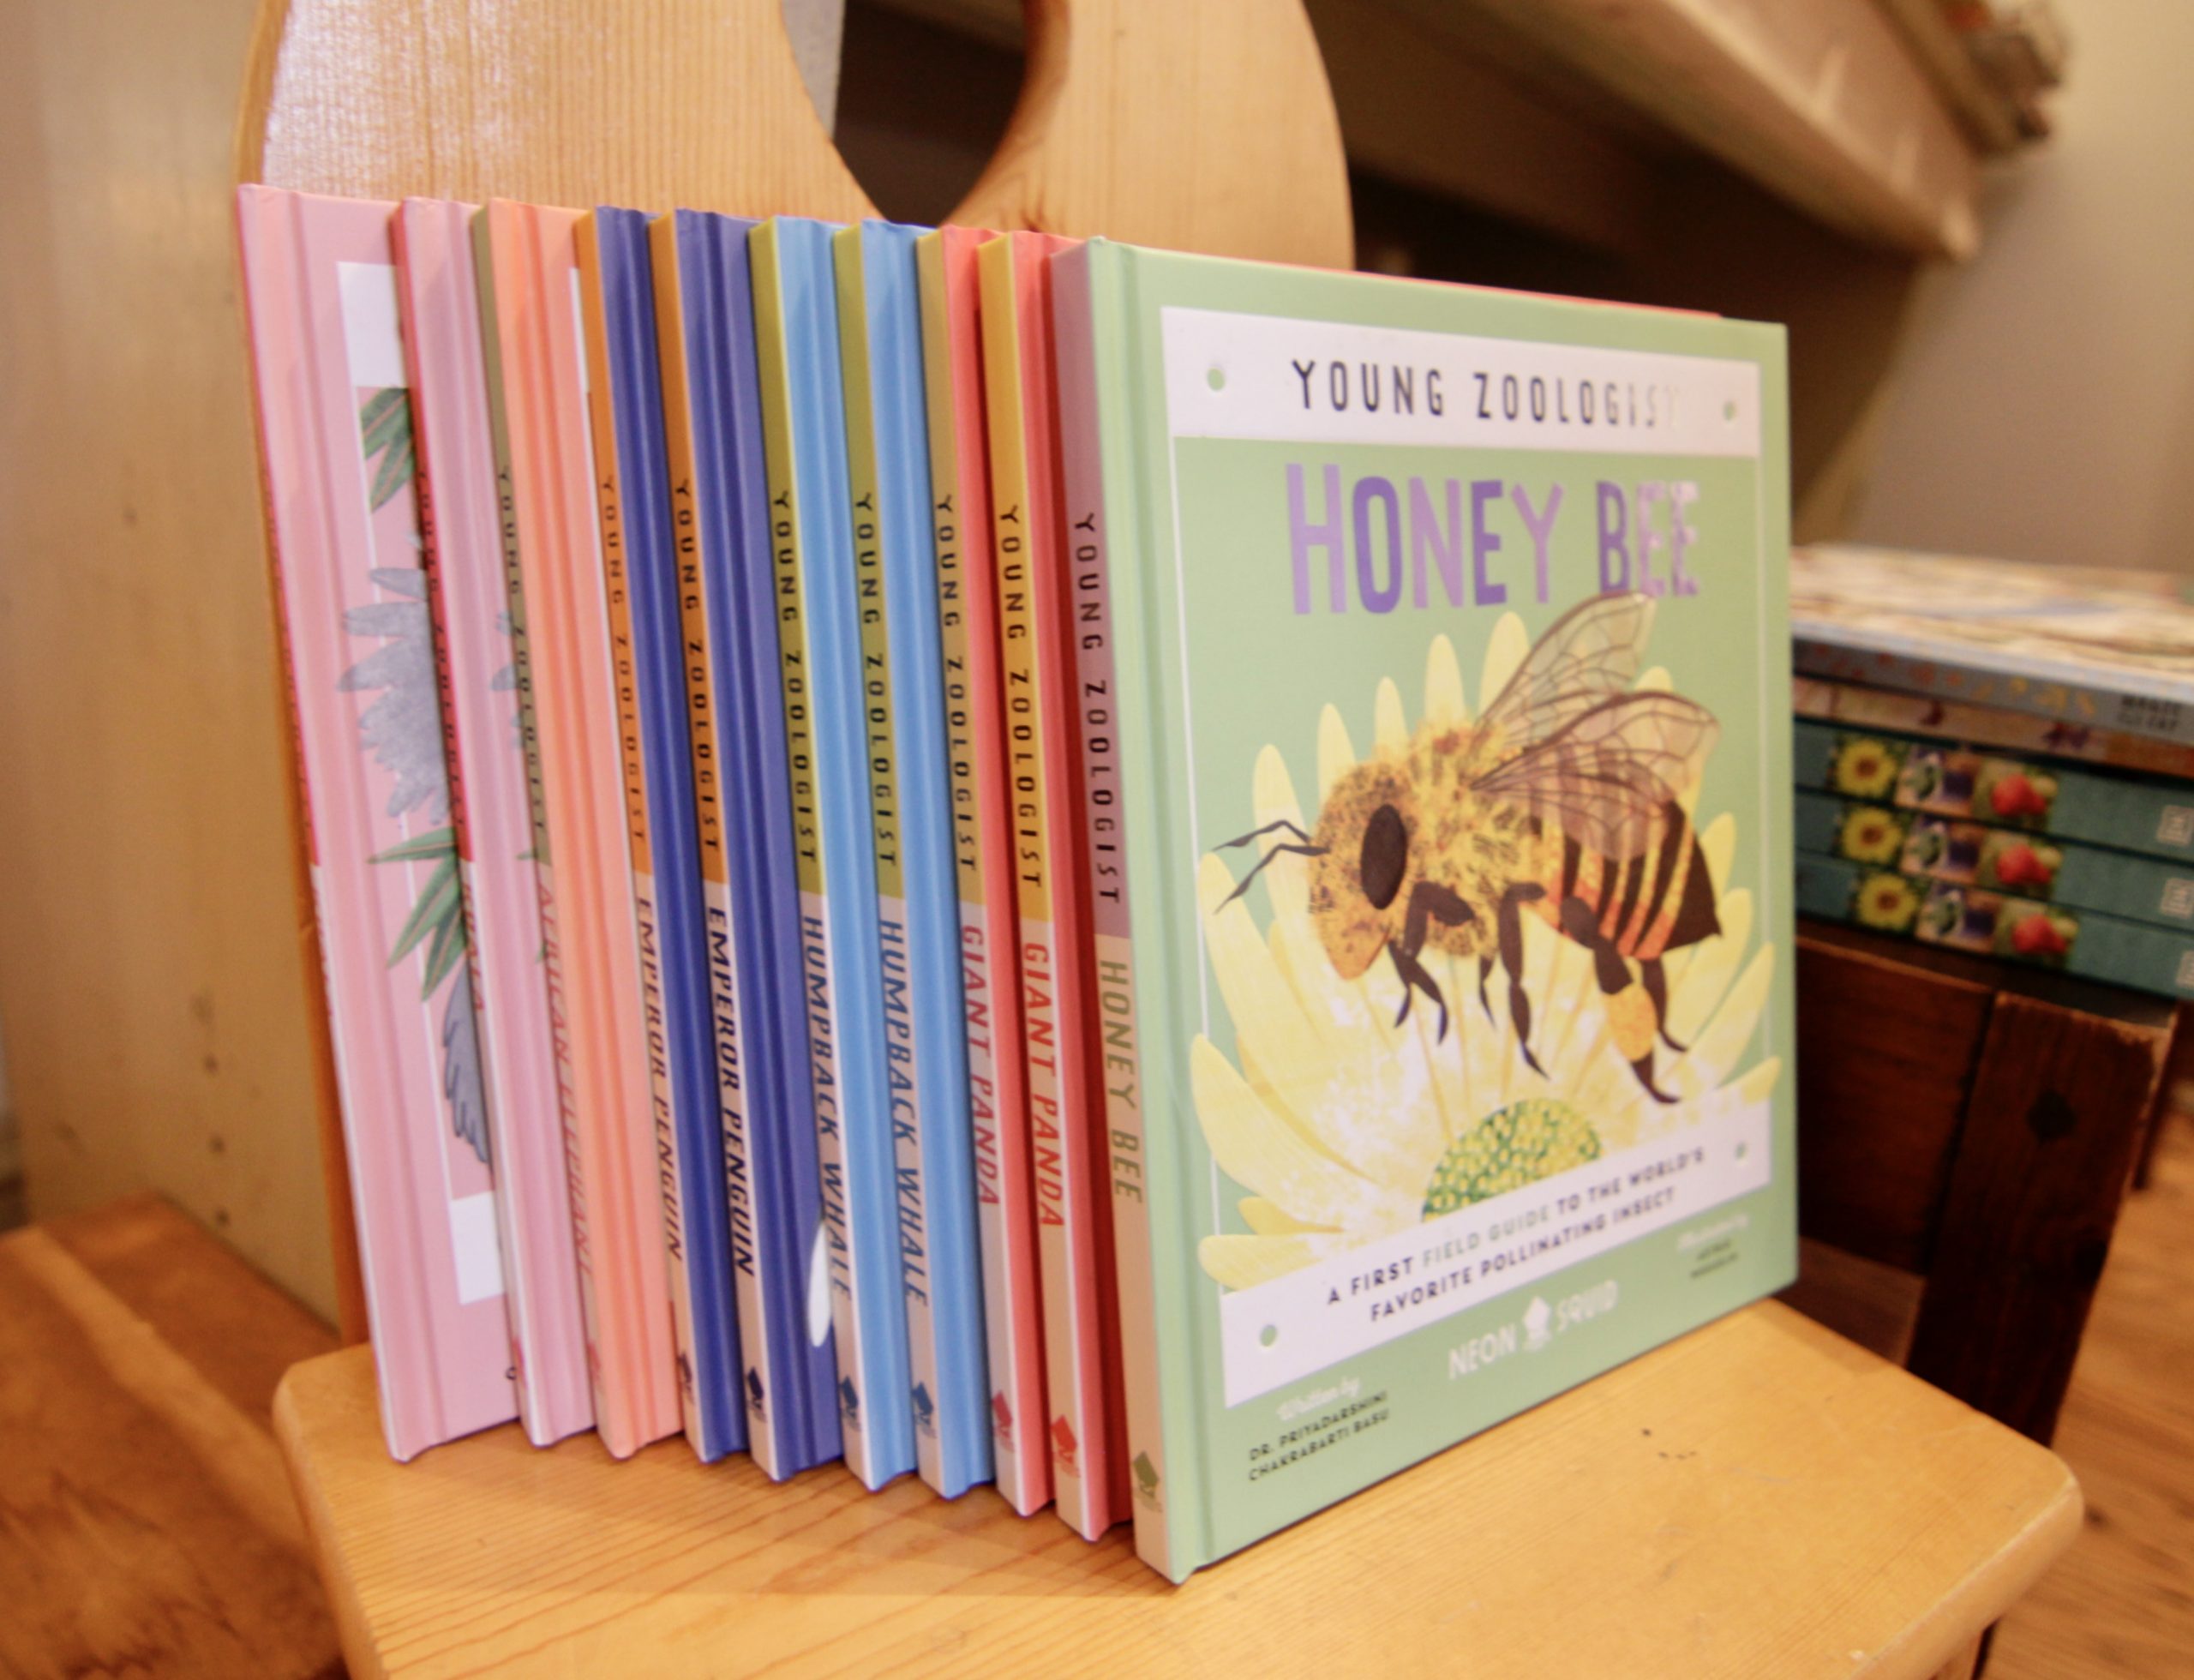
Children’s Picture Books
For picture books, you’ll definitely want to take a look at the delightful Mell Fell by Corey R. Tabor and Evergreen by Matthew Cordell. However, if your little one leans more towards nonfiction, there’s an incredible series of beautifully illustrated field guides called Young Zoologist with topics like Honey Bee, Giant Panda, and Koala (and many more!).
And of course you can’t pass up the variety of activity books such as the very popular Paint by Sticker series.
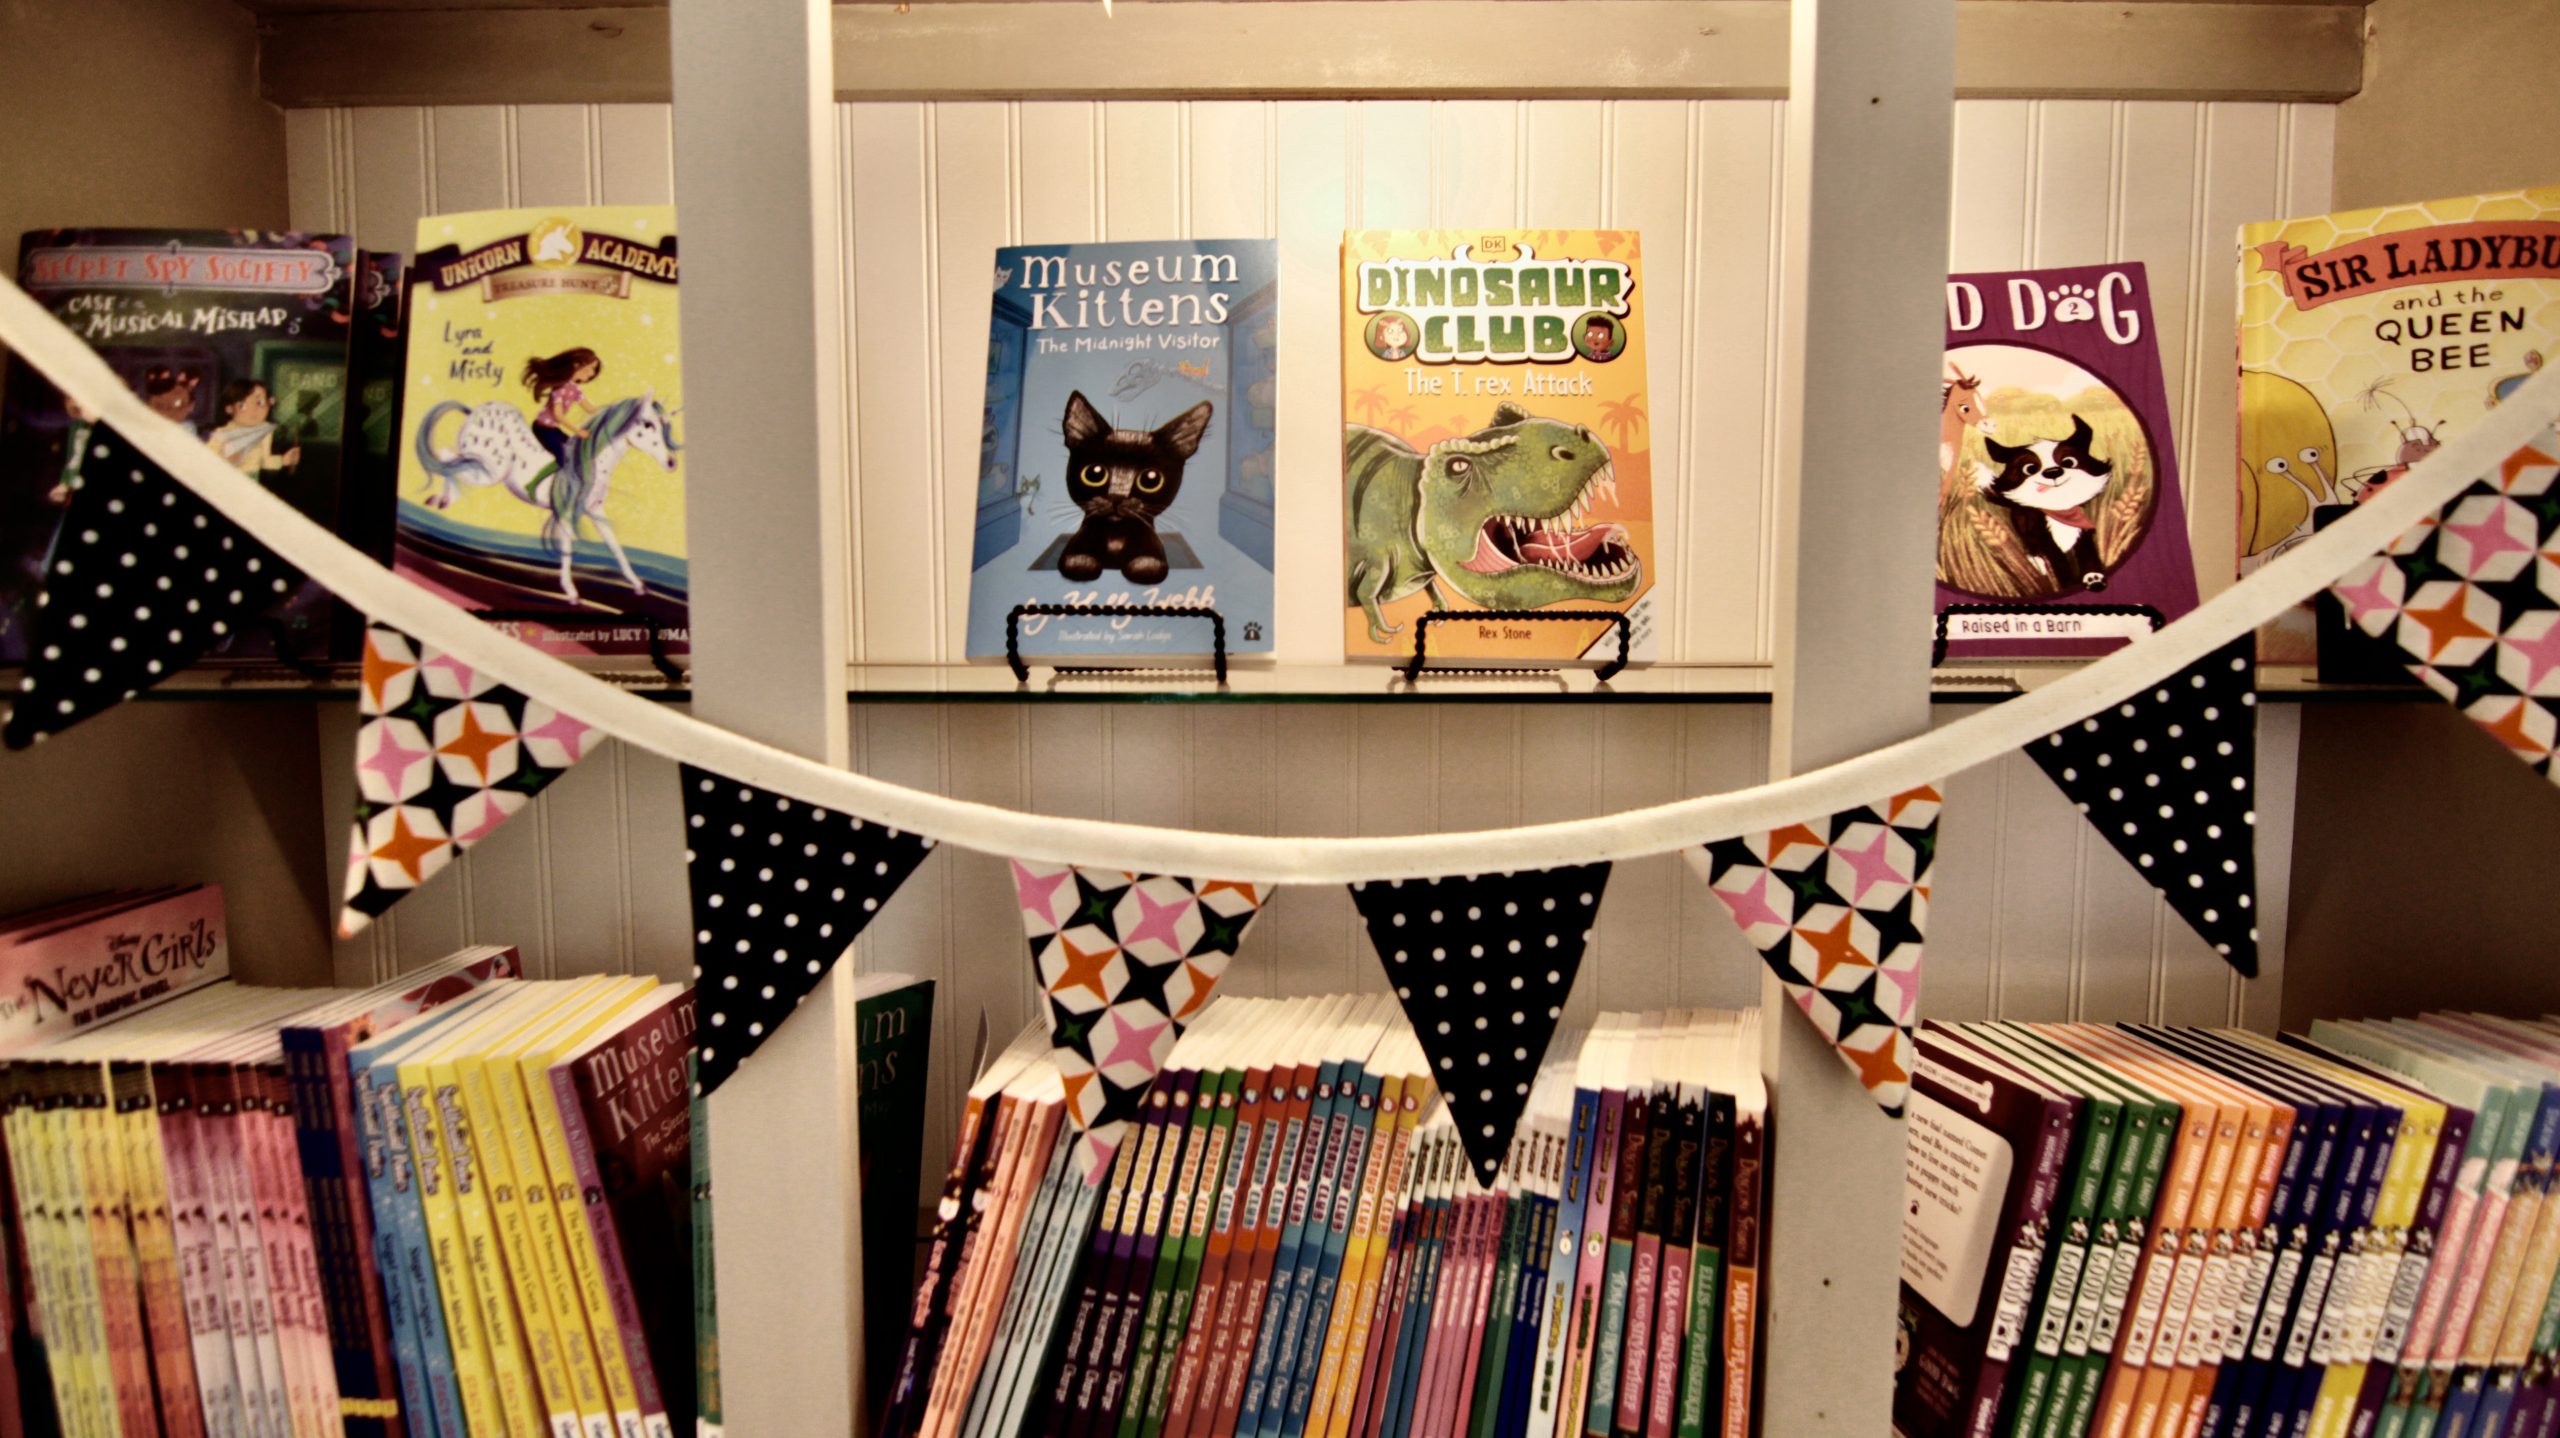
Early Reader Books
Packing a paperback with short chapters will keep your early reader entertained, help them to build reading skills, and promote confidence with reading while having fun with great stories such as Museum Kittens, The Nevergirls. Good Dog, or Dinosaur Club.
Middle Grade Books

For your middle grader who loves fantasy, Once There Was by Kiyash Monsef is a brand-new fantasy novel featuring mythical creatures. Or if they read Skandar and the Unicorn Thief by A. F. Steadman last summer, Skandar and the Phantom Rider is the second in the series and just released. Then of course, there’s the modern classic, Jacqueline Woodson’s Brown Girl Dreaming, a memoir in verse that we always return to.
For graphic novels, check out the Wings of Fire and Amulet series, or lean in to Birch Tree’s summer theme with the super nostalgic graphic novel adaptations of Sweet Valley Twins.
Young Adult (YA) Books
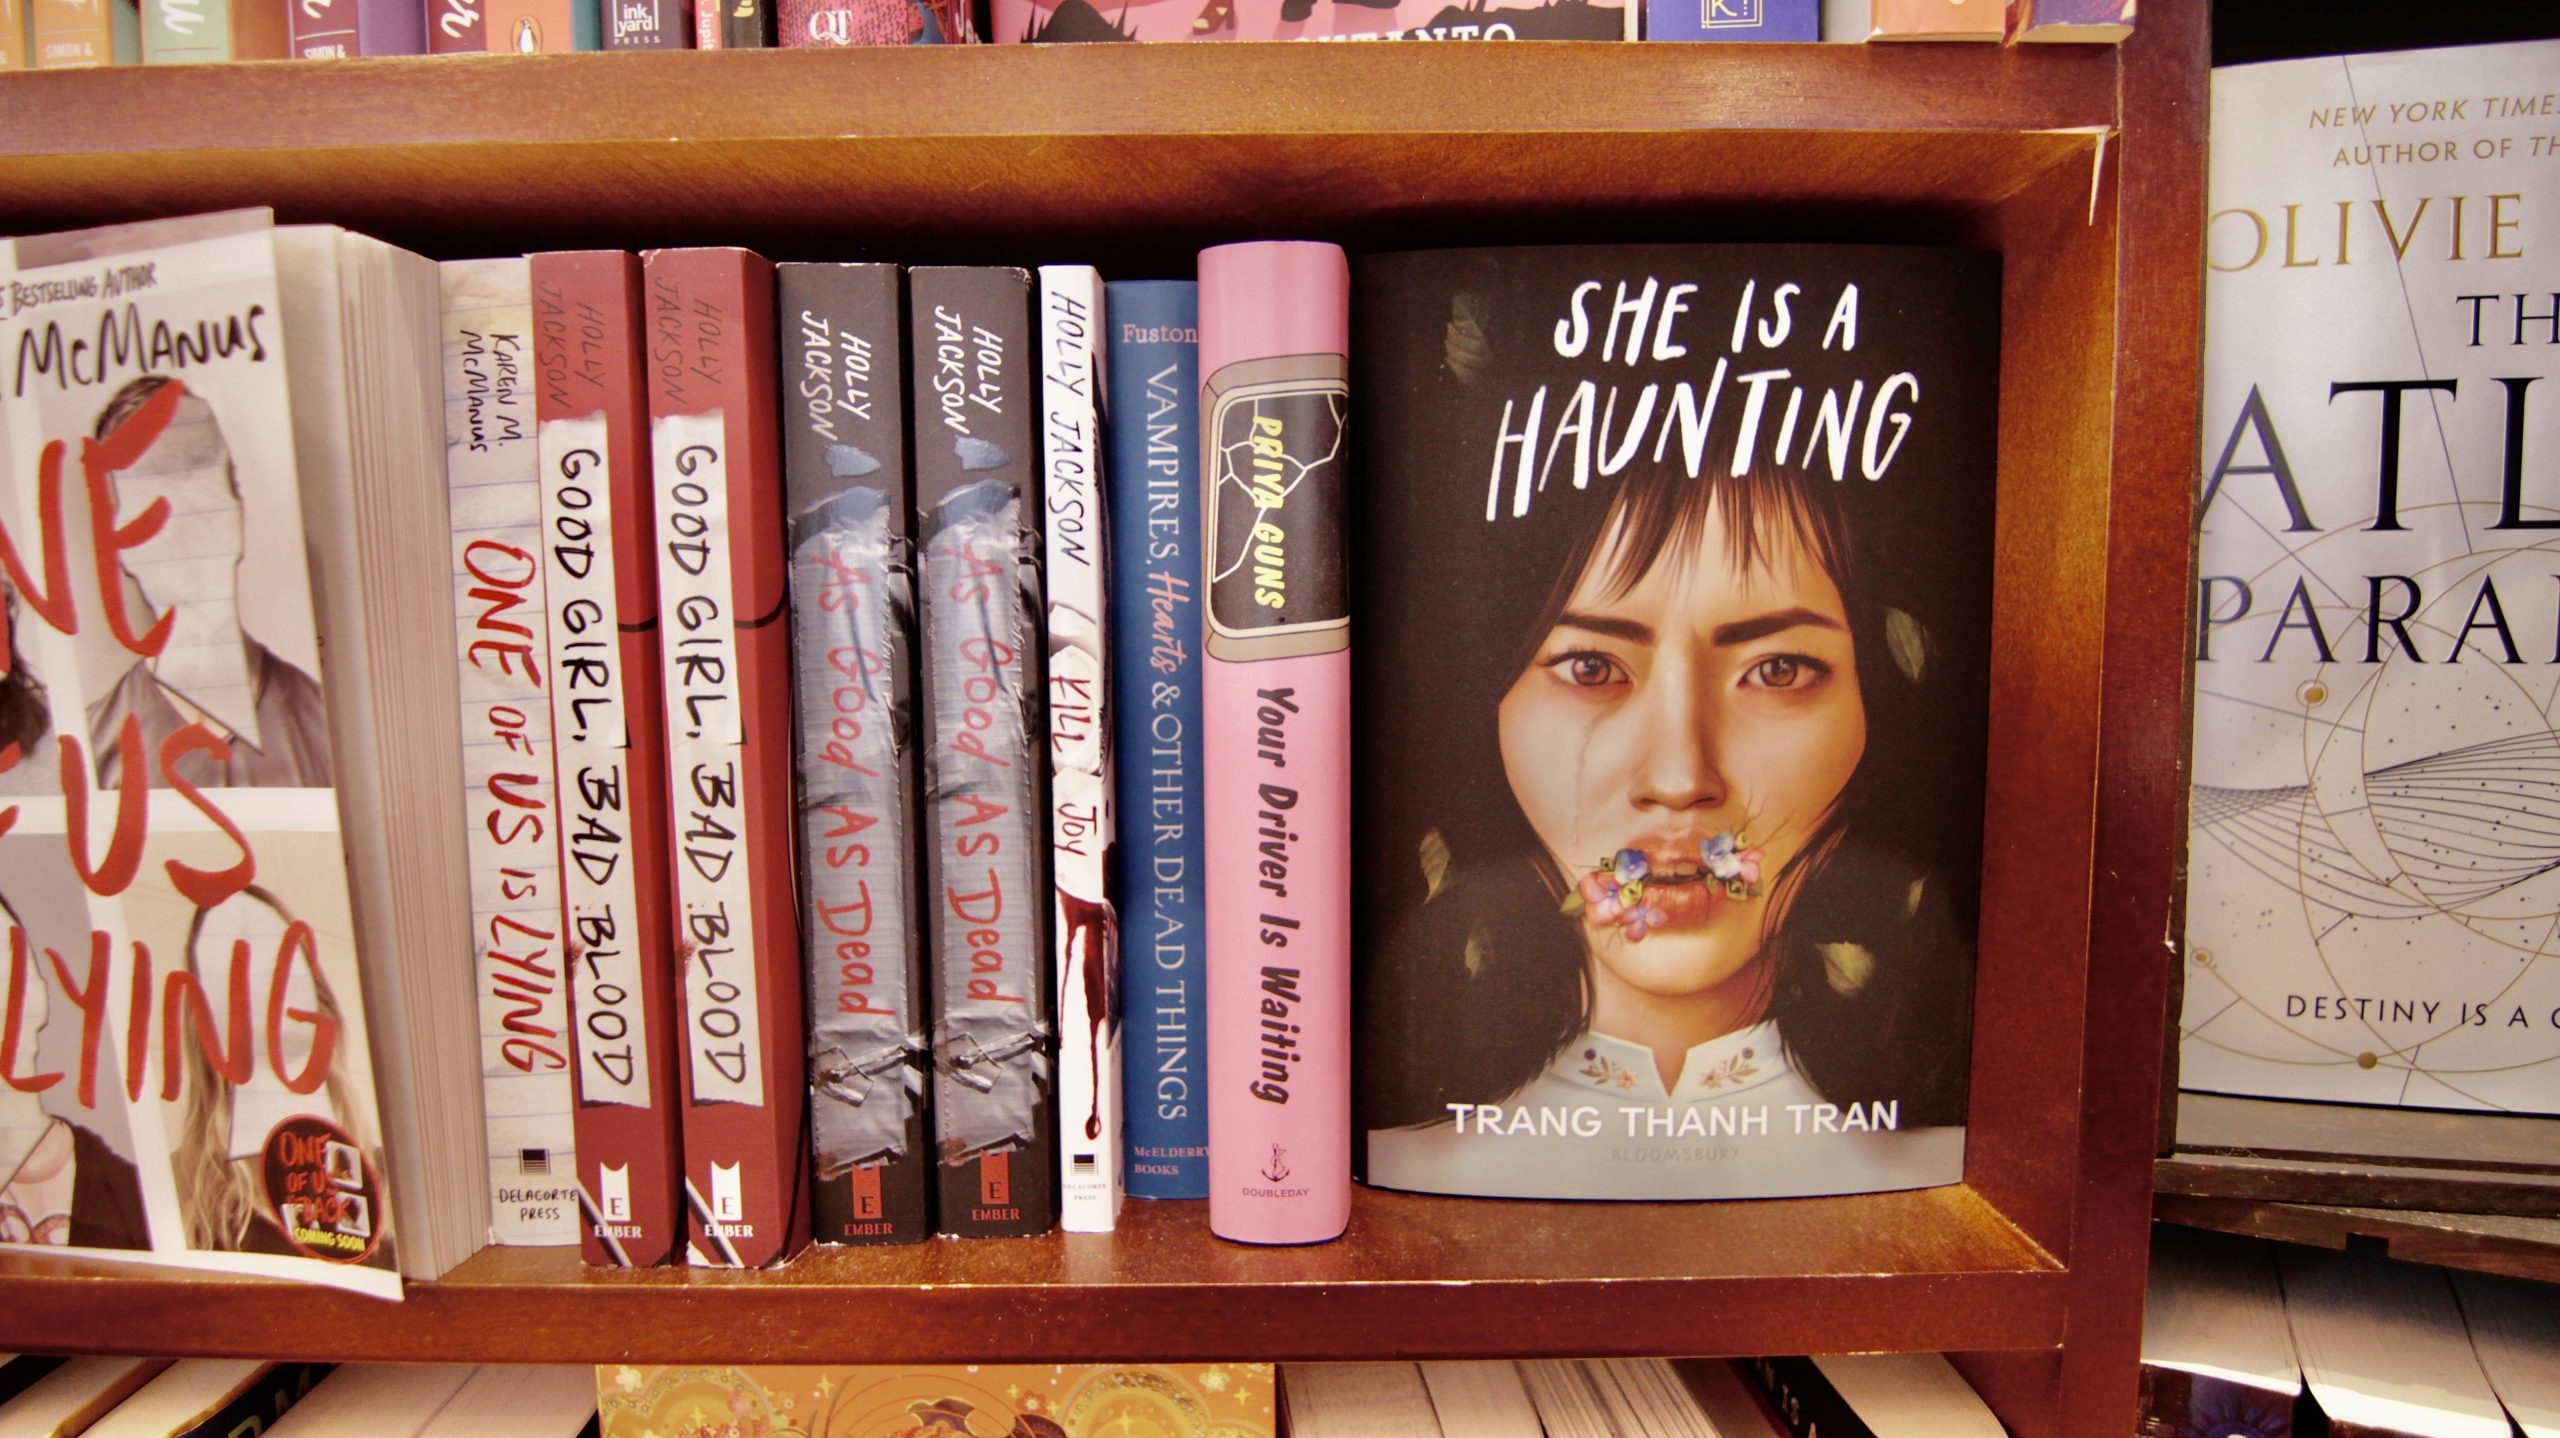
For young adult readers, we have a real range of recommendations from fantasy with Chloe Gong’s These Violent Delights, Tracy Deonn’s The Legendborn Cycle, and Adalyn Grace’s Belladonna; to mysteries with Their Vicious Games by Joelle Wellington; to horror (Trang Thanh Tran’s She is a Haunting); all the way over to fun romances such as The Summer I Turned Pretty by Jenny Han and Heartstopper by Alice Oseman. Hardcovers, paperbacks, graphic novels… take your pick!
Nonfiction Books
To keep you grounded in reality and learn something new, check out Path Lit by Lightning: The Life of Jim Thorpe by David Maraniss (coming to Birch Tree Bookstore in June!). Or, out in paperback in May, Trailed: One Woman’s Quest to Solve the Shenandoah Murders by Kathryn Miles.
Memoirs
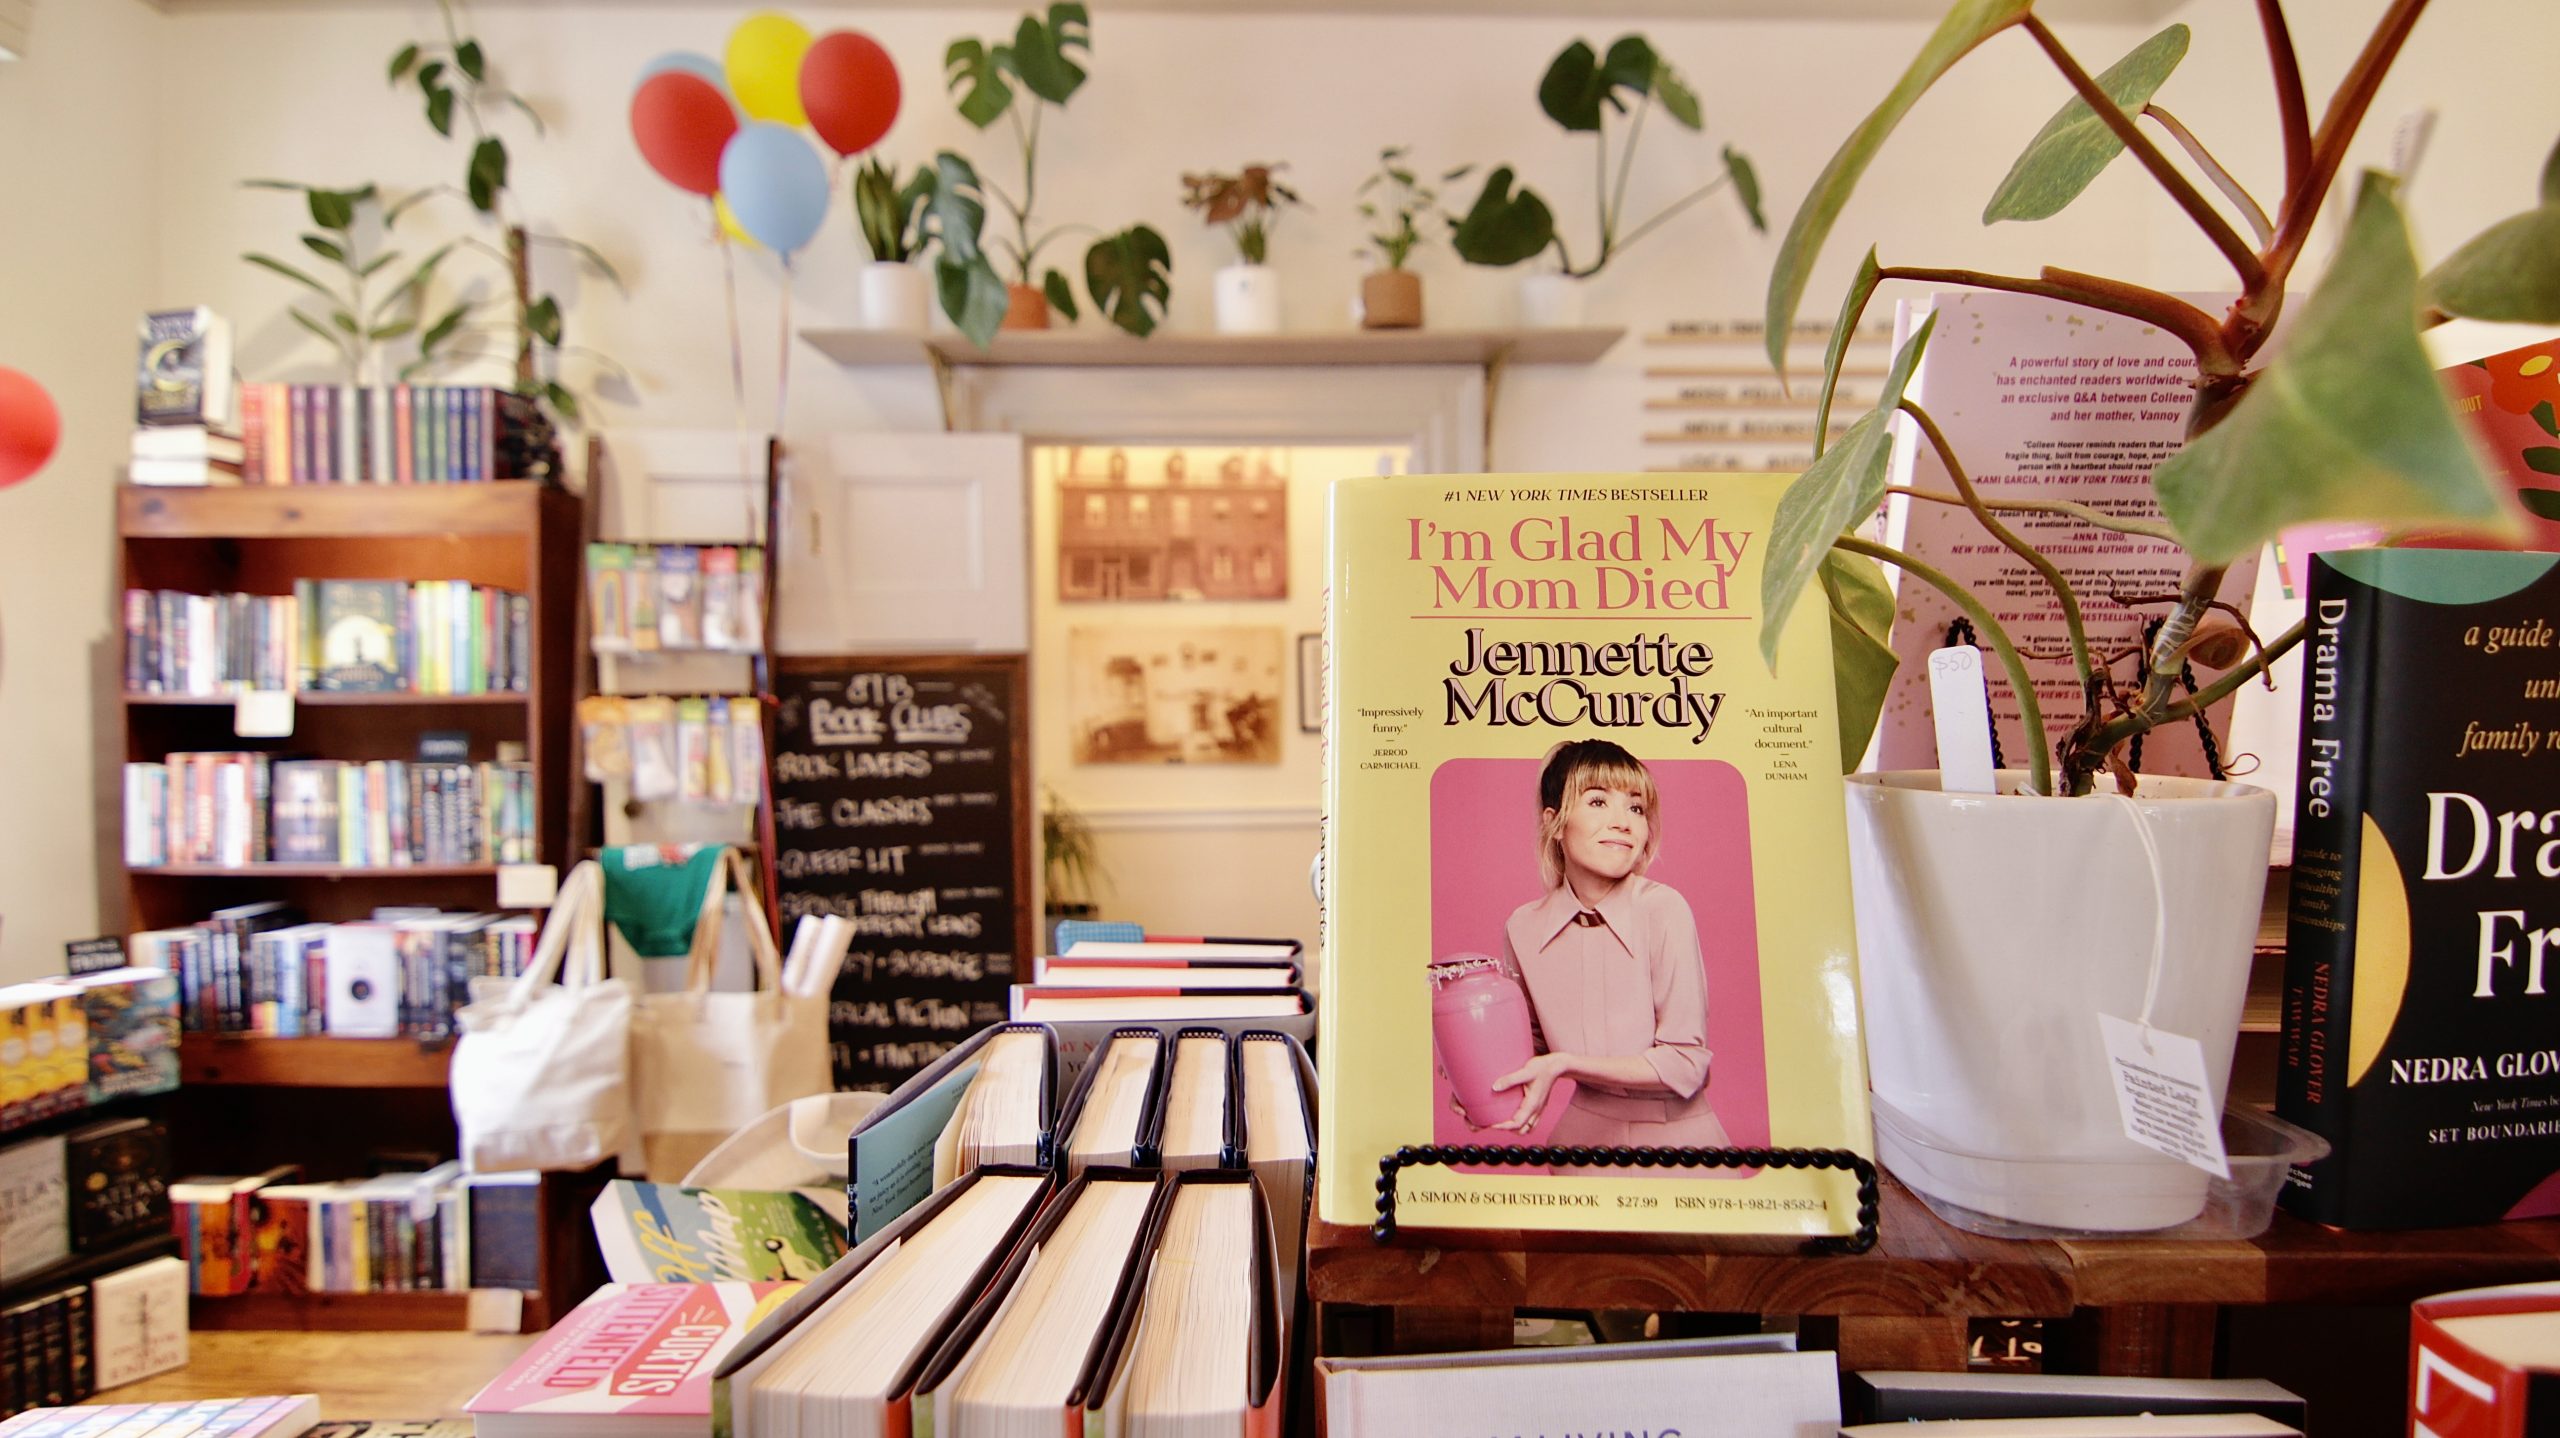
For memoirs, you have probably already read I’m Glad My Mom Died by Jeannette McCurdy of iCarly fame, but if not… now is the time! Or for something a little more celebratory and hopeful – but also meaningful and thoughtful – check out geobiologist Hope Jahren’s Lab Girl (labs! plants! botany!) or author John Green’s The Anthropocene Reviewed (rating the human-centered planet on a five-star scale!).
Historical Fiction

While you’re traveling to new places this summer, why not also do some time-traveling? Some of the best authors in historical fiction such as Kirstin Harmel with The Paris Daughter and Marie Benedict with The First Ladies have new releases coming out this summer.
Plants and Nature

Because Birch Tree Bookstore and Foliage Plants coexist in the beautiful 11 W Market St. building, not only are plants scattered all around the books, but many of our books focus on gardening and nature, such as Soil, Wilderness Tales, and (coming in October! That’s sort-of still summer, right?) Living Wild by Hilton Carter.
Fiction Books
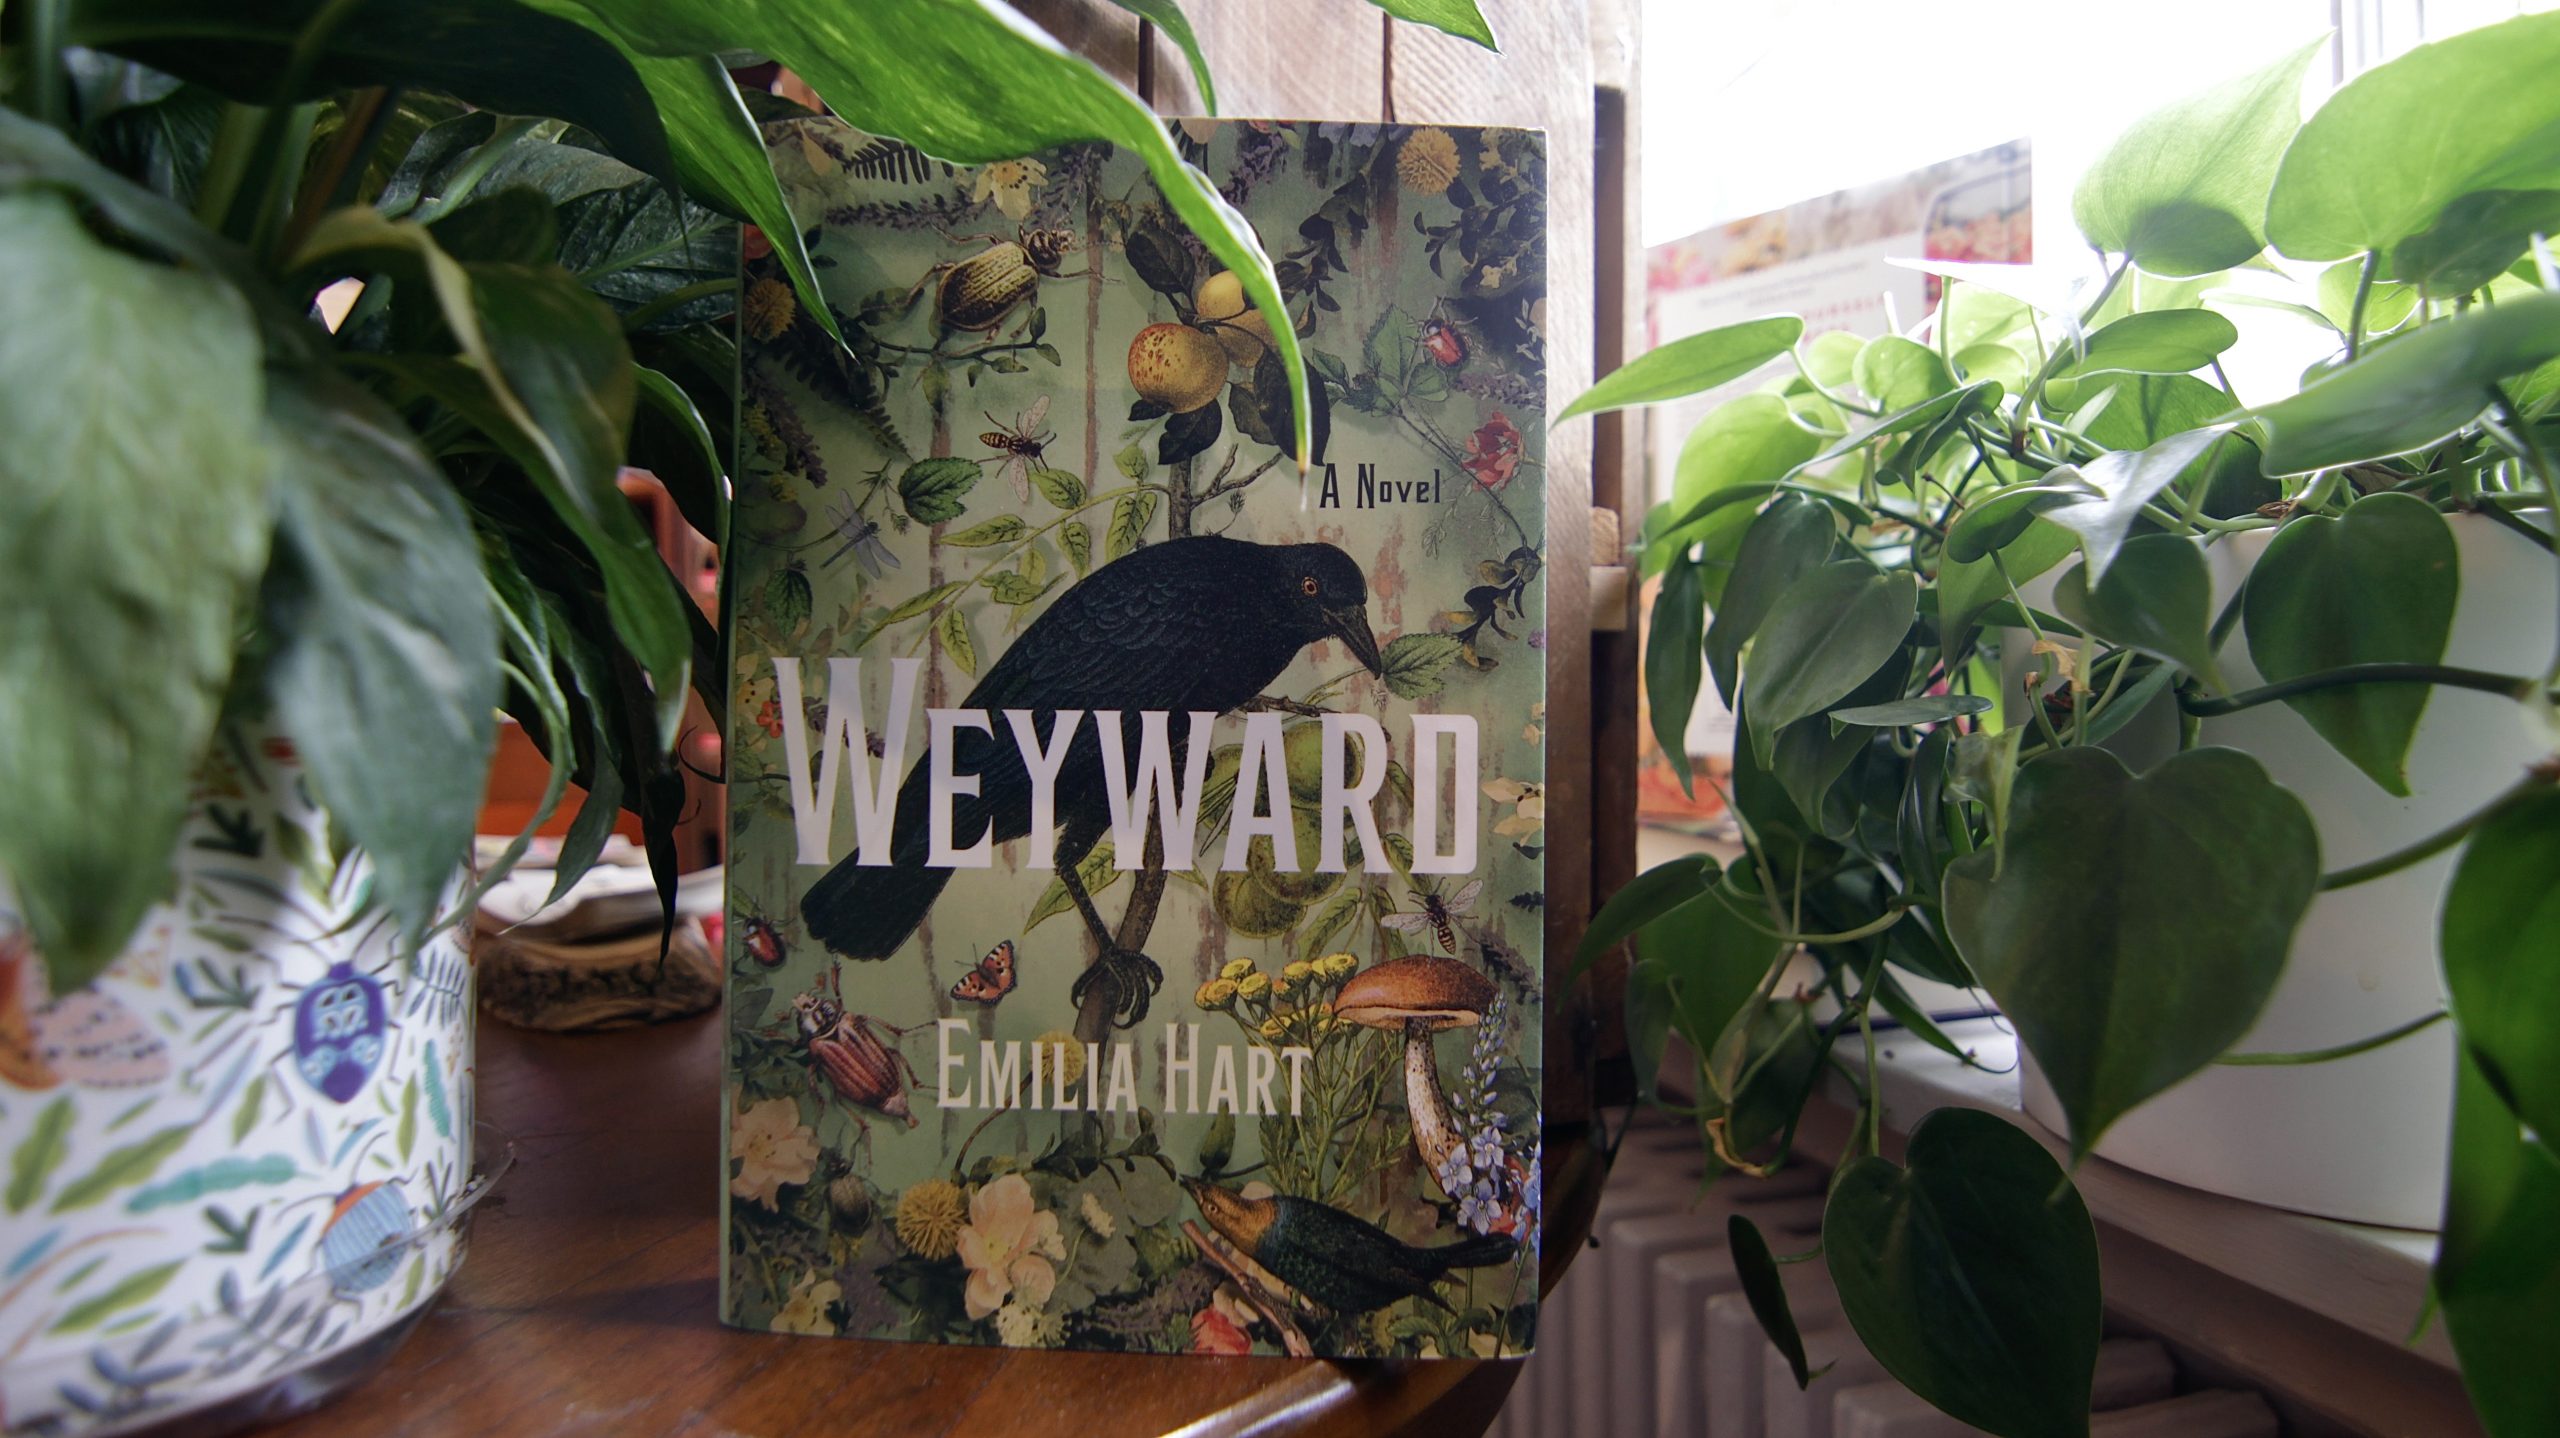
General fiction is one of the most challenging genres to narrow down. For that summer-camp-nostalgia, The Summer of Songbirds is about a group of friends trying to save the camp that they loved when they were growing up. New releases to look out for are The Five-Star Weekend by Elin Hildenbrand, Yellowface by RF Kuang, and The Half-Moon by Mary Beth Keane… but maybe Tomorrow, and Tomorrow, and Tomorrow and Weyward have also been on your TBR for a while, so how are you supposed to pick?
Maybe just read all six!
Mystery & Suspense Books
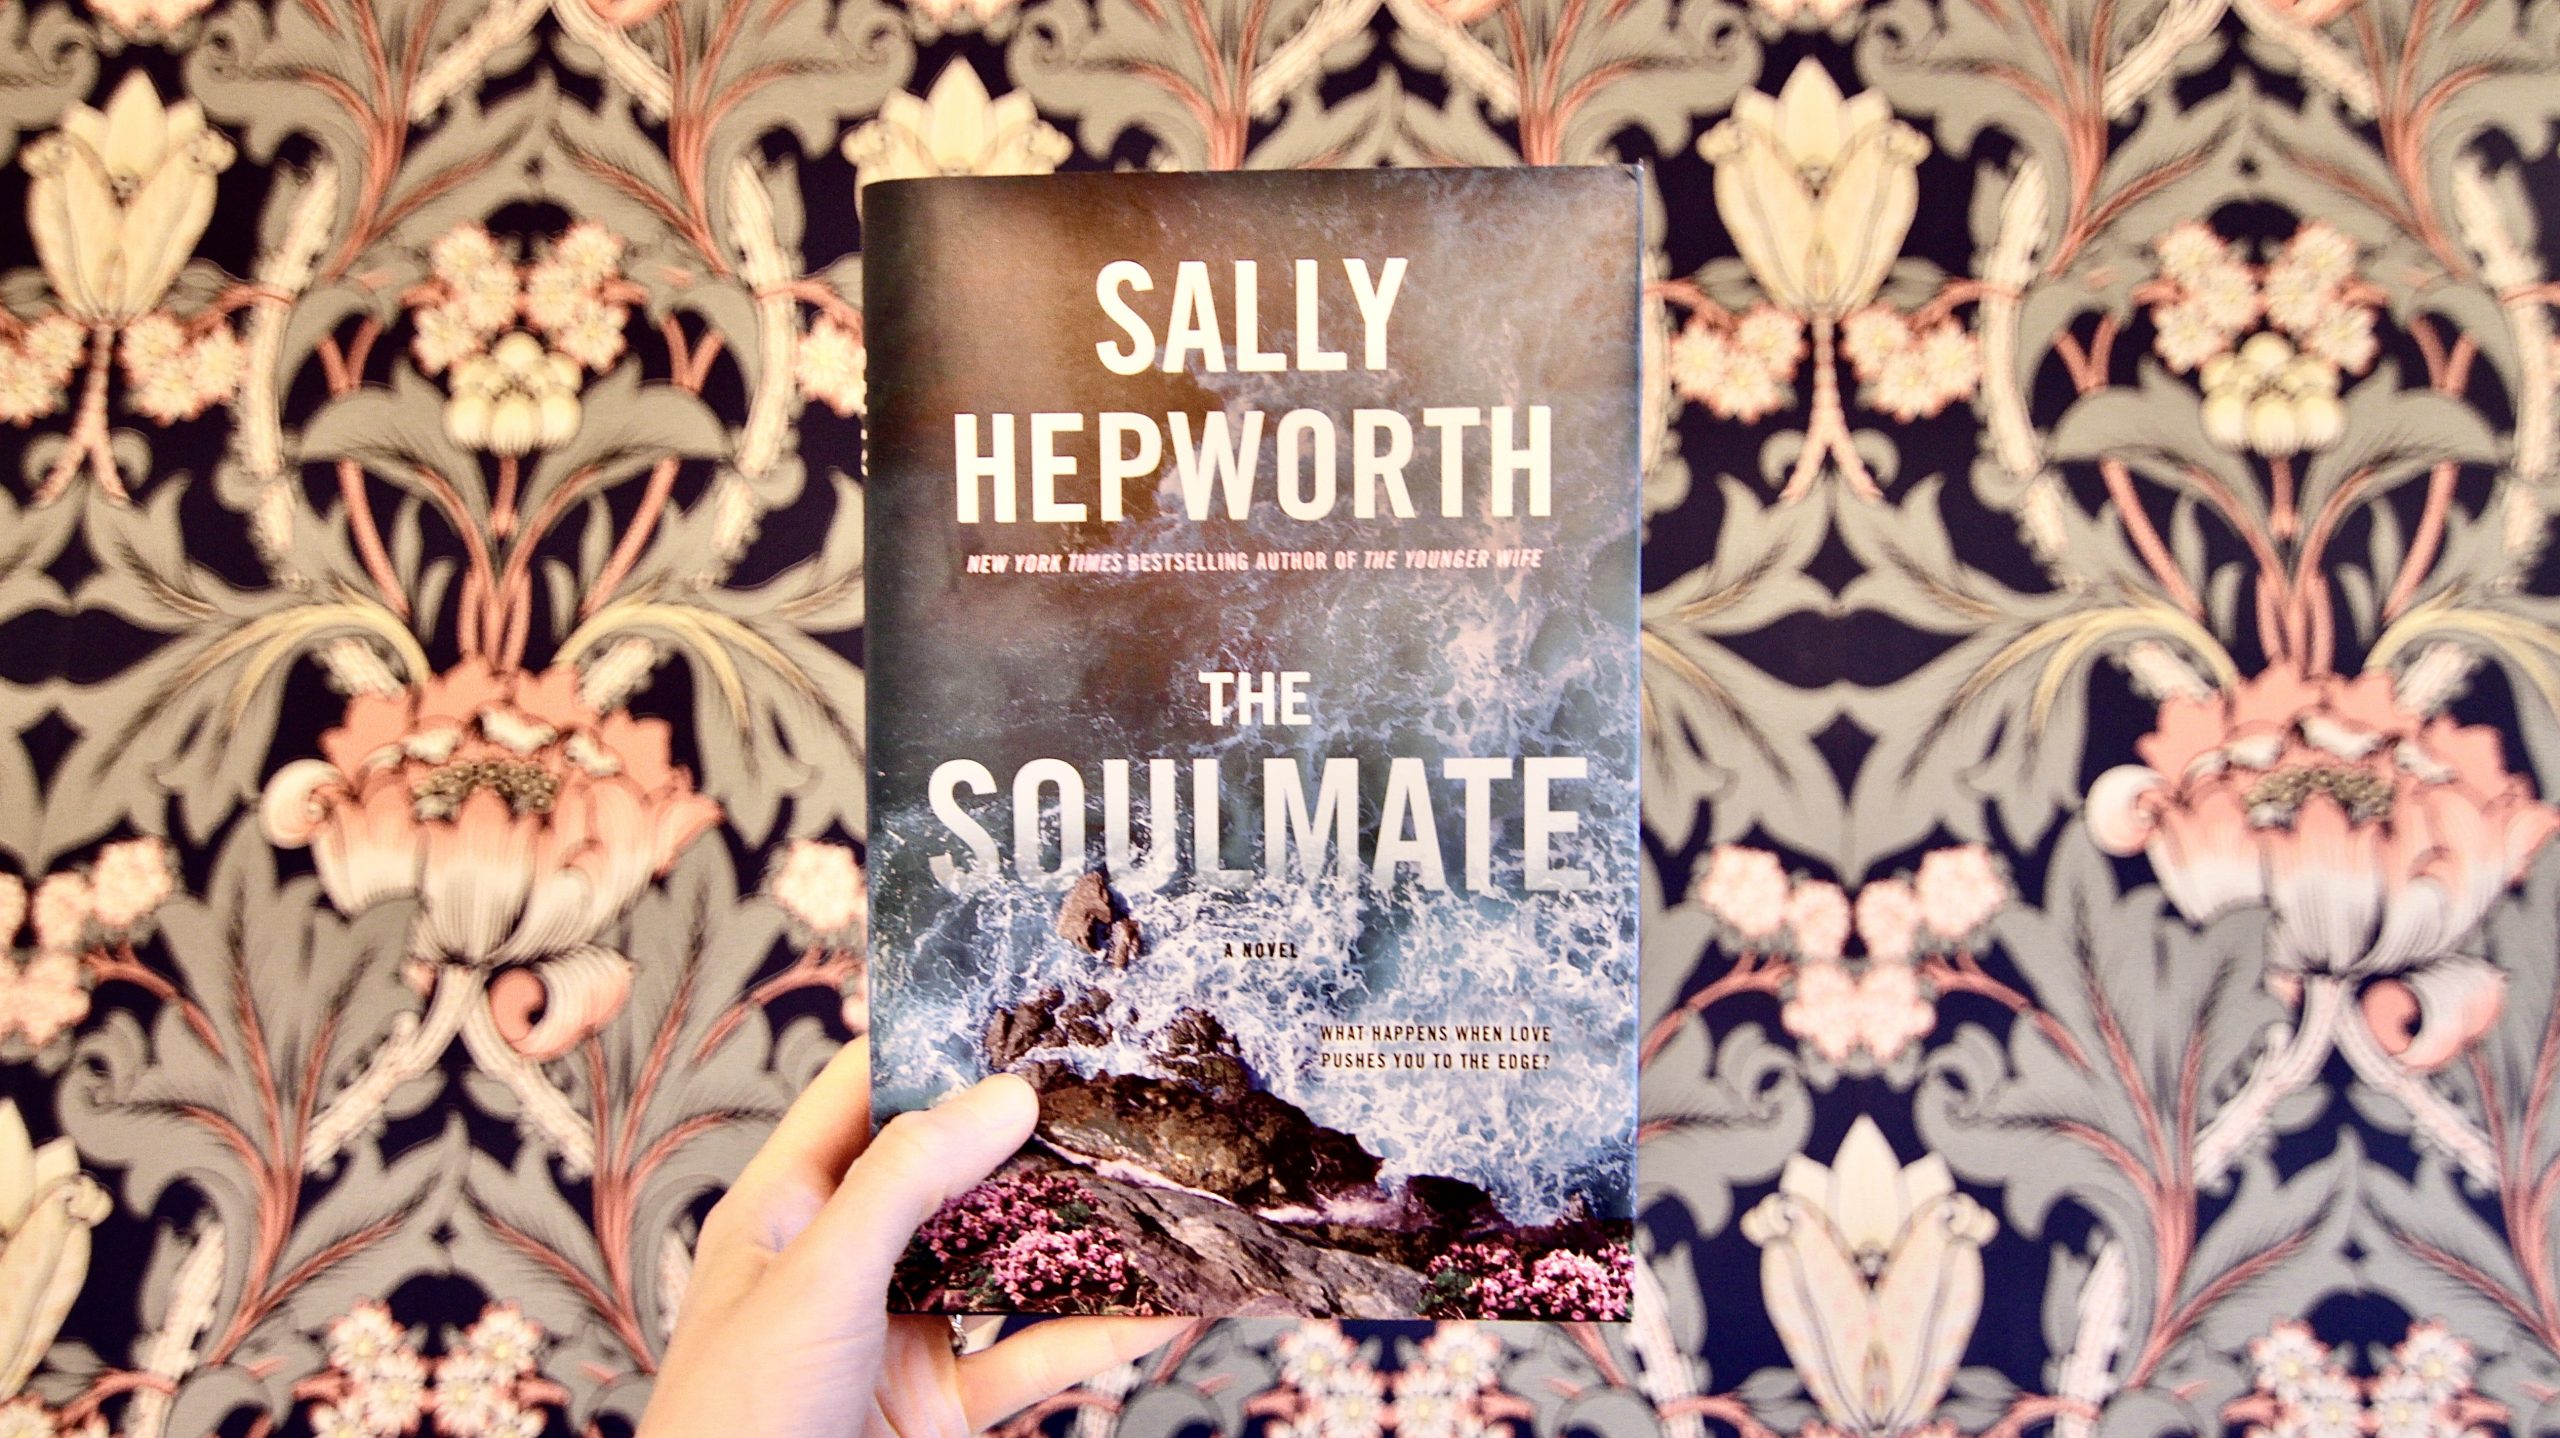
OK, maybe the most difficult genre to narrow down is actually mystery… some of the best beach reads are mysteries, especially from tried and true authors like Ruth Ware (Zero Days) and Riley Sager (The Only One Left). Or if you want to branch out a bit, check out The Soulmate (amazing cover), The Good Ones (coming to Birch Tree in June), The Whispers (from author of The Push!), The Senator’s Wife, or the gothic horror about a woman who travels to an island populated with people obsessed with 1994, Dead Eleven.
Science Fiction & Fantasy Books
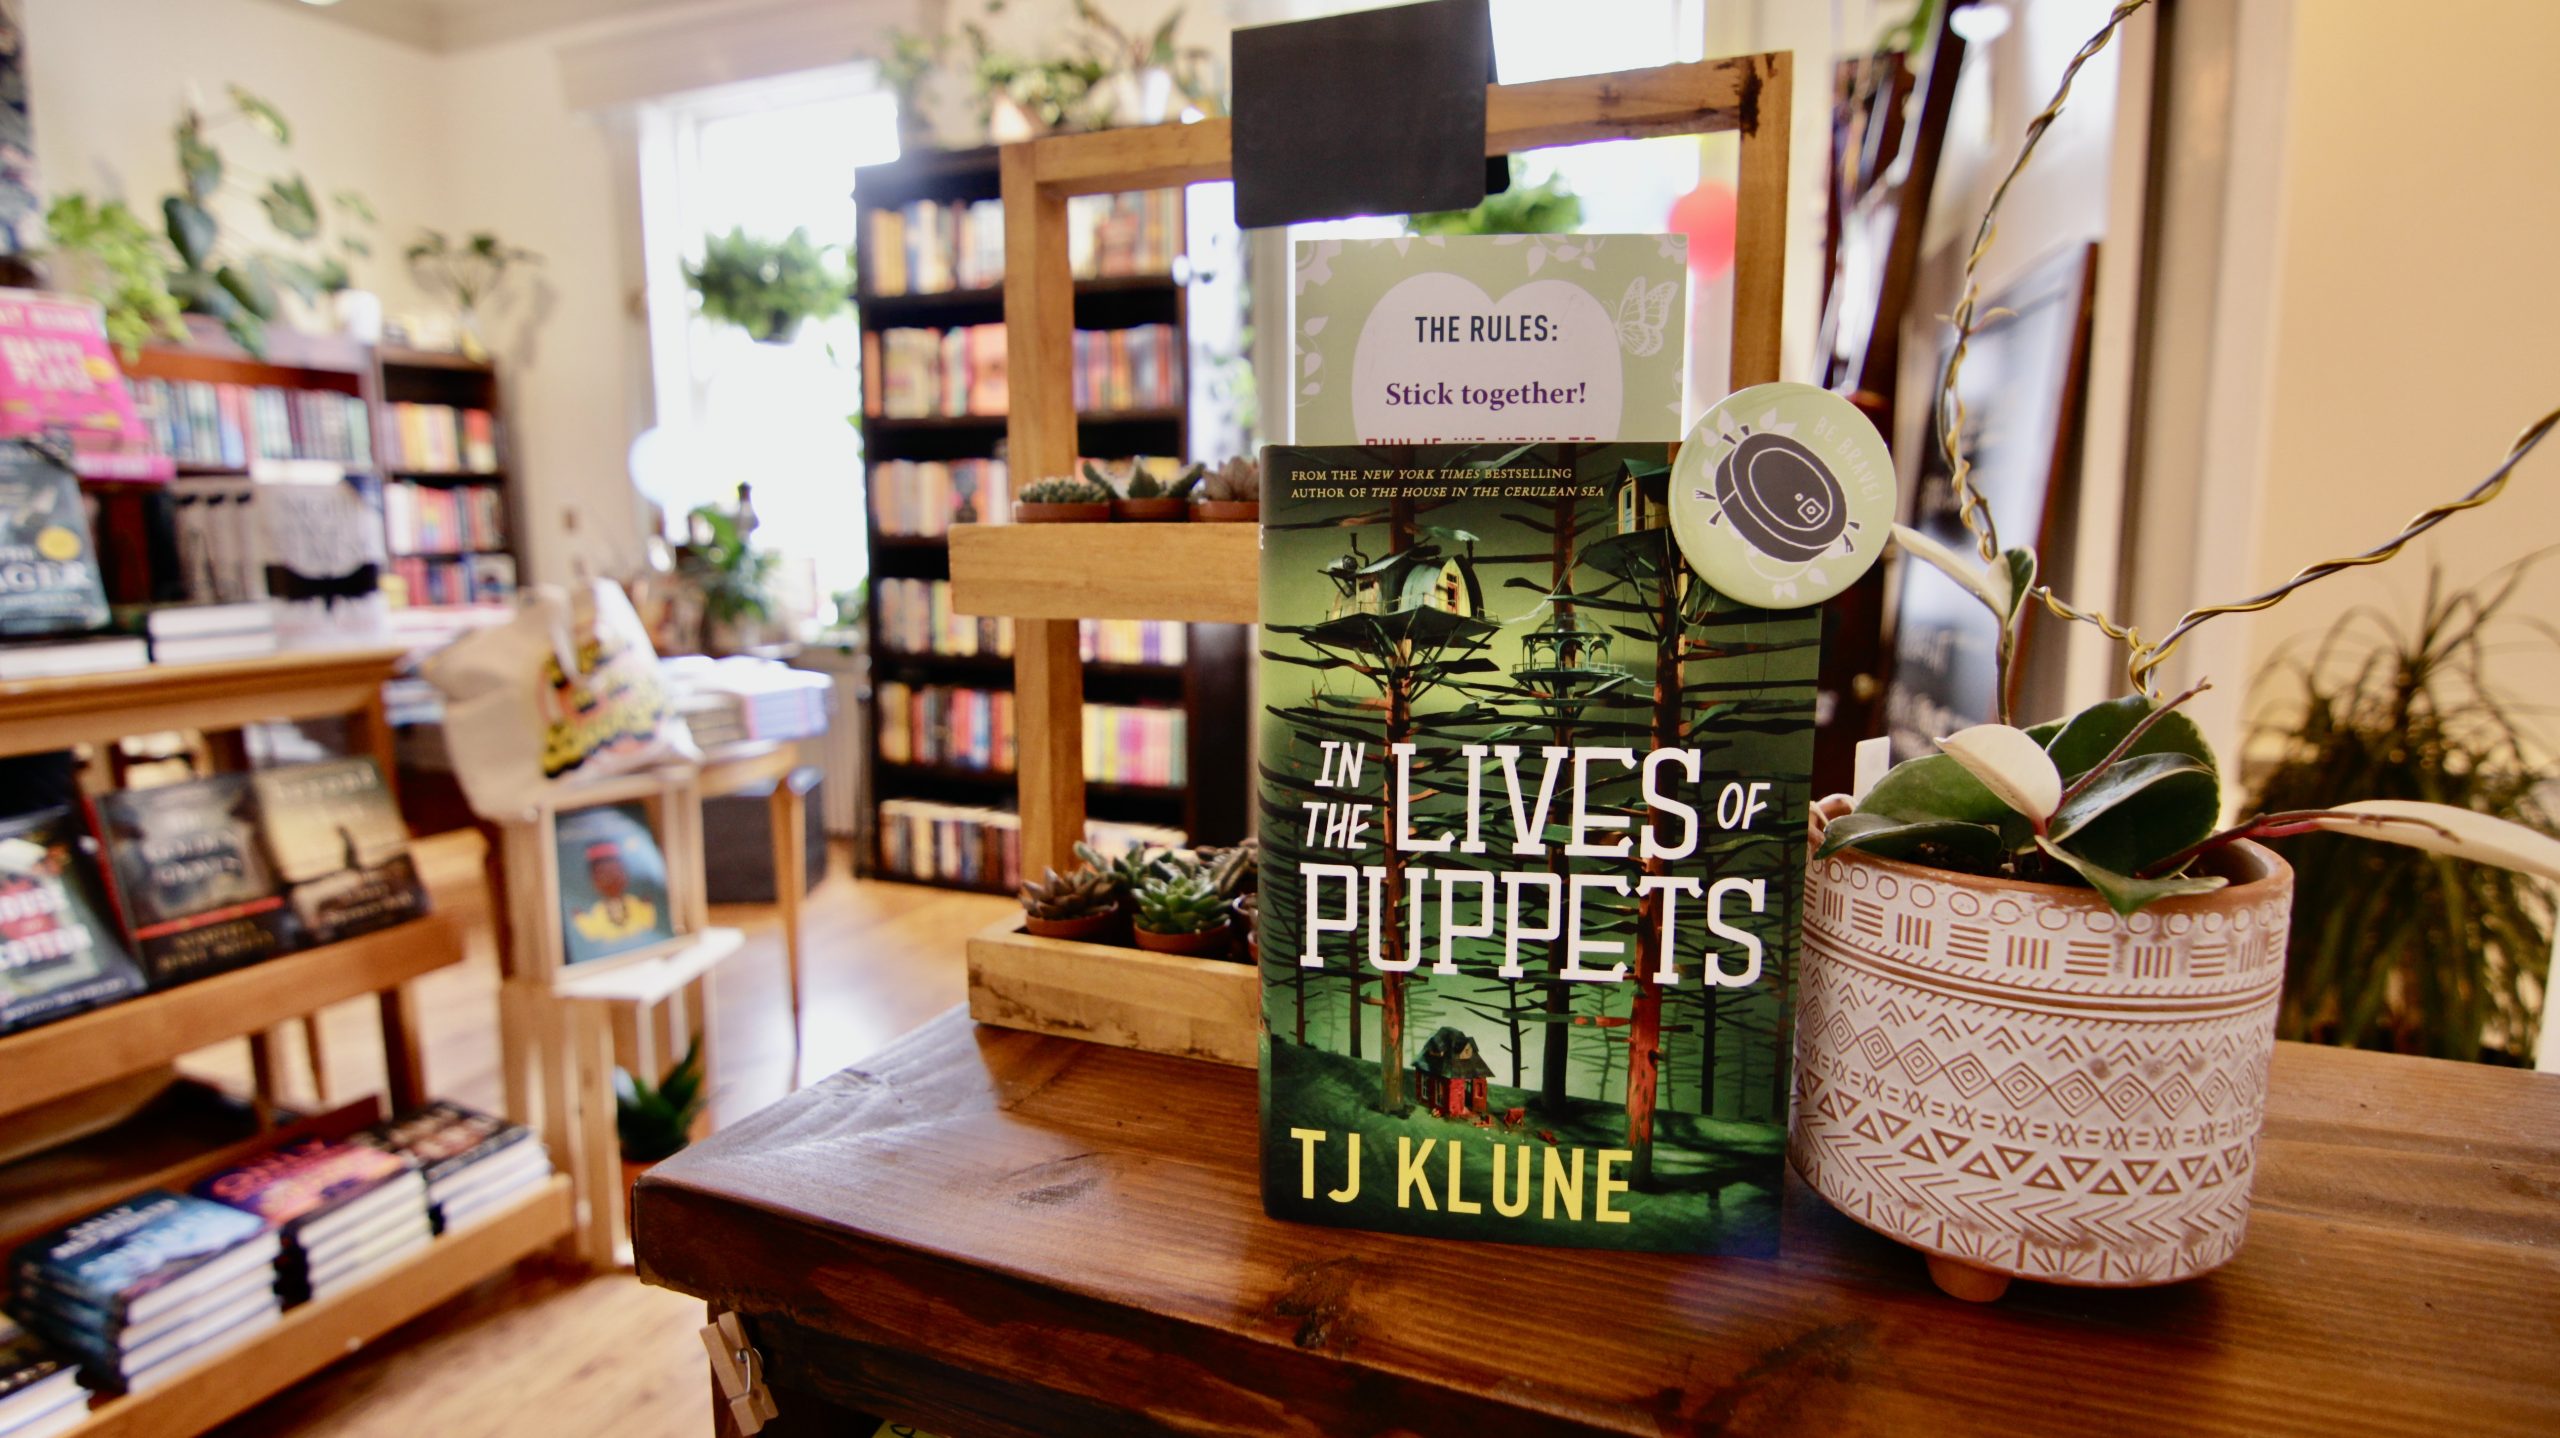
For fellow SFF lovers, we have a huge list of new releases to enjoy this spring and summer! If you want a big, warm hug in the form of a quirky sci-fi retelling of Pinocchio, run (don’t walk) to pick up In the Lives of Puppets.
Another cozy sci-fi with the dedication “For anyone who could use a break,” check out Becky Chambers’s A Psalm for the Wild-Built. And then of course one of Brandon Sanderson’s new titles, The Frugal Wizard’s Handbook for Surviving Medieval England, is coming out in June along with Translation State by Ann Leckie, Witch King by Martha Wells of Murderbot fame (May release!), and Immortal by Chloe Gong (July!).
Romance Books
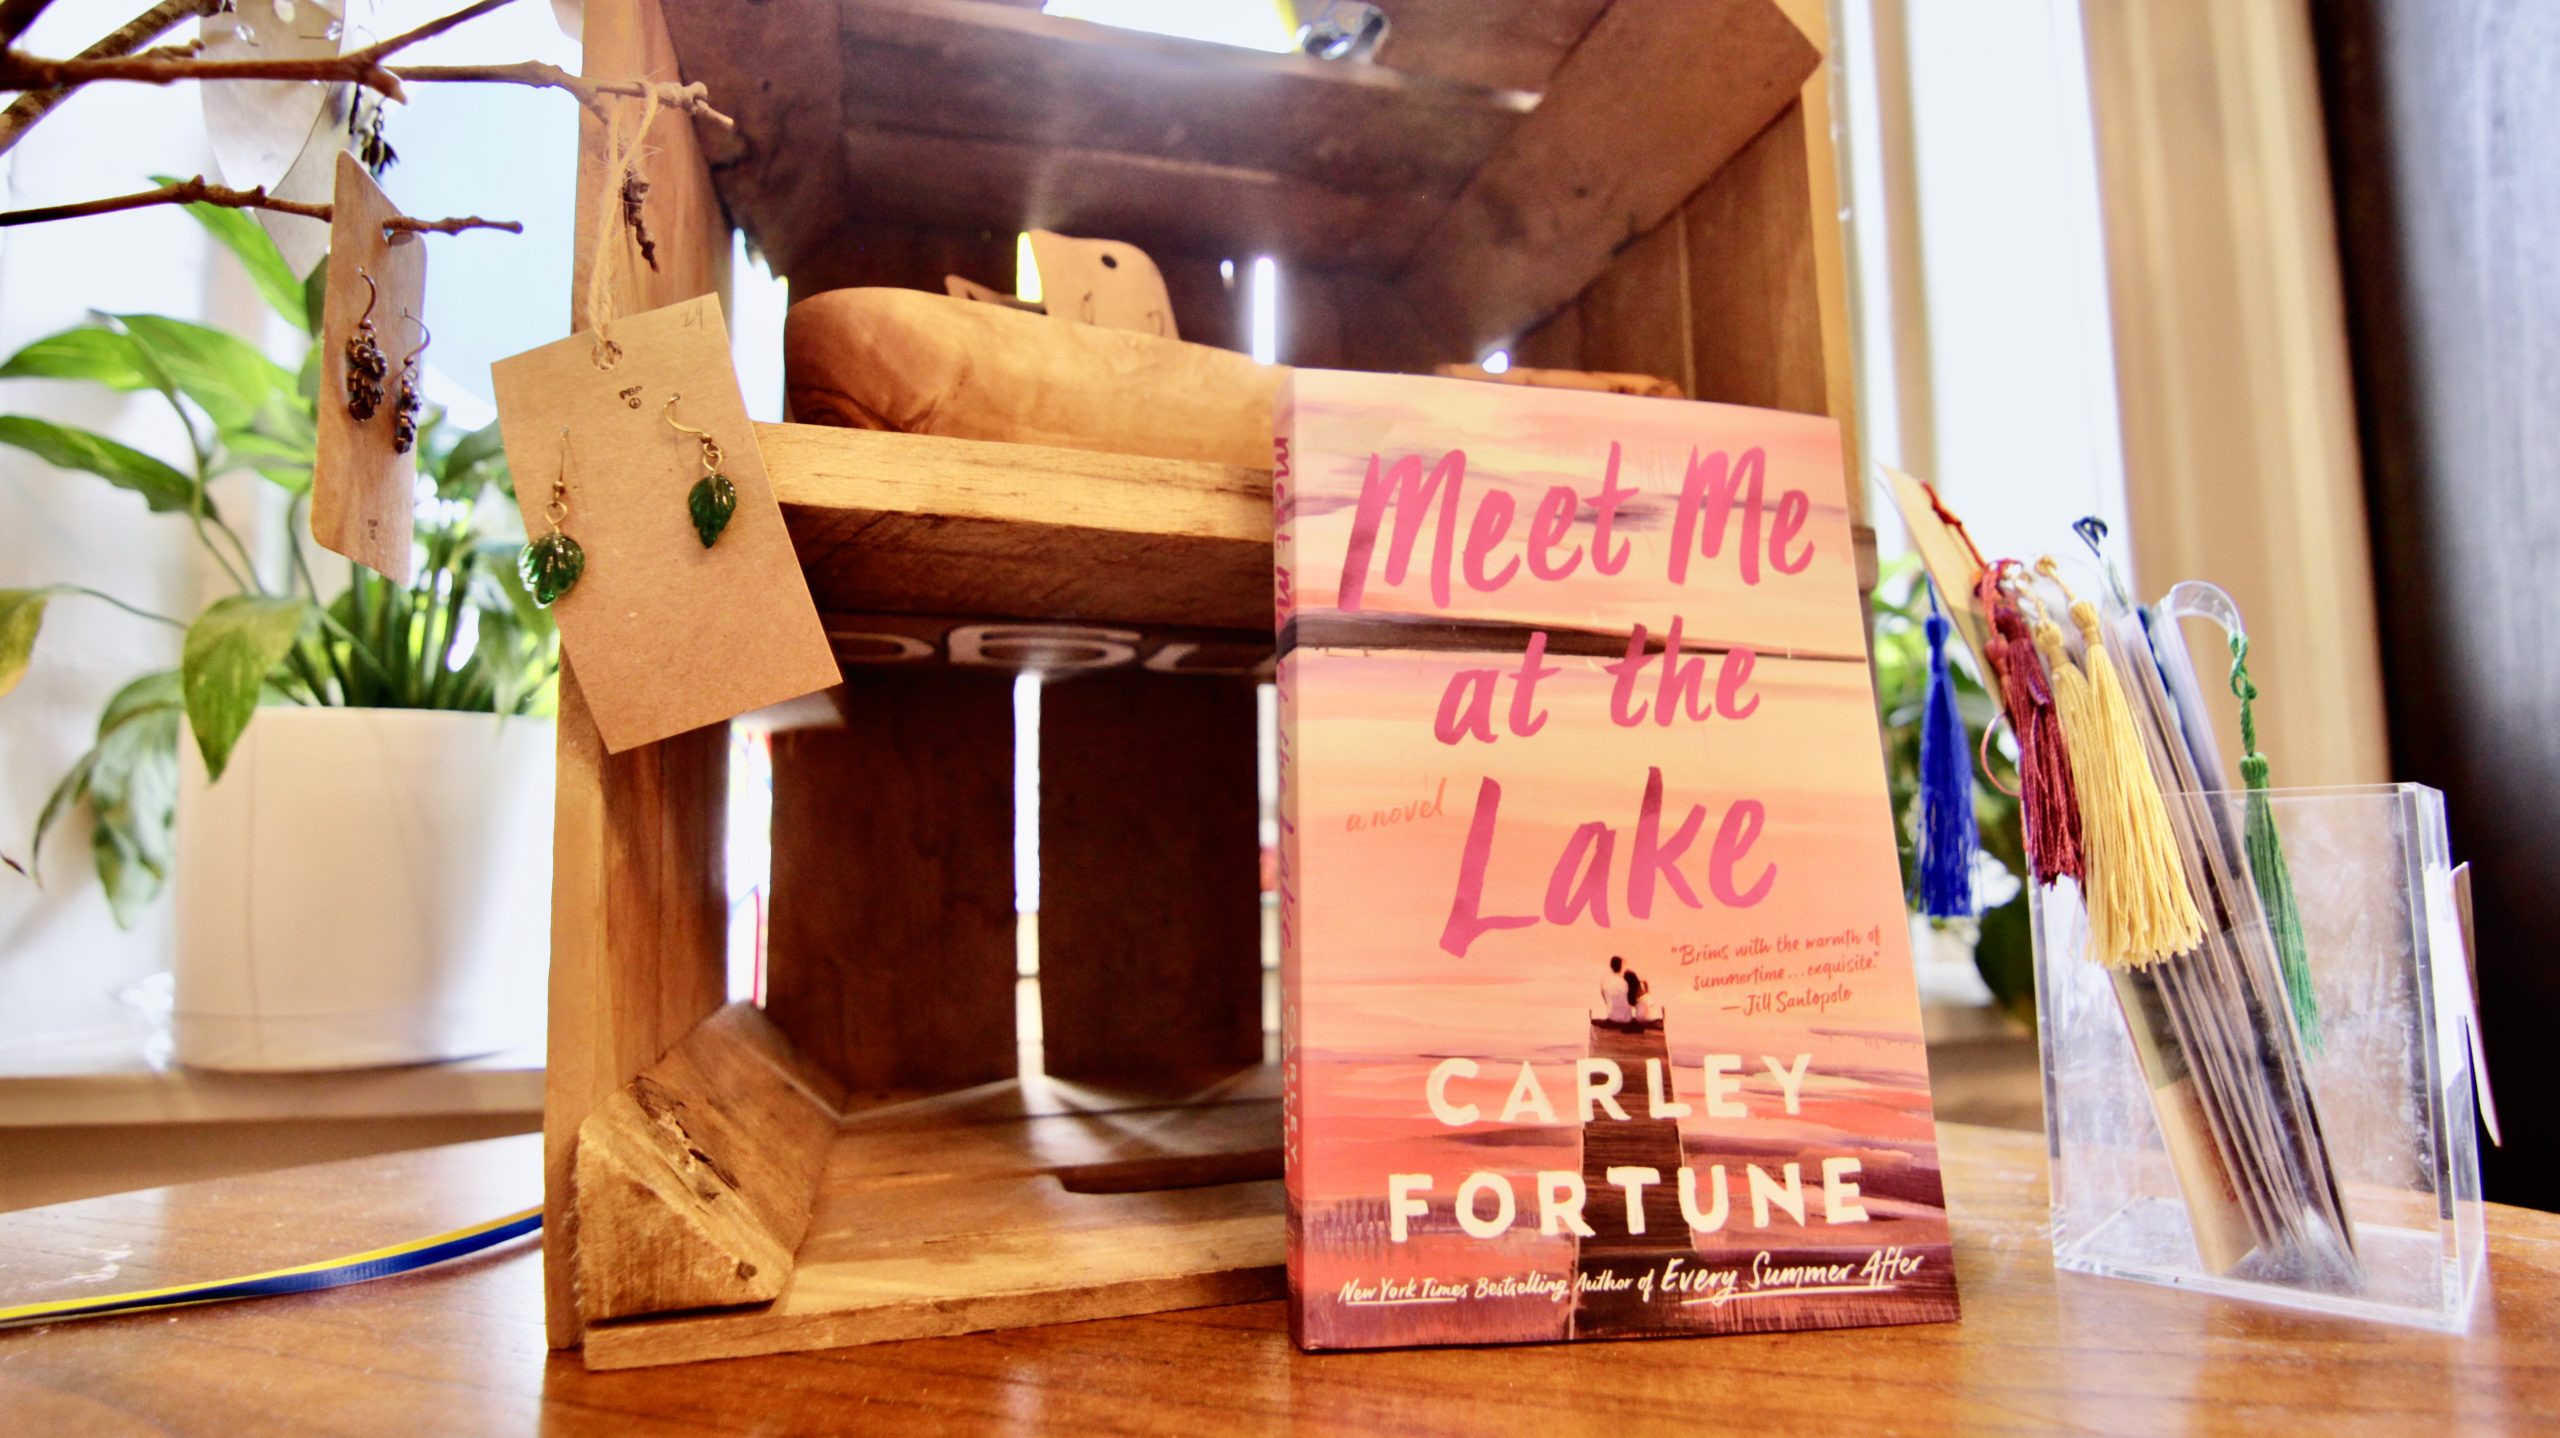
What would a vacation be without a little romance? We have a list and a half of great titles for this summer… Starting with everyone’s favorite STEM/romance writer, Ali Hazelwood and Love, Theoretically, then moving on to (buckle up!): The True Love Experiment by Christina Lauren herself, no less; Meet Me at the Lake by Carley Fortune; Thank You for Listening by Julia Whelan; and Meant to Be by the illustrious Emily Giffin, and Hello, Stranger by Katherine Center (July release).
And the “summer” titles! Same Time Next, Summer by Annabel Monaghan (June release); Summer Reading by Jenn McKinlay (May release); and The Summer Girl by Elle Kennedy (July release);
Cookbooks
So you want to bring the tastes of the sea to your table this year, but you’ve never worked with oysters before… We’ve got your back with Nils Bernstein’s The Joy of Oysters : A Complete Guide to Sourcing, Shucking, Grilling, Broiling, and Frying.
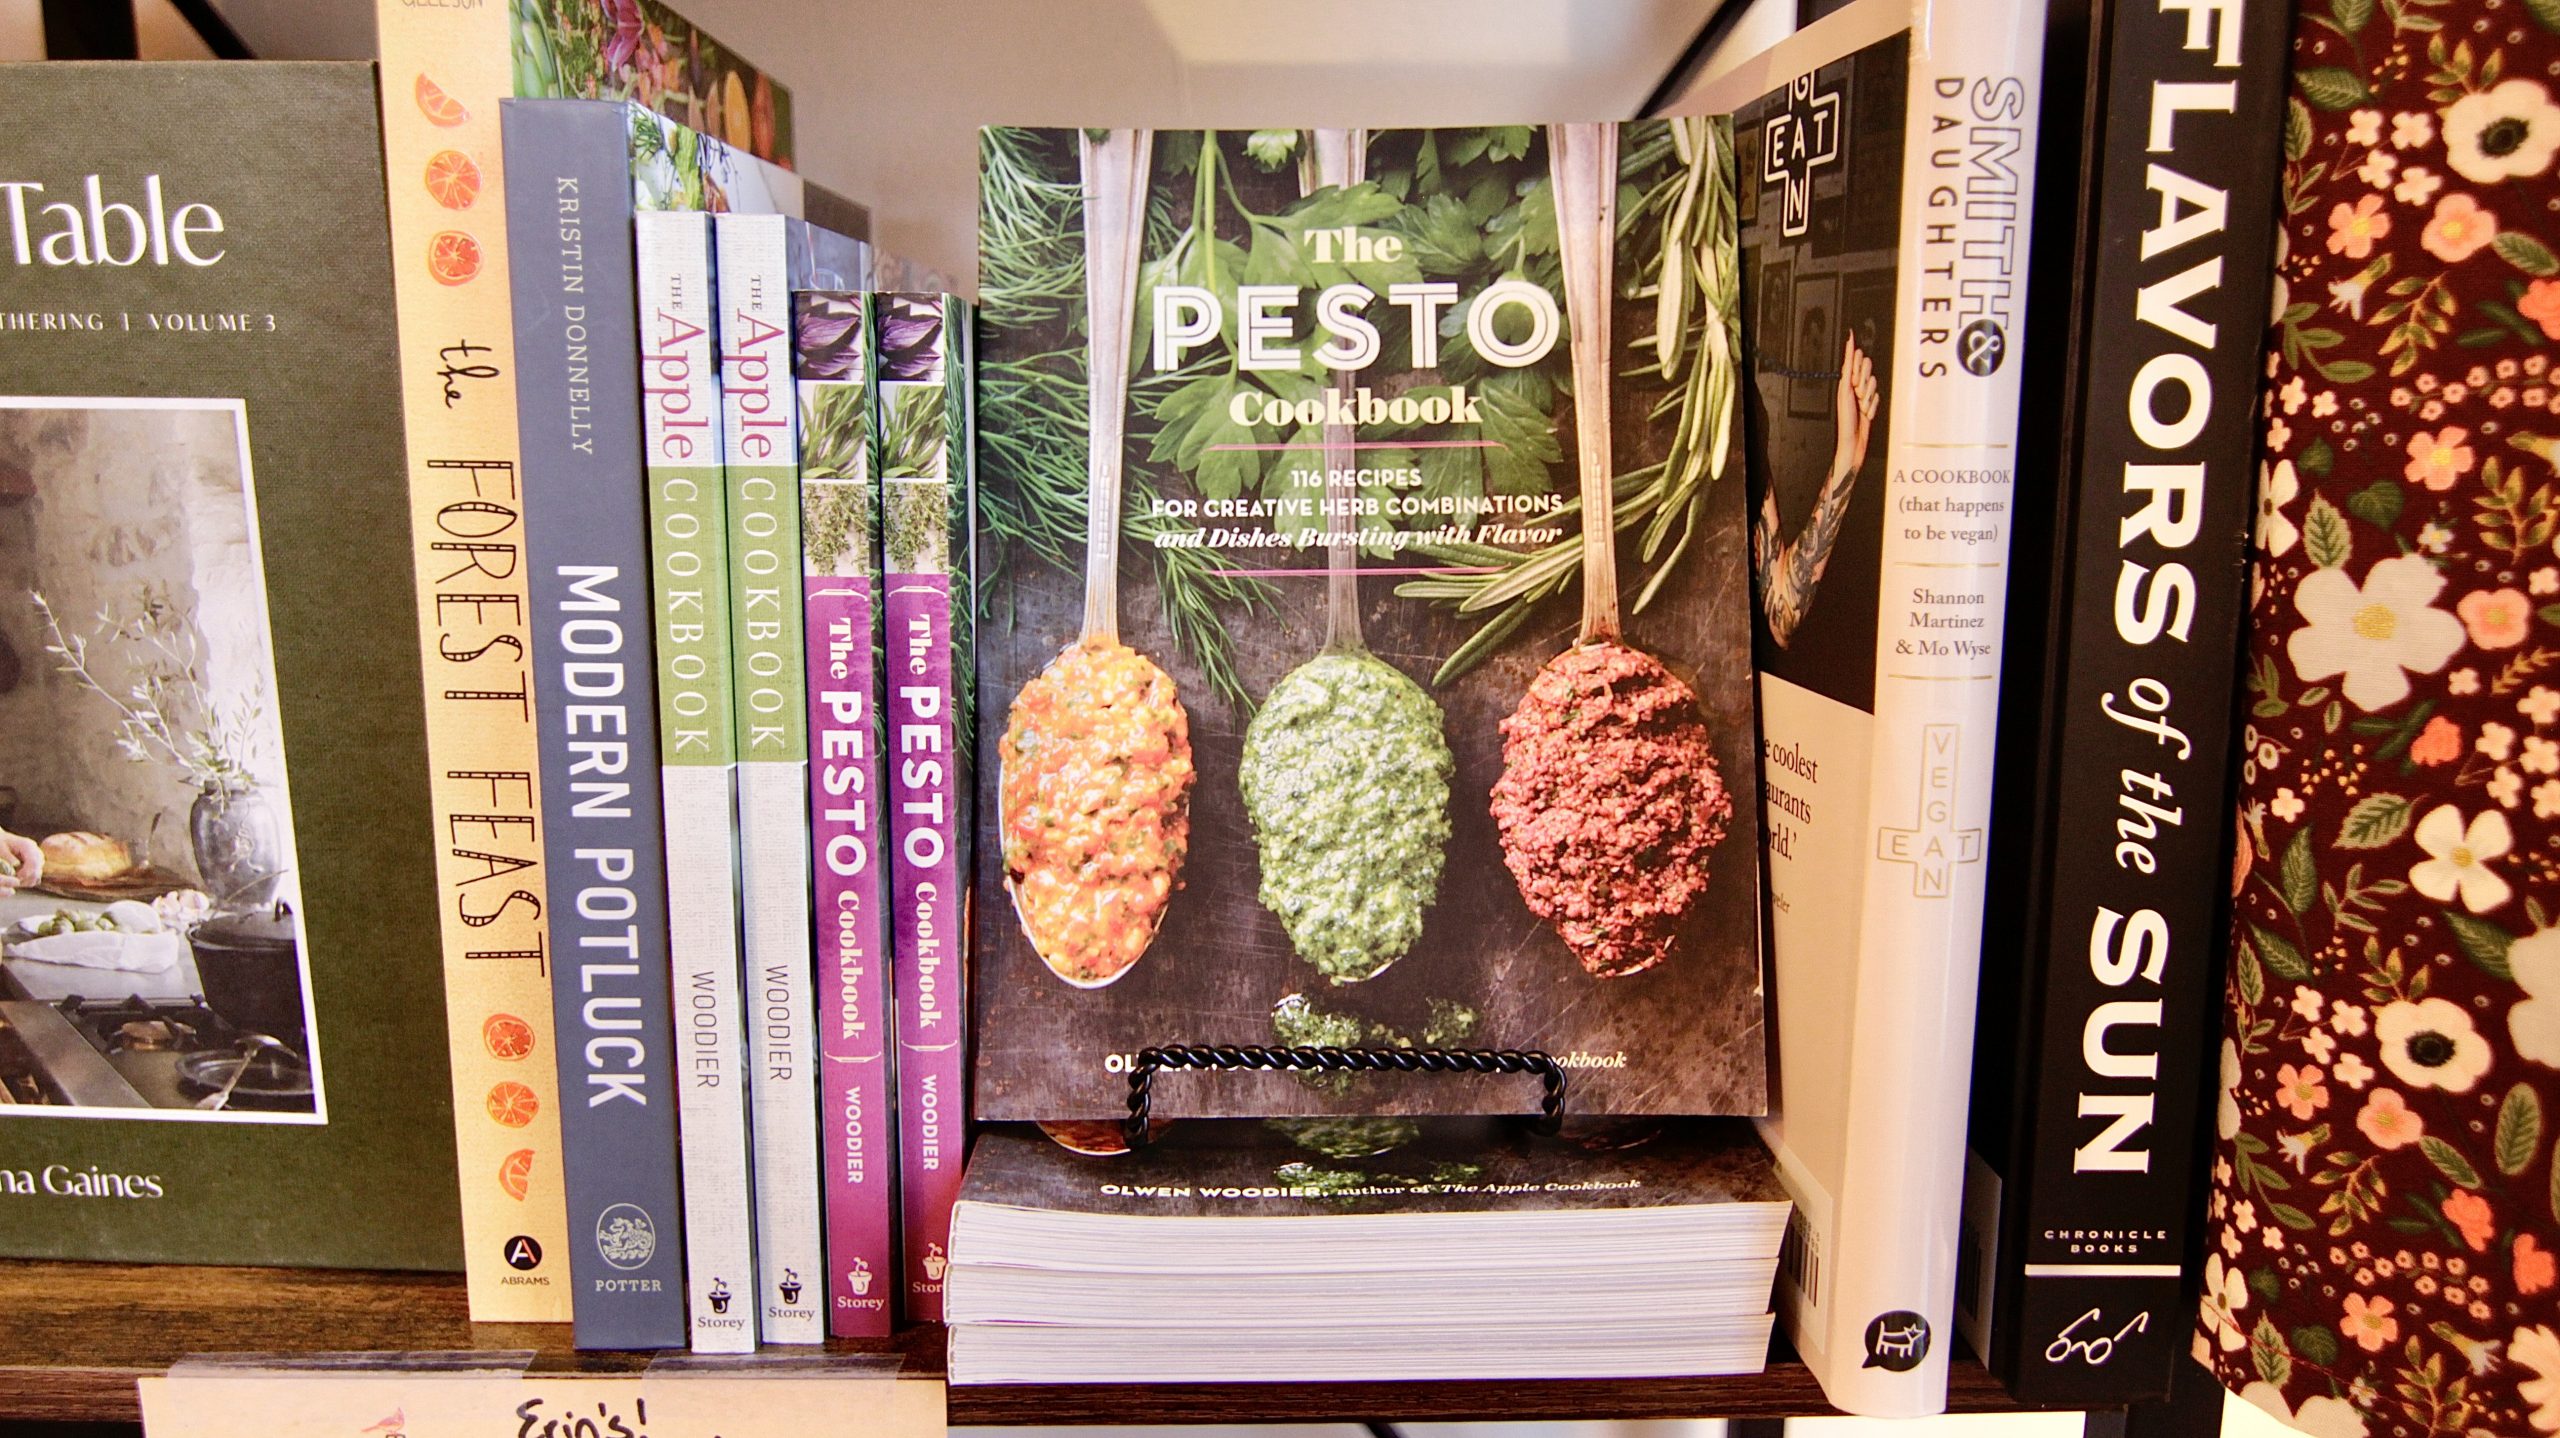
For some local Leesburg flavors, it’s absolutely essential to get Olwen Woodier’s The Pesto Cookbook: 116 Recipes for Creative Herb Combinations and Dishes Bursting with Flavor.
Since this is Birch Tree’s summer of nostalgia, you absolutely can’t miss B. Dylan Hollis’s Baking Yesteryear: The Best Recipes from the 1900s to the 1980s. With recipes like Chocolate Potato Cake, Cornflake Macaroons, and Chocolate Sauerkraut Cake (yyyep: sauerkraut cake… but seriously, I do want to try this!), you are guaranteed some fun baking this summer, and maybe even the chance to find a new-old favorite!
Summers are for books, good food, and fond memories. Whether you’re traveling around the world or just out to your backyard, what will you bring with you to read?

Laura Seabourne is a bookseller at Birch Tree Books and a lifelong book-lover. She particularly loves science fiction and fantasy, but really, how can a reader choose just two favorite genres? In her spare time, she enjoys reading books, thinking about books, teaching books, writing about books… and knitting, of course. CR: Legends and Lattes and Bird by Bird.
Don’t miss a post! Get the latest local guides and neighborhood news straight to your inbox!
![]()
Designing the Ultimate Coastal Cowgirl Home
You don’t need to live by the coast to appreciate and enjoy coastal style at home. Last year, “Coastal Grandmother” inspired decor was all the rage—this aesthetic celebrates the laid back, beachy lifestyle we often see represented in Nancy Meyers movies. While the Coastal Grandmother look is certainly still en vogue, this year, we’re seeing the term “Coastal Cowgirl” being used to describe the latest “it” look: think airy, crocheted pieces, woven accessories, and denim. Though this phrase has mostly been used within the fashion world, who says you can’t embrace a Coastal Cowgirl look at home? We’ve rounded up some of our favorite products from area retailers to help you celebrate this look.
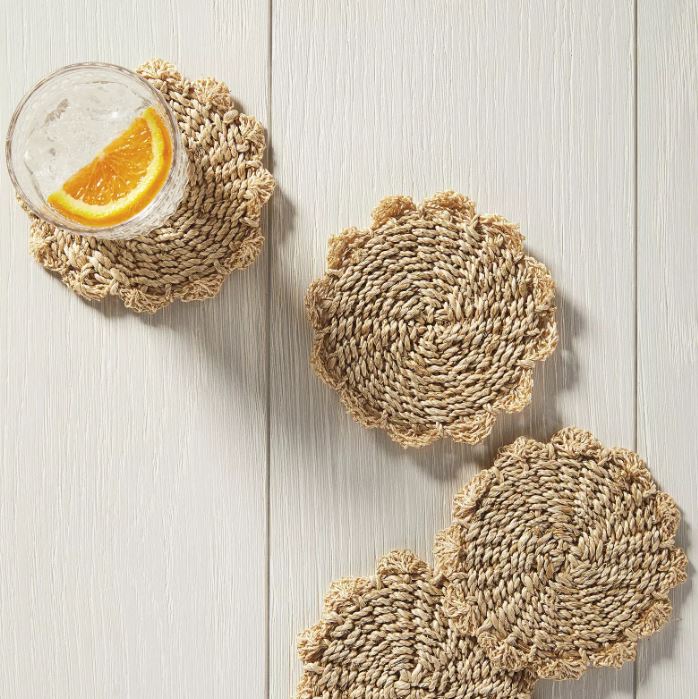
The next time you’re shopping on Bethesda Row, stop by Serena & Lily for a few chic woven accessories. We’re loving these cute coasters, which are perfect for al fresco entertaining but will also look stunning on the coffee table. Additionally, a simple, classic round tray like this one will shine on the bar cart corralling liquor bottles.
[smartslider3 slider=”104″]
Located in the Wildwood Center in North Bethesda, South Moon Under is chock full of trendy attire and accessories, but the retailer offers a small home section, too. Scoop up a candle or two and introduce a signature scent into your Coastal Cowgirl home. The Capri Blue Volcano candle is always a classic, and its white jar is right in line with this simple aesthetic.
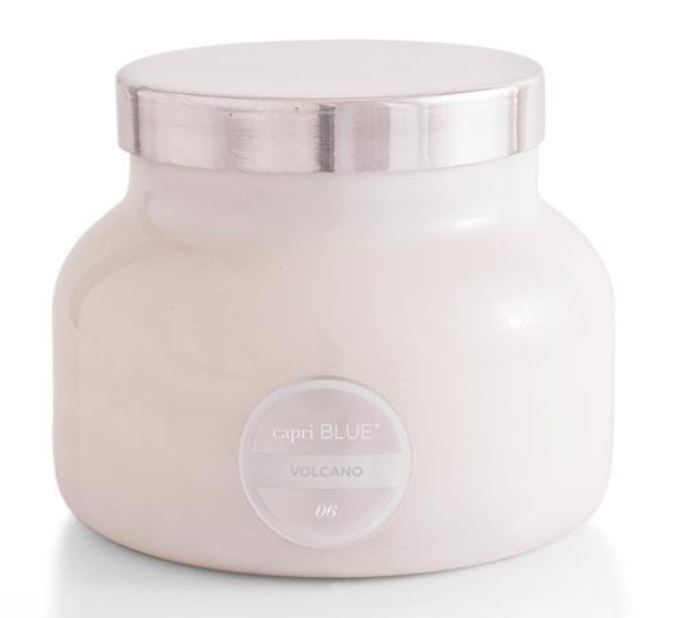
Capri Blue White Volcano Candle
What’s more coastal than hydrangeas? This darling bowl is perfect for stashing keys, jewelry, matchbooks, you name it. And might we also suggest these hydrangea themed stemless wine glasses? Located in the Village at Shirlington, Le Village Marche is an excellent destination for all things home decor, particularly if you love a bit of French flair.
[smartslider3 slider=”105″]
Stay warm on chilly summer nights with a warm throw blanket that’s perfect for the coastal lover. It’ll look equally cute draped over your sofa when not in use. It’s available at Salt & Sundry, located on 14th Street in DC’s Logan Circle neighborhood.
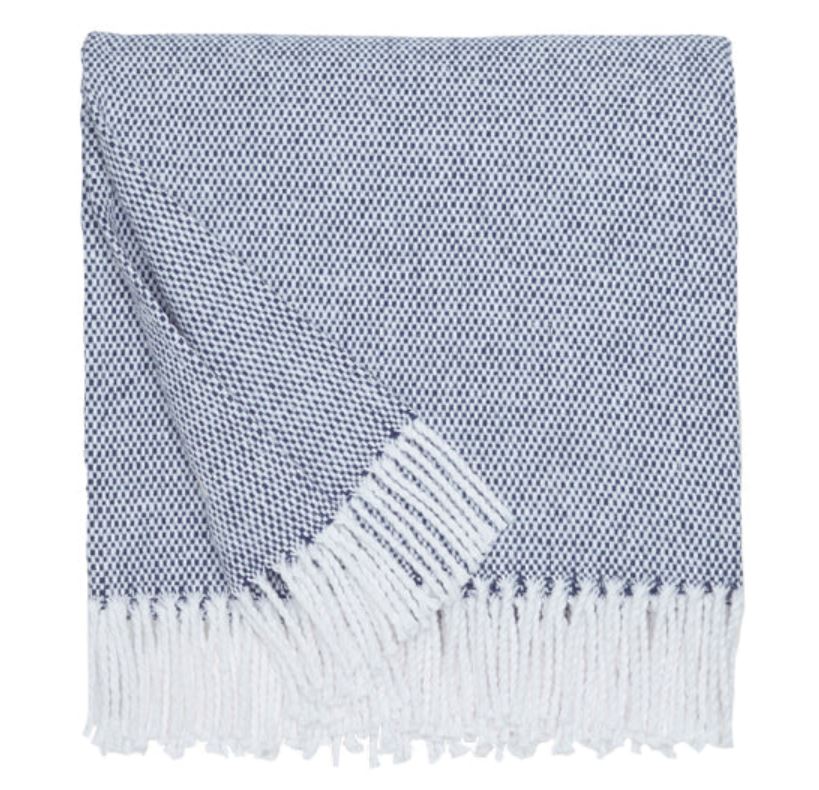
Terzo Throw
Last but not least, don’t forget to stock up on some placemats that you can use indoors and out. Summer is all about BBQs and other celebratory events, after all! These jute beauties scream coastal and are so timeless—plus, jute is known for being extra durable. Grab them at Boxwood in Old Town Alexandria.
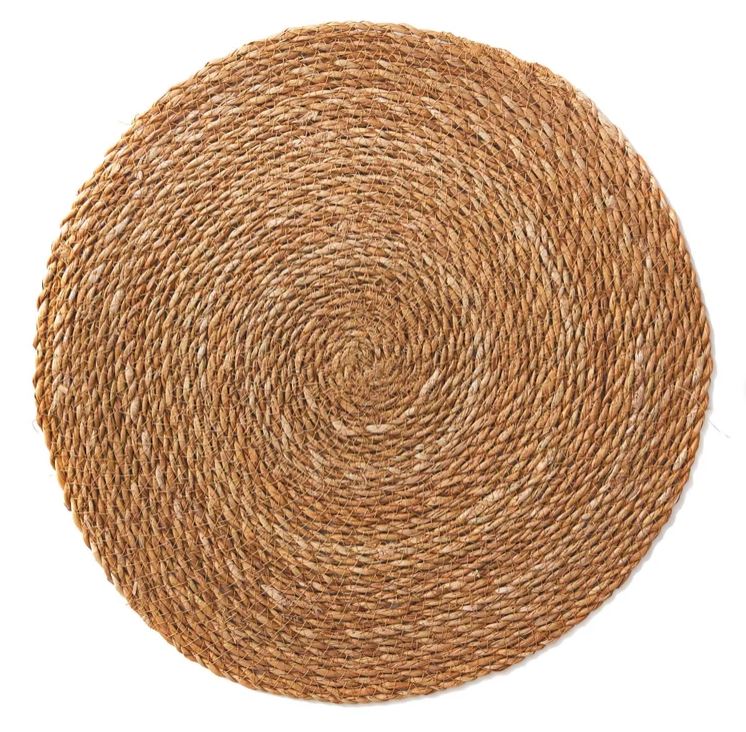
Jute Round Placemat
Sarah Lyon is a New York City-based freelance writer, originally from Bethesda, MD. She contributes to a number of national design and lifestyle publications like Architectural Digest, Apartment Therapy, MyDomaine, the Washington Post, and more. Sarah also works with designers to help them style spaces for photo shoots. Find more shelfies on her Instagram page, @sarahlyon9
Don’t miss a post! Get the latest local guides and neighborhood news straight to your inbox!
![]()
Experts’ Top Kitchen Trends For 2023
This week we would like to share top kitchen trends from our partners at The Scout Guide.
If the kitchen is the heart of the home, then achieving a functional, stylish space is of the utmost importance. We sought the expertise of six Scouted interior experts for their pulse on what’s trending in kitchen design right now. And while these design elements are definitely having a moment, they’re classic enough to have staying power. Whether you’re looking to update your kitchen or simply in search of a little home decor eye candy, read on to discover the kitchen trends you’ll be seeing everywhere this year.

Interior design by Emily Tucker Design. Photography by Stacy Zarin Goldberg.
The non-island island. “Having a freestanding ‘furniture’ island is a great way to infuse personality into a kitchen,” says Emily Tucker, owner of Emily Tucker Design in Boulder, Colorado. “I’m seeing these a lot with vintage tables, or new tables with a design nod to the past,” she says. This easily achievable trend lends flexibility to your kitchen design. Tucker explains that by using a piece of furniture, rather than a permanently placed island, you can not only change the configuration of your kitchen with relative ease but also have the option to change out the piece of furniture completely whenever new inspiration hits.
A new type of pantry. Countertop pantries, or upper cabinets that sit directly on the countertop, are gaining in popularity in larger kitchens. These countertop catchalls allow for taller cabinetry, extra storage, and even the newly minted appliance garages (a place to hide appliances that once lived on your countertops) that are uber functional and popular at the moment. Mary Baude, owner and principal designer of Whitetail in Chelsea, Michigan, adds that not only are they visually appealing but they also serve to break up a space, solving a lot of layout issues that can arise in a kitchen.

Interior design by Natalie Clayman Interior Design. Photography by Beall and Thomas Photography.
Say more with a slab. There is nothing more poetic in kitchen design than an element that perfectly marries beauty and function. Natalie Clayman, owner of Natalie Clayman Interior Design in Knoxville, Tennessee, reports that opting for a slab over the more traditional tiled backsplash will not only lend a luxe look to your space but provides a durable, easily maintained backdrop for your culinary pursuits.
Shake up Shaker. Shaker cabinets, identified by the wide frame with the inset panel, have been a design staple in kitchens for years, so much so it has almost become a design afterthought. It’s still a tried and true look, but Tucker notes this classic style now has a modern twist, thanks to more contemporary options like thinner frames or beveled edges.

Interior design by Mead Design. Photography by Kristen Elizabeth Studio.
Opt for a handsome hood. According to Liv Tiblier, chief creative officer of Mead Design in Maitland, Florida, plaster range hoods are having a moment in contemporary kitchen design. Where traditional metal or wood hoods once reigned supreme, this customizable lightweight alternative is trending thanks to its clean and minimal design aesthetic.
Favor the handmade. A movement toward the hand-crafted, perfection in imperfection, is really showing up in the area of tile. “Handmade porcelain backsplash tiles are a wonderful way to create a unique moment within a kitchen,” says Glenna Stone, principal of Glenna Stone Interior Design in Philadelphia, Pennsylvania. With each tile differing slightly from the next, the overall look provides depth and interest that is not as easily achieved when using machine manufactured tiles.

Interior design by Snake River Interiors. Photography by Tuck Fauntleroy.
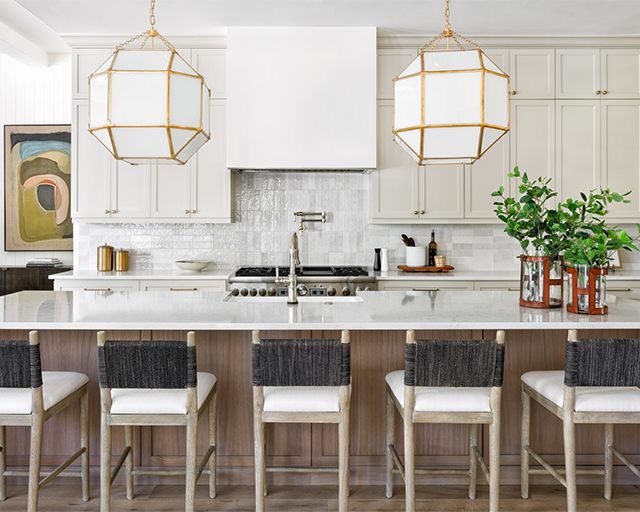
Put an emphasis on natural light. While not a trend per se, natural light’s impact on design has never been more apparent. Whether highlighting already existing windows or taking the step to create more, the priority is squarely placed on letting the light shine. Elisa Chambers, principal designer of Snake River Interiors in Jackson, Wyoming, uses nature’s sunshine as an integral part of her design, as in the kitchen shown above. She explains that adding more natural light, instantly turns a kitchen into an airy and expansive space.
Marble goes matte. Marble has long been the MVP of the kitchen, but shied away from by families that are worried about its high-maintenance qualities. Enter the newest trend in marble: a finish that eschews polished, high-gloss in favor of the family-friendly honed texture. Chambers urges people to forget the kid gloves and embrace the wear and tear of everyday life. “I always encourage folks to find the beauty in the texture that accumulates with high use surfaces,” she says. “When the gloss of its original polished finish is gone, you are left with a honed surface, reminiscent of those found in historic villas in Italy.” In her opinion, a well-worn marble countertop is the perfect way to tell the family’s story, “stains become memories shared with laughter.”

Interior design by Whitetail. Photography by Marta Perez.
Make it moody. “A light, bright kitchen is always beautiful and timeless, but there’s something to be said for incorporating elements that evoke a certain moodiness,” Baude says. To achieve this decidedly dramatic style, Baude recommends making your island a darker shade than surrounding cabinetry, choosing dark pendant lighting, and incorporating vintage paintings or rugs that feature a well-worn patina. “I love to mix in found elements like oversized runners and estate sale art to ground the space and create contrast. It can add a touch of moodiness without jumping headfirst into the trend,” she shares.

Interior design by Glenna Stone Interior Design. Photography by Adam Macchia; styling by Kristi Hunter.
Add warmth with wood. After years of cabinetry colors spanning the rainbow, and all-white cabinets reigning supreme, stained wood tones are making their way back into all the chicest kitchens. According to Stone, whether you choose to use wood cabinets throughout or as an accent in conjunction with painted cabinets, the texture and warmth they provide is unparalleled. Paired with modern light fixtures and sleek countertops keeps this look from feeling too country.
TSG Tip 455 from Emily Tucker, owner of Emily Tucker Design in Boulder, Colorado; Natalie Clayman, owner of Natalie Clayman Interior Design in Knoxville, Tennessee; Liv Tiblier, chief creative officer of Mead Design in Maitland, Florida; Elisa Chambers, principal designer of Snake River Interiors in Jackson, Wyoming; Mary Baude, owner and principal designer of Whitetail in Chelsea, Michigan; Glenna Stone, principal of Glenna Stone Interior Design in Philadelphia, Pennsylvania. Emily Tucker Design appears in The Scout Guide Boulder. Natalie Clayman Interior Design appears in The Scout Guide Knoxville. Mead Design appears in The Scout Guide Orlando. Snake River Interiors appears in The Scout Guide Jackson Hole. Whitetail appears in The Scout Guide Ann Arbor. Glenna Stone Interior Design appears in The Scout Guide Main Line and Philadelphia.
For More Events or Information About the National Cherry Blossom Festival, Click HERE!
Don’t miss a post! Get the latest local guides and neighborhood news straight to your inbox!
![]()
Home quality, longevity back in vogue for affluent buyers: Peter Pennoyer
This week we would like to share home quality and longevity for affluent buyer from our partners at Luxury Portfolio.
After decades of teardowns replaced with cookie-cutter mansions and new-build homes without much thought put into them, luxury real estate is looking once more towards quality materials, custom details and master craftsmanship.
Perhaps spurred by spending a bit more time at home since 2020, the affluent are paying special attention to what goes into their homes and how long they will last.
“People are thinking much more carefully about the quality of their homes,” said Peter Pennoyer, founding partner of New York-based Peter Pennoyer Architects, during a Luxury Portfolio International webinar.
“Ultimately our clients have to decide their level of investment, but when offered a choice we find that most of our clients elect for quality and longevity,” he said.
Mr. Pennoyer was in conversation with Mickey Alam Khan, president of Luxury Portfolio, during the Luxury Hour webinar last week.
In The Details
Clients of Peter Pennoyer Architects are paying much more attention to the details in their homes, from the quality of the materials used to their provenance and makers.
In a New York brownstone renovation, master plaster workers were called in to create custom moldings on walls, arches and ceilings.
“The owner was intrigued,” Mr. Pennoyer said. “They liked the story of where this came from, and they were excited to see that there was a studio of artists who could produce this kind of work.”
For a house in Palm Beach, Florida, the couple invested in bespoke materials such as glazed green roof tiles. Mr. Pennoyer traveled all the way to Italy with another client in Ohio to choose the perfect marble for his fireplace mantle.
“That tendency to be interested in how things are built, how they’re finished, where the stone comes from, where the plaster comes from, who’s making it – that’s an incredible spur to investment that we’re seeing in the residential area,” Mr. Pennoyer said.
“It does give the clients a feeling that what they own is special and unique to them,” he said.
This interest even extends to multi-family high- and mid-rise buildings.
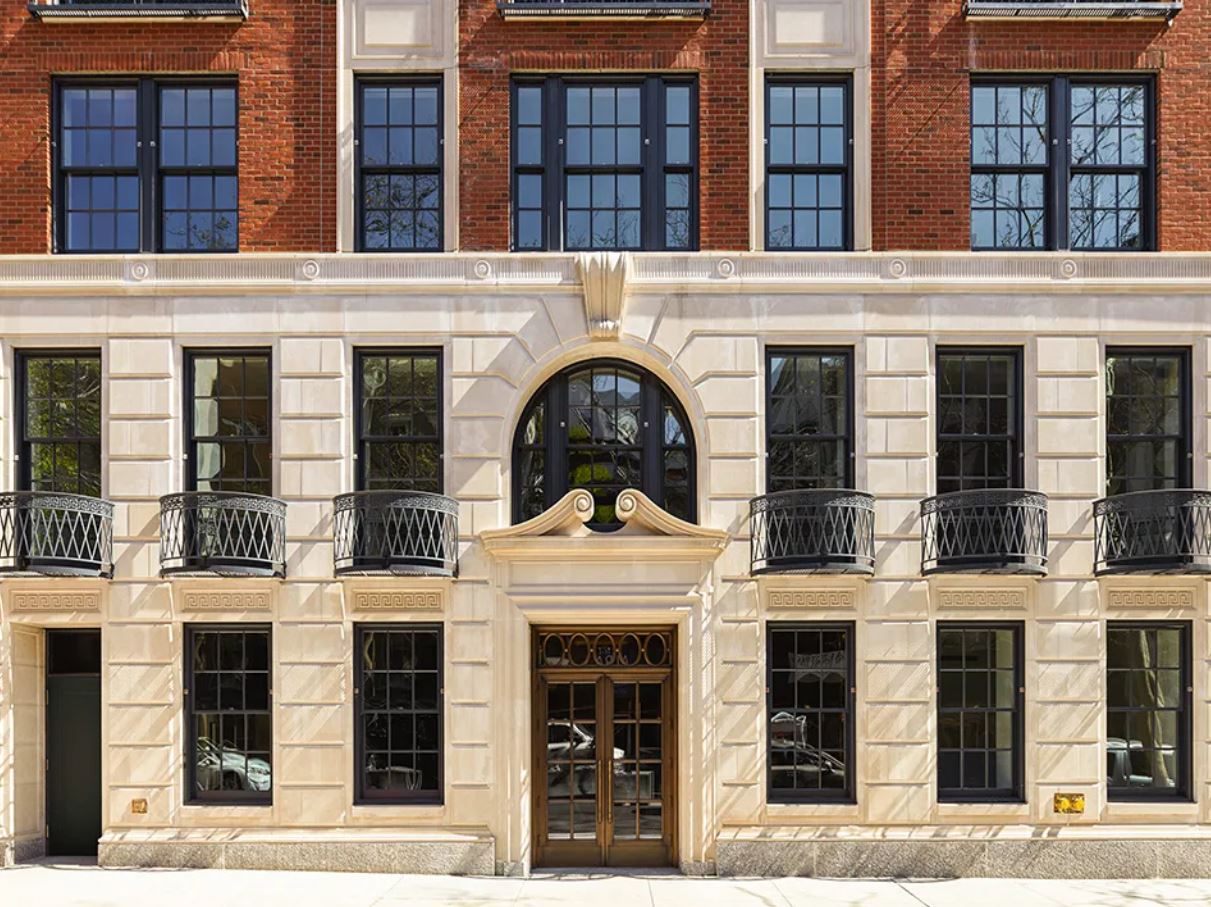
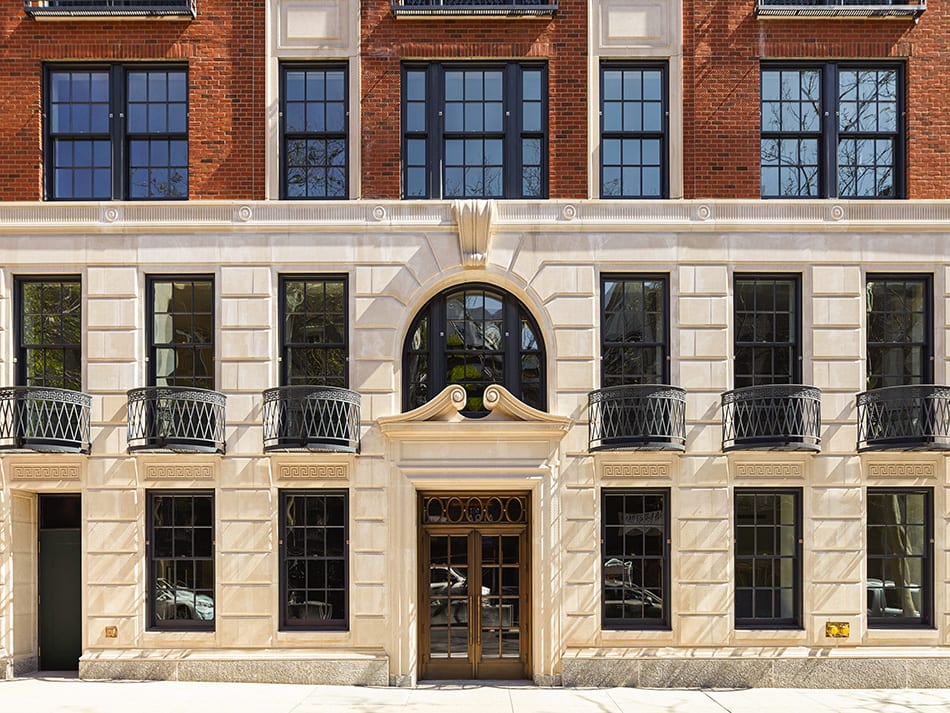
A New York building designed by the firm was constructed entirely of limestone with custom metal windows. Another building features carved limestone on the façade, bronze doors and custom metalwork balconies.
Old Is New
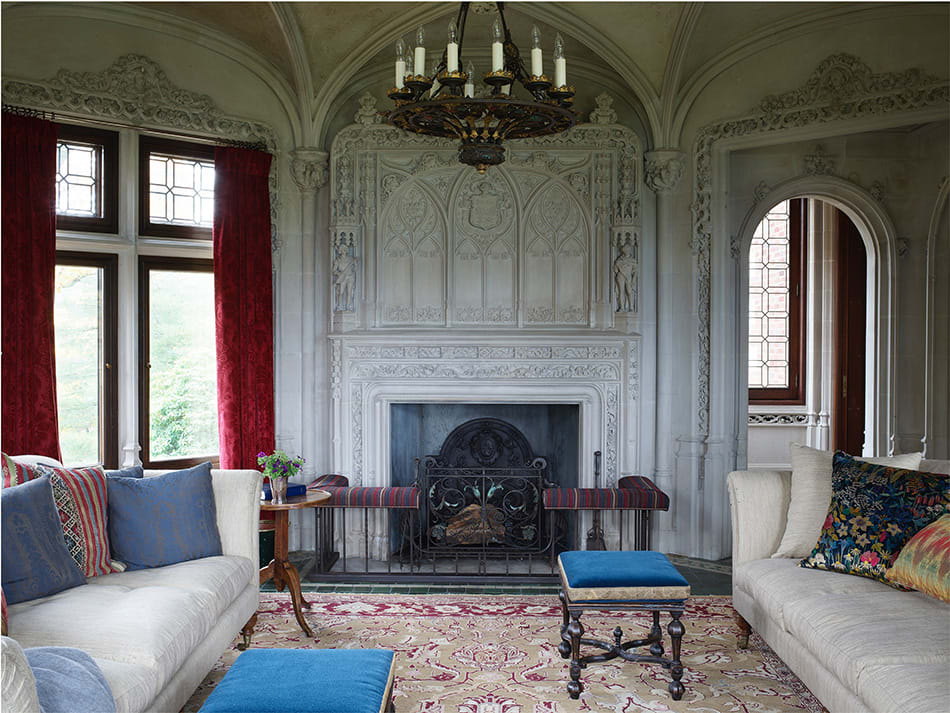
Mr. Pennoyer is also seeing people gravitating towards historic homes that have already stood the test of time, carefully renovating them.
“People are willing to take on houses that were once considered white elephants – incredibly beautiful but degraded, tired, unmaintained historic mansions,” he said.
“It has been typical for years, especially in very high-end markets in the suburbs around New York, that buyers simply didn’t have the appetite to invest in top end restoration. That has changed.”
The firm, which has a conservation division and often works on older homes, restored one such house north of Boston that had fallen into disrepair.
“It really does have that feeling of being an older mansion,” Mr. Pennoyer said. “We had such a great time restoring all the stonework.”
People have also been gravitating towards historic high- and mid-rises in cities, even looking for those designed by specific architects, such as a 1920s Rosario Candela co-op renovated by the firm.
“There are buildings that were once considered quite dowdy – these old co-ops,” Mr. Pennoyer said. “We’re able to renew these. It’s encouraging that clients are now sophisticated about who designed what.”
Lasting Lifestyle
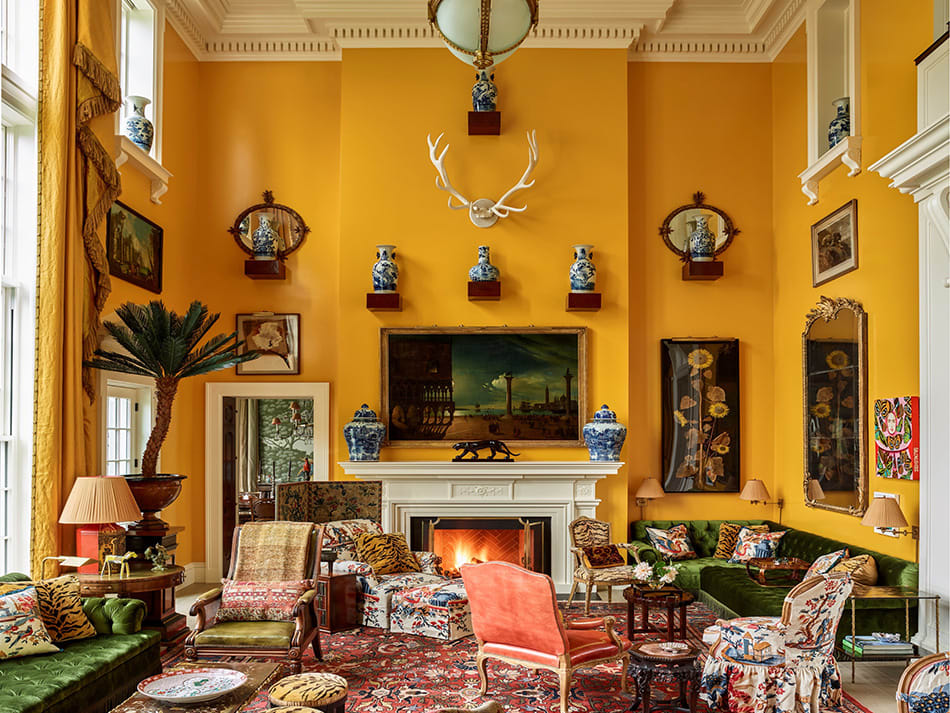
Many clients of the firm who choose to build their own home from scratch are creating their own legacy.
“We have been really lucky to have a few clients over the years who center their developments on their collections,” Mr. Pennoyer said, including American contemporary artist Jeff Koons.
One client is an avid contemporary art collector and built a family home in Ohio that centered around his collection.
“It’s sitting on top of an art gallery, which is underground,” Mr. Pennoyer said. “The land itself has 37 works of sculpture art which are considered significant in the museum world.
“This house will be deeded to the Cleveland Art Museum,” he said. “This is someone who is pursuing a passion project around his dedication to design.”
Even on a smaller scale, clients are building homes that reflect their lives and house not just them, but the things they hold dear, like that of another Peter Pennoyer client who lives outside of Cleveland.
“At first blush, it looks like it could be for an older couple, but in fact it’s for a young family,” Mr. Pennoyer said of the home. “They wanted to celebrate their life and their lifestyle and create a house where they could raise their children, with the idea that perhaps there’d be a wedding on the lawn someday.”
This dedication to a home is encouraging to Mr. Pennoyer, not only for the craftsmanship inside, but for the sustainability of something built well that will last for generations – something many say they are looking for, according to a Luxury Portfolio International report.
“That kind of long-term commitment to the real estate that seems to be increasing,” Mr. Pennoyer said.
“There is a whole category of families we work for who are looking at establishing, if not a multi-generational feeling, at least a house for life,” he said.
For More Events or Information About the National Cherry Blossom Festival, Click HERE!
Don’t miss a post! Get the latest local guides and neighborhood news straight to your inbox!
![]()
The Family Reunion

After an incredible first year, Chef Kwame Onwuachi’s “The Family Reunion” returns for a second time to the Salamander Resort in Middleburg Virginia this August, 18-21, and we couldn’t be more excited.
James Beard Award-winning Chef Kwame Onwuachi comes together with Food & Wine to present this three-day, immersive experience that has been lauded by both guests and talent alike; it is a revered moment to elevate some of the most important voices in the culinary industry while also bringing about glorious celebrations, pivotal discussions, and unforgettable shared experiences.
Onwuachi, author of the acclaimed memoir Notes from a Young Black Chef, said “The Family Reunion was created to celebrate Black and Brown contributions to the food industry. Join us as we kick off year two of festivities with bigger, better and even more important programming.”
Chef Onwuachi is joined by a number of the industry’s top talent, including James Beard Award-winning chef, author, and entrepreneur Alexander Smalls; three-time Chopped champion Andre Fowles; James Beard Award-winning chef and BBQ pitmaster Rodney Scott; author and culinary historian Dr. Jessica B. Harris; and Carla Hall, a restaurateur, Top Chef alum and host of the Emmy Award-winning series The Chew. (Please visit The Family Reunion website to view a full list of celebrity guests, speakers, presenters, and more.)
This multifaceted event carries its attendees through a variety of experiences, including compelling panel discussions, topical cooking demonstrations, and invigorating recreational activities. In addition, daily “family” meals will be served, bringing together attendees and celebrity participants alike.
“The Family Reunion is more than an event. It’s a culmination and celebration of different cultures with food as a vehicle,” Onwuachi said. “We are bringing the most important voices in the culinary industry together to share anecdotes, recipes and viewpoints in order to leave with our hearts and minds full.”
Furthermore, The Family Reunion website states that its mission is “to nurture, develop and celebrate racial and ethnic diversity within the next generation of hospitality professionals,” and we are so excited to both see and feel this paramount mission come to life at the event.
McEnearney Associates is honored to be sponsoring The Family Reunion, and we hope you are as thrilled as we are to be able to experience the work of these brilliant creators.

Photo courtesy of: Kwame Onwuachi
Kwame Onwuachi is a James Beard Award-winning chef and author of the critically acclaimed memoir “Notes from a Young Black Chef,” which is being turned into a feature film by A24.
Kwame’s resume is incomparable: he has been named one of Food & Wine’s Best New Chefs, Esquire Magazine’s 2019 Chef of the Year, and is a 30 Under 30 honoree by both Zagat and Forbes.
He’s also been featured on Time’s 100 Next List and has been named the most important Chef in America by the San Francisco Chronicle.
Don’t miss a post! Get the latest local guides and neighborhood news straight to your inbox!
![]()
Enjoy a day trip to Middleburg Virginia
As you may know, Middleburg is known as the “Nation’s Horse and Hunt Capital” for its foxhunting, steeplechases, and large estates. Middleburg is also known for its small-town charm and local wineries. So come explore this historic town for a day or for a weekend, like Jackie Kennedy used to do!
If you’re hungry from traveling, check out local favorites Red Horse Tavern or Middleburg Common Grounds to grab a bite to eat.
Wineries & Vineyards

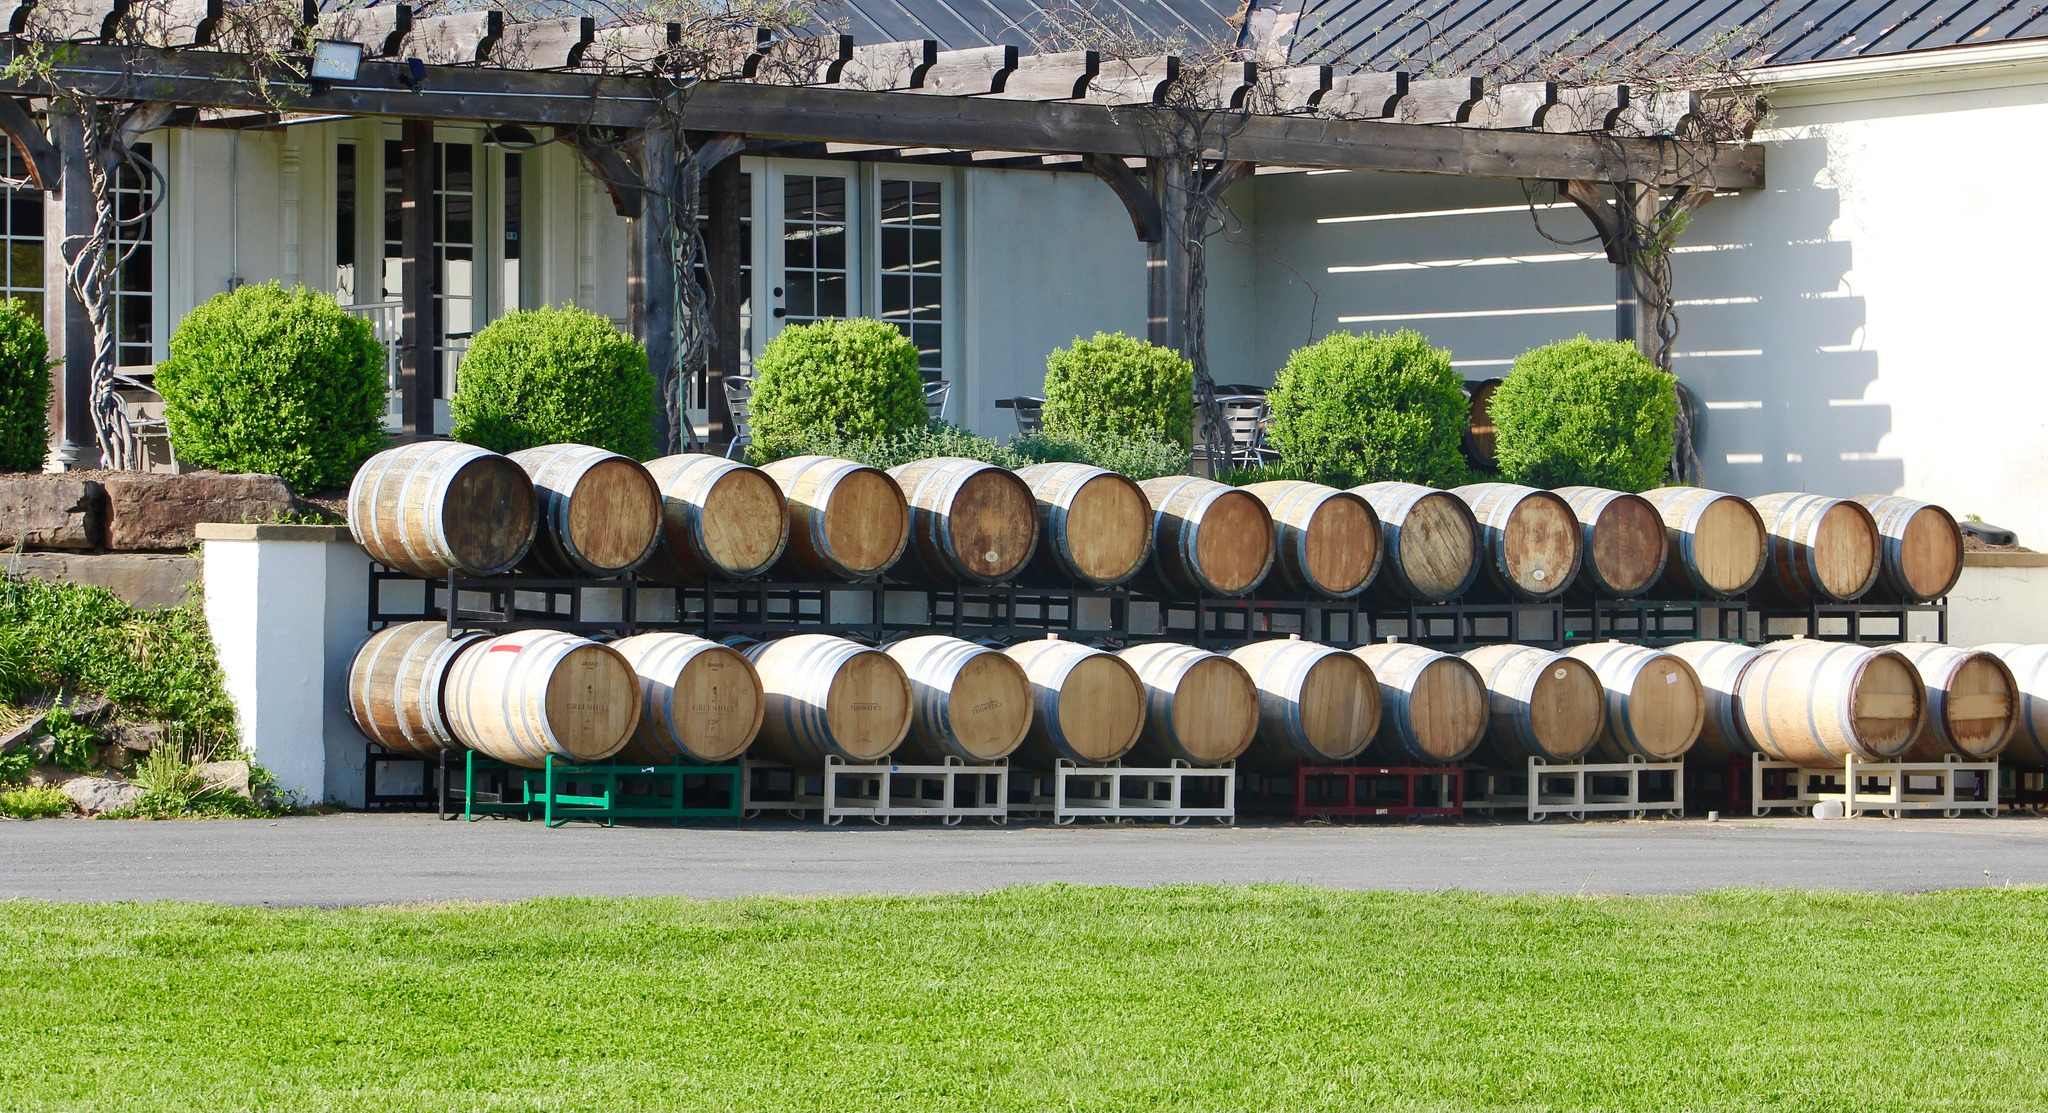
Photo courtesy of: Green Hill Winery & Vineyard
If you are a wine aficionado or enjoy charcuterie boards with a view then you are going to want to visit the wineries and vineyards listed below:
- Green Hill Winery & Vineyard
- Artemisia Farm & Vineyard
- Boxwood Estate Winery
- 50 West Vineyards
- Cana Vineyards and Winery of Middleburg
- Chrysalis Vineyards
Local Shops
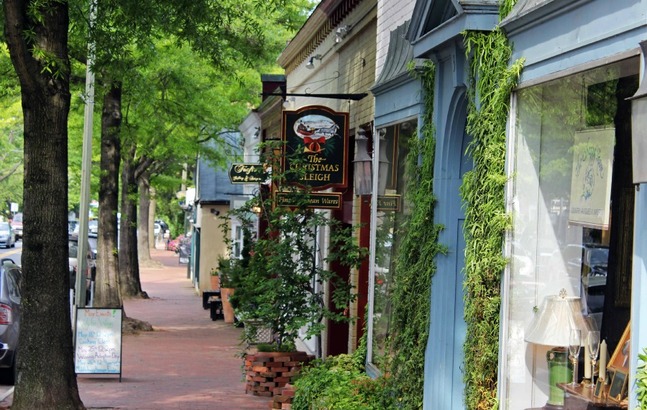
Photo courtesy of: The Hepburn
Middleburg has many shops that cater to its sophisticated clientele. You can find everything from one-of-a-kind jewelry, to antiques, to horse feed and equestrian gear, fashion forward outfits, and more.
Crème de la Crème
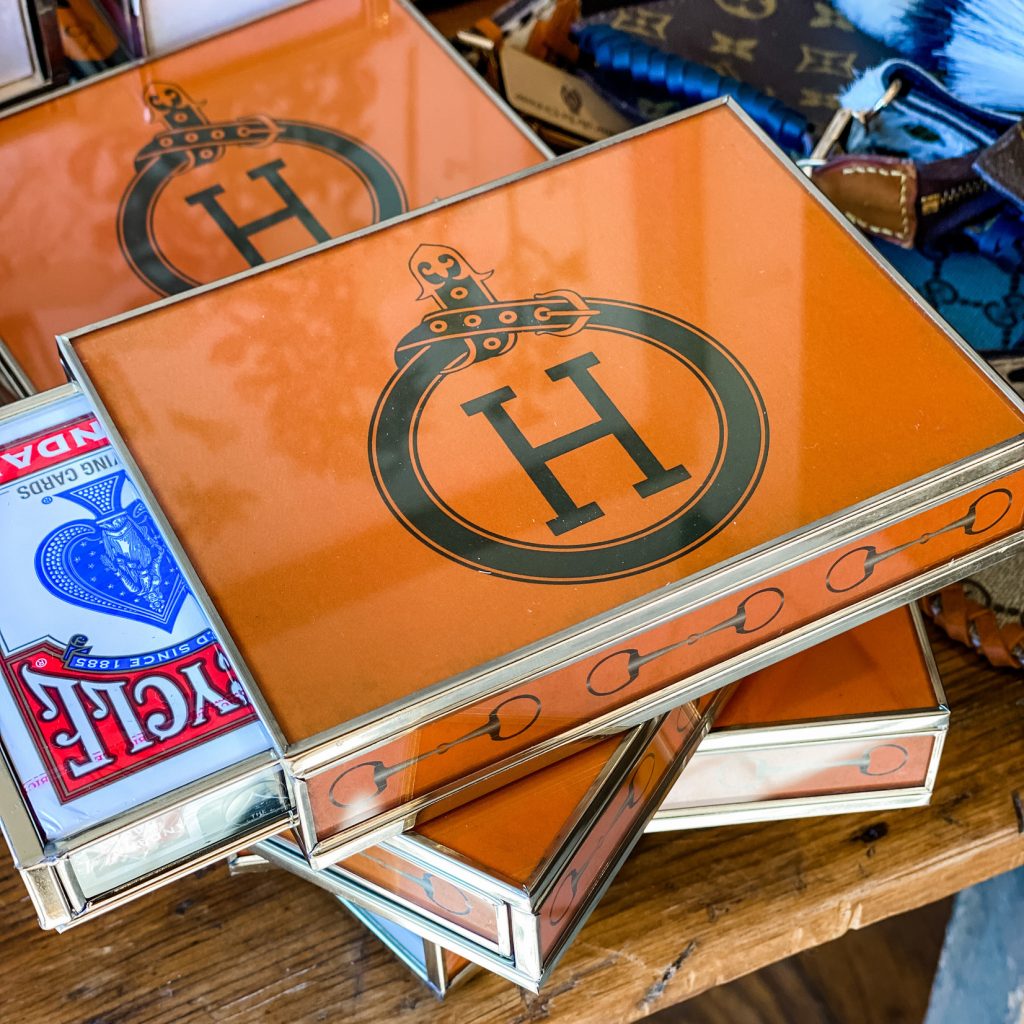
Photo courtesy of: Crème de la Crème
Upon entering one of our boutiques your Crème de la Crème experience will begin with the lingering scent of our signature candles. As you wander through the store, each turn will lead you to discover unique yet useful finds, like this JM Piers Orange H Card Box.
Tri-County Feeds, Fashions, Finds

Photo courtesy of: Tri-County Feeds, Fashions, Finds
Stop by and pick up today’s most fashionable equestrian gear that will make you stand out in front of all the judges when competing!
Chloe’s Boutique

Photo courtesy of: Chloe’s Boutique
Chloe’s offers classic and fashion-forward apparel, accessories and gifts at affordable prices that you will love to enjoy.
The Paradise Antiques
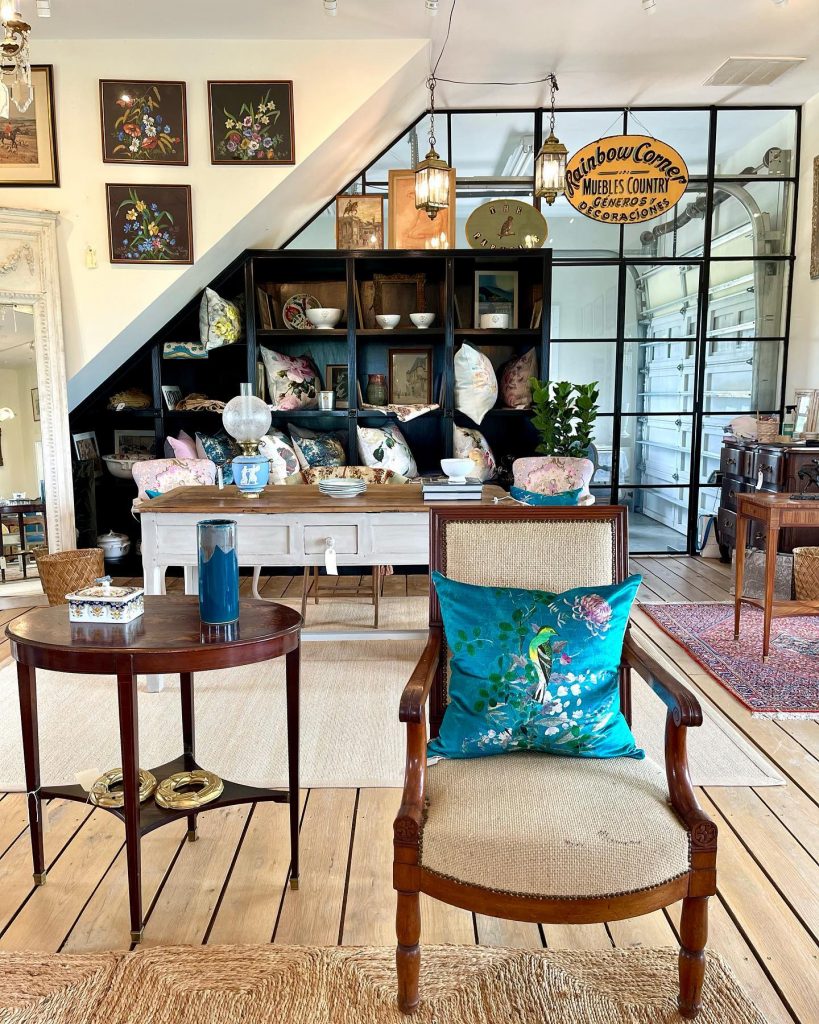
Photo courtesy of: The Paradise Antiques
Check out the fabulous antiques and one-of-a-kind pieces to bring the spirit of Middleburg into your home.
After you grab a bite to eat, visit a winery, and go shopping, and realize that Middleburg could be the perfect place for you to put down roots or invest in a vacation home, make sure to reach out to McEnearney Associates to get the process started of calling Middleburg home.
Don’t miss a post! Get the latest local guides and neighborhood news straight to your inbox!